It’s not just you – nearly everyone struggles with a jumble of cords and wires these days. How did we get to this point of universal frustration? Blame it largely on the rise of consumer technology late in the 20th century. By the 1980s, home offices were becoming more common with personal computers, printers, monitors, and telephone lines. The ’90s just added to the problem, with fax machines, first-generation networking equipment, speakers – each of these devices had power cords and data cables.
Now fast-forward to the present day: work-from-home home offices brimming with laptops, docking stations, ring lights, chargers, and external hard drives. The mess under the desk has gotten more complicated than ever and is typically hidden away until something breaks or you finally muster the will to clean.
But what can be done about it? Let’s dive in.
Why Cable Management Matters
Whether you’re working from home or overseeing a team across bustling office workstations in Melbourne, it’s amazing how much impact simple cable management can have.
Tidying up that cable clutter doesn’t just make your workspace look sharper – it also reduces the risk of accidents or damage to your equipment. With fewer cables on the floor, cleaning becomes much easier (and you’ll keep dust from building up around your tech).
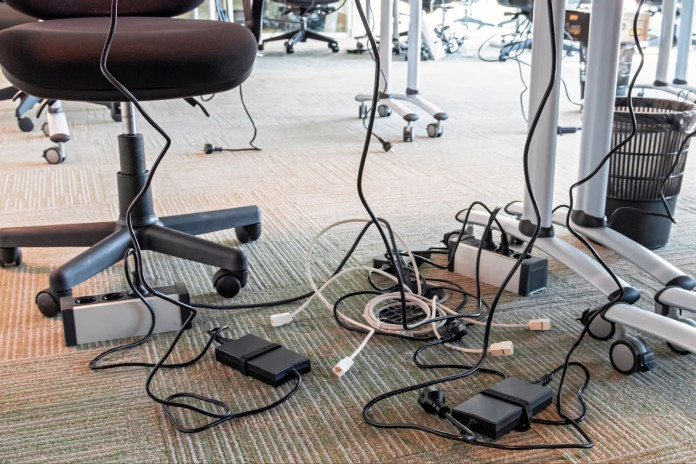
Before you begin organising, take a few minutes to observe. How many cables do you have plugged in – more than you expected? Are any of those cables ridiculously long, snaking everywhere? Are they tangled together, or worse yet, dangling under your seat where you keep tripping over them?
Essential Tools & Accessories for Cable Management
So you’re ready to finally tackle the cable chaos? We’ve made a handy checklist of the must-have organising tools and accessories – just tick them off as you go:
Tools & Accessories |
Description |
Check |
Cable trays & under-desk mounts |
Find something solid that will fit across your desk and remember to check that it comes with all the mounting hardware to make it easier to install. | [ ] |
Velcro ties & zip ties |
They usually come in assortments of different sizes and colours, so you can even colour-coordinate your cables for added convenience. | [ ] |
Cable sleeves & covers |
Look for sleeves that are made from durable and flexible materials like neoprene or braided fabric that can stretch to accommodate different cable diameters. Some sleeves even come with zipper or Velcro closures, which makes it easy to add or remove cables as needed. | [ ] |
Power boards with surge protection |
Look for power boards that have a good joule rating (the higher the better) and that have certifications from reputable safety standards. Some even come with built-in USB ports, which can help to reduce the number of chargers on your desk. | [ ] |
Label makers or tags |
The easiest and fastest option is to pick up a pack of pre-made cable tags or write directly on masking tape with a permanent marker. If you want a more professional look, consider investing in a handheld label maker – they’re inexpensive, easy to use, and allow you to create clear and durable labels with adhesive backing that sticks well. | [ ] |
Clips & adhesive hooks |
When shopping, look for adhesive clips that have strong, residue-free backing so they will stick well but not damage your furniture if you have to remove them later. Plastic or rubber-coated clips are usually best to avoid pinching or damaging cables. | [ ] |
Step-by-Step: How to Organise Your Cables
Now you’ve got your tools sorted, here’s how to put them to work and get those cables under control.
-
Unplug Everything
Start by unplugging everything beneath your desk. This feels overkill, but you can’t really wrangle a cable mess until everything is unplugged.
As you go, label each cord. A small piece of masking tape with the device’s name written on it will do. Remember to turn off your computer and any other sensitive electronics the right way so you don’t have to worry about understanding data loss or damage.
-
Sort by Device & Function
Once everything’s unplugged, organise the heap into piles by category. A desk filled with cords may seem like a Rubik’s cube that just got shaken, but believe me when I say that it helps so much to have everything visible and separated.
Grouping cables by device or use-case will make it clear what you have, and you may find out that you have duplicates or cables you no longer use.
-
Mount Power Boards
Next, it’s time to address any power boards that are just lying on the floor. Not only does it make them prime targets for collecting dust, it also means you have to be extra-careful not to trip on them.
Mounting them on the underside of your desk or to the wall will keep everything off the floor and neatly arranged. Most power boards have small keyhole slots at the back for easy screwing in, but you can also use strong adhesive strips.
-
Bundle Excess Length
Plug everything back in (this is easier now that your cables are neatly grouped). Chances are, you’ll be met with a lot of excess cable length (literally). This excess is what leads to knots, getting caught on chairs, and untidy spaces.
Pick up the slack and bundle it up neatly, using velcro ties. Velcro ties are reusable, adjustable, and don’t damage your cables (zip ties can be too tight when re-adjusted, and can damage thinner cables). You can also bundle multiple cables using a cable sleeve.
-
Route Cables Along Legs
With your cables bundled, you can now direct them. This simply means routing your cables along the desk or behind it, rather than letting them dangle around loosely.
Use adhesive clips or hooks to clip your cables to the floor or desk. Clip, clip, clip – it’s strangely satisfying to tuck each cord into its own little nook as if it’s finally being welcomed home. You’ll also never have to play detective again when a cord mysteriously gets stuck on your chair every time you roll back.
-
Label Ends For Easy ID
Cut down on those moments when you accidentally unplug the wrong cable when you’re in a rush (we’ve all done it, and had those few minutes where you stare at your desk cables not knowing which one to plug back in first, right in the middle of an important Zoom call ) by labelling the ends of your cables.
A small cable tag will work, or you can just use a small piece of masking tape with a handwritten note on it. Next time you’re fumbling around the back of your desk, you’ll know immediately where everything goes.
-
Test Everything Works.
Before you sit back and bask in the glory of your newly organised desk, take a minute to test everything. Turn everything back on, and make sure everything is working as expected (monitors, speakers, chargers).
It’s a small step, and is much less infuriating than trying to troubleshoot everything after you’ve pushed your desk against the wall.
Tips For A Tidy Desk
And one last note. Maintenance is key. Every now and then (once a month or so) check to see that everything is still connected and hasn’t gotten tangled up. Your future self (and your gear) will be grateful for your care in not only preventing dust bunnies and tripping hazards but for prolonging the life of your hardware and having an overall much more peaceful space.
It’s such a little investment of your time that you’ll reap the rewards every time you sit down at your desk.
