![]()
Google’s Pixel phones are good looking, fast, and they’re secure as hell. The Pixels not only have extra security and encryption (which complicates custom recoveries immensely), they include a dual partition system for updating the OS in the background. The background updating is a great idea for seamless OS updates, just as Chromebooks do it but if you never plan on updating through Google’s OTA process there’s something else you can do with that dual partition and it’s a lot more fun.
When the Pixels first arrived with dual system partitions I was shooting the breeze with some folks on XDA about the possibility of dual booting these partitions. We suspected it might well be possible if we could figure out how these partitions worked. Why would you ever want to do this I hear you ask? Many reasons. The main one being root access. Some apps such as Pokemon Go, Snapchat and Android Pay will NOT work with root access. There are ways around some of these but they are complicated and often troublesome (eg. Xposed – which isn’t available for Nougat yet, Magisk root, etc) and can sometimes stop working when apps update etc.
What if you could boot into a ROM that was not rooted when you wanted to use one of these apps and then boot into a ROM with root access when you were done?
The reason this can get complicated with the Pixels is because of the way they flash their ROMs, kernels and root. The Pixels have two system partitions, two boot partitions and 2 vendor partitions but only one data partition. At any one time only ONE system partition and it’s corresponding boot partition will be active. Thus if you flash the same ROM (custom or stock both work) to each system partition they could easily share the data partition and you have a fully functioning dual booting device (At this stage I have been unable to get dual booting working with two different ROMs — unless they are extremely similar — due to the shared data partition having different values for each ROMs particular tweaks etc inside the phone settings).
Of course there is only one way to know for sure if this worked — test it out, so I did. What follows is the step by step process to get dual boot working on my Pixel XL, but considering the Pixel has the same partitions it should work the same for them (untested though unless you would like to donate a Pixel to the cause so if you have a Pixel proceed at your own risk). For those wondering about Android Pay etc and the SafetyNet Check read back over my article from last year on how it is bypassed.
The following instructions can also be used as a “How to flash a custom ROM to your Pixel” instructional piece so read on if you are at all interested in that. Flashing custom ROMs and kernels etc for the Pixel phones is very different to the process for previous phones although sometimes it sounds more complicated than what it actually is IRL.
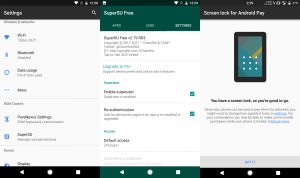
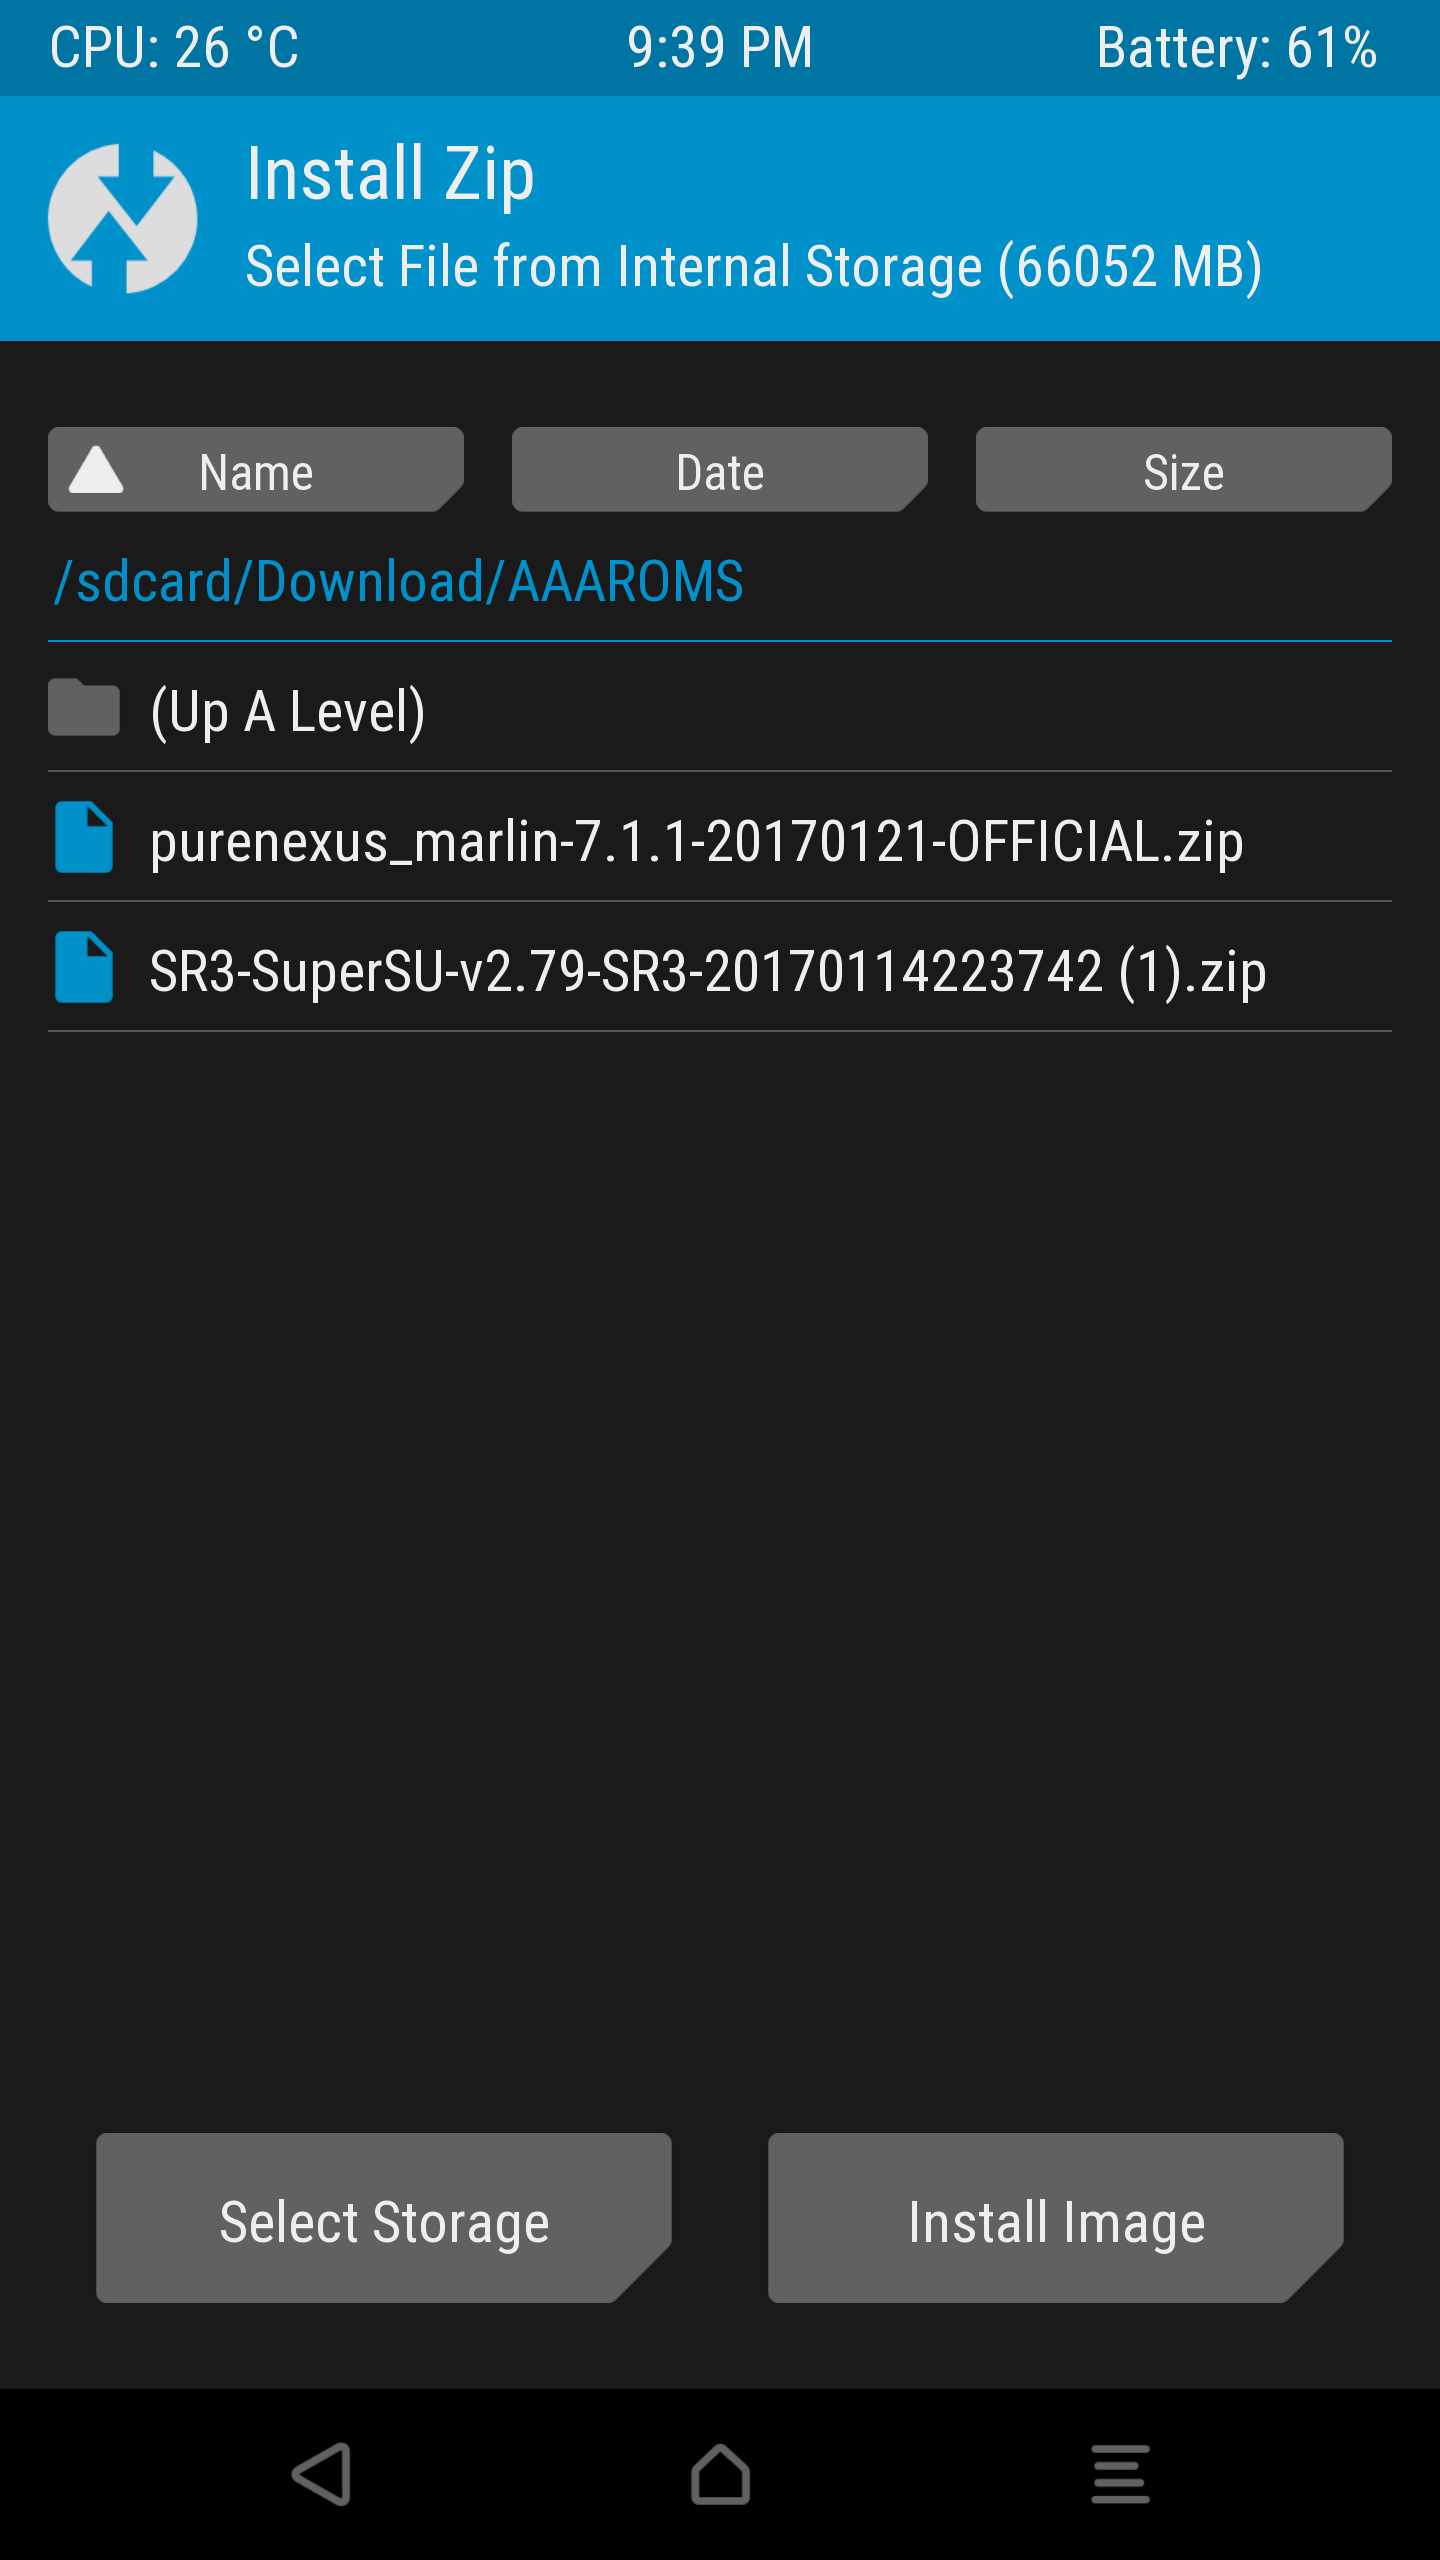
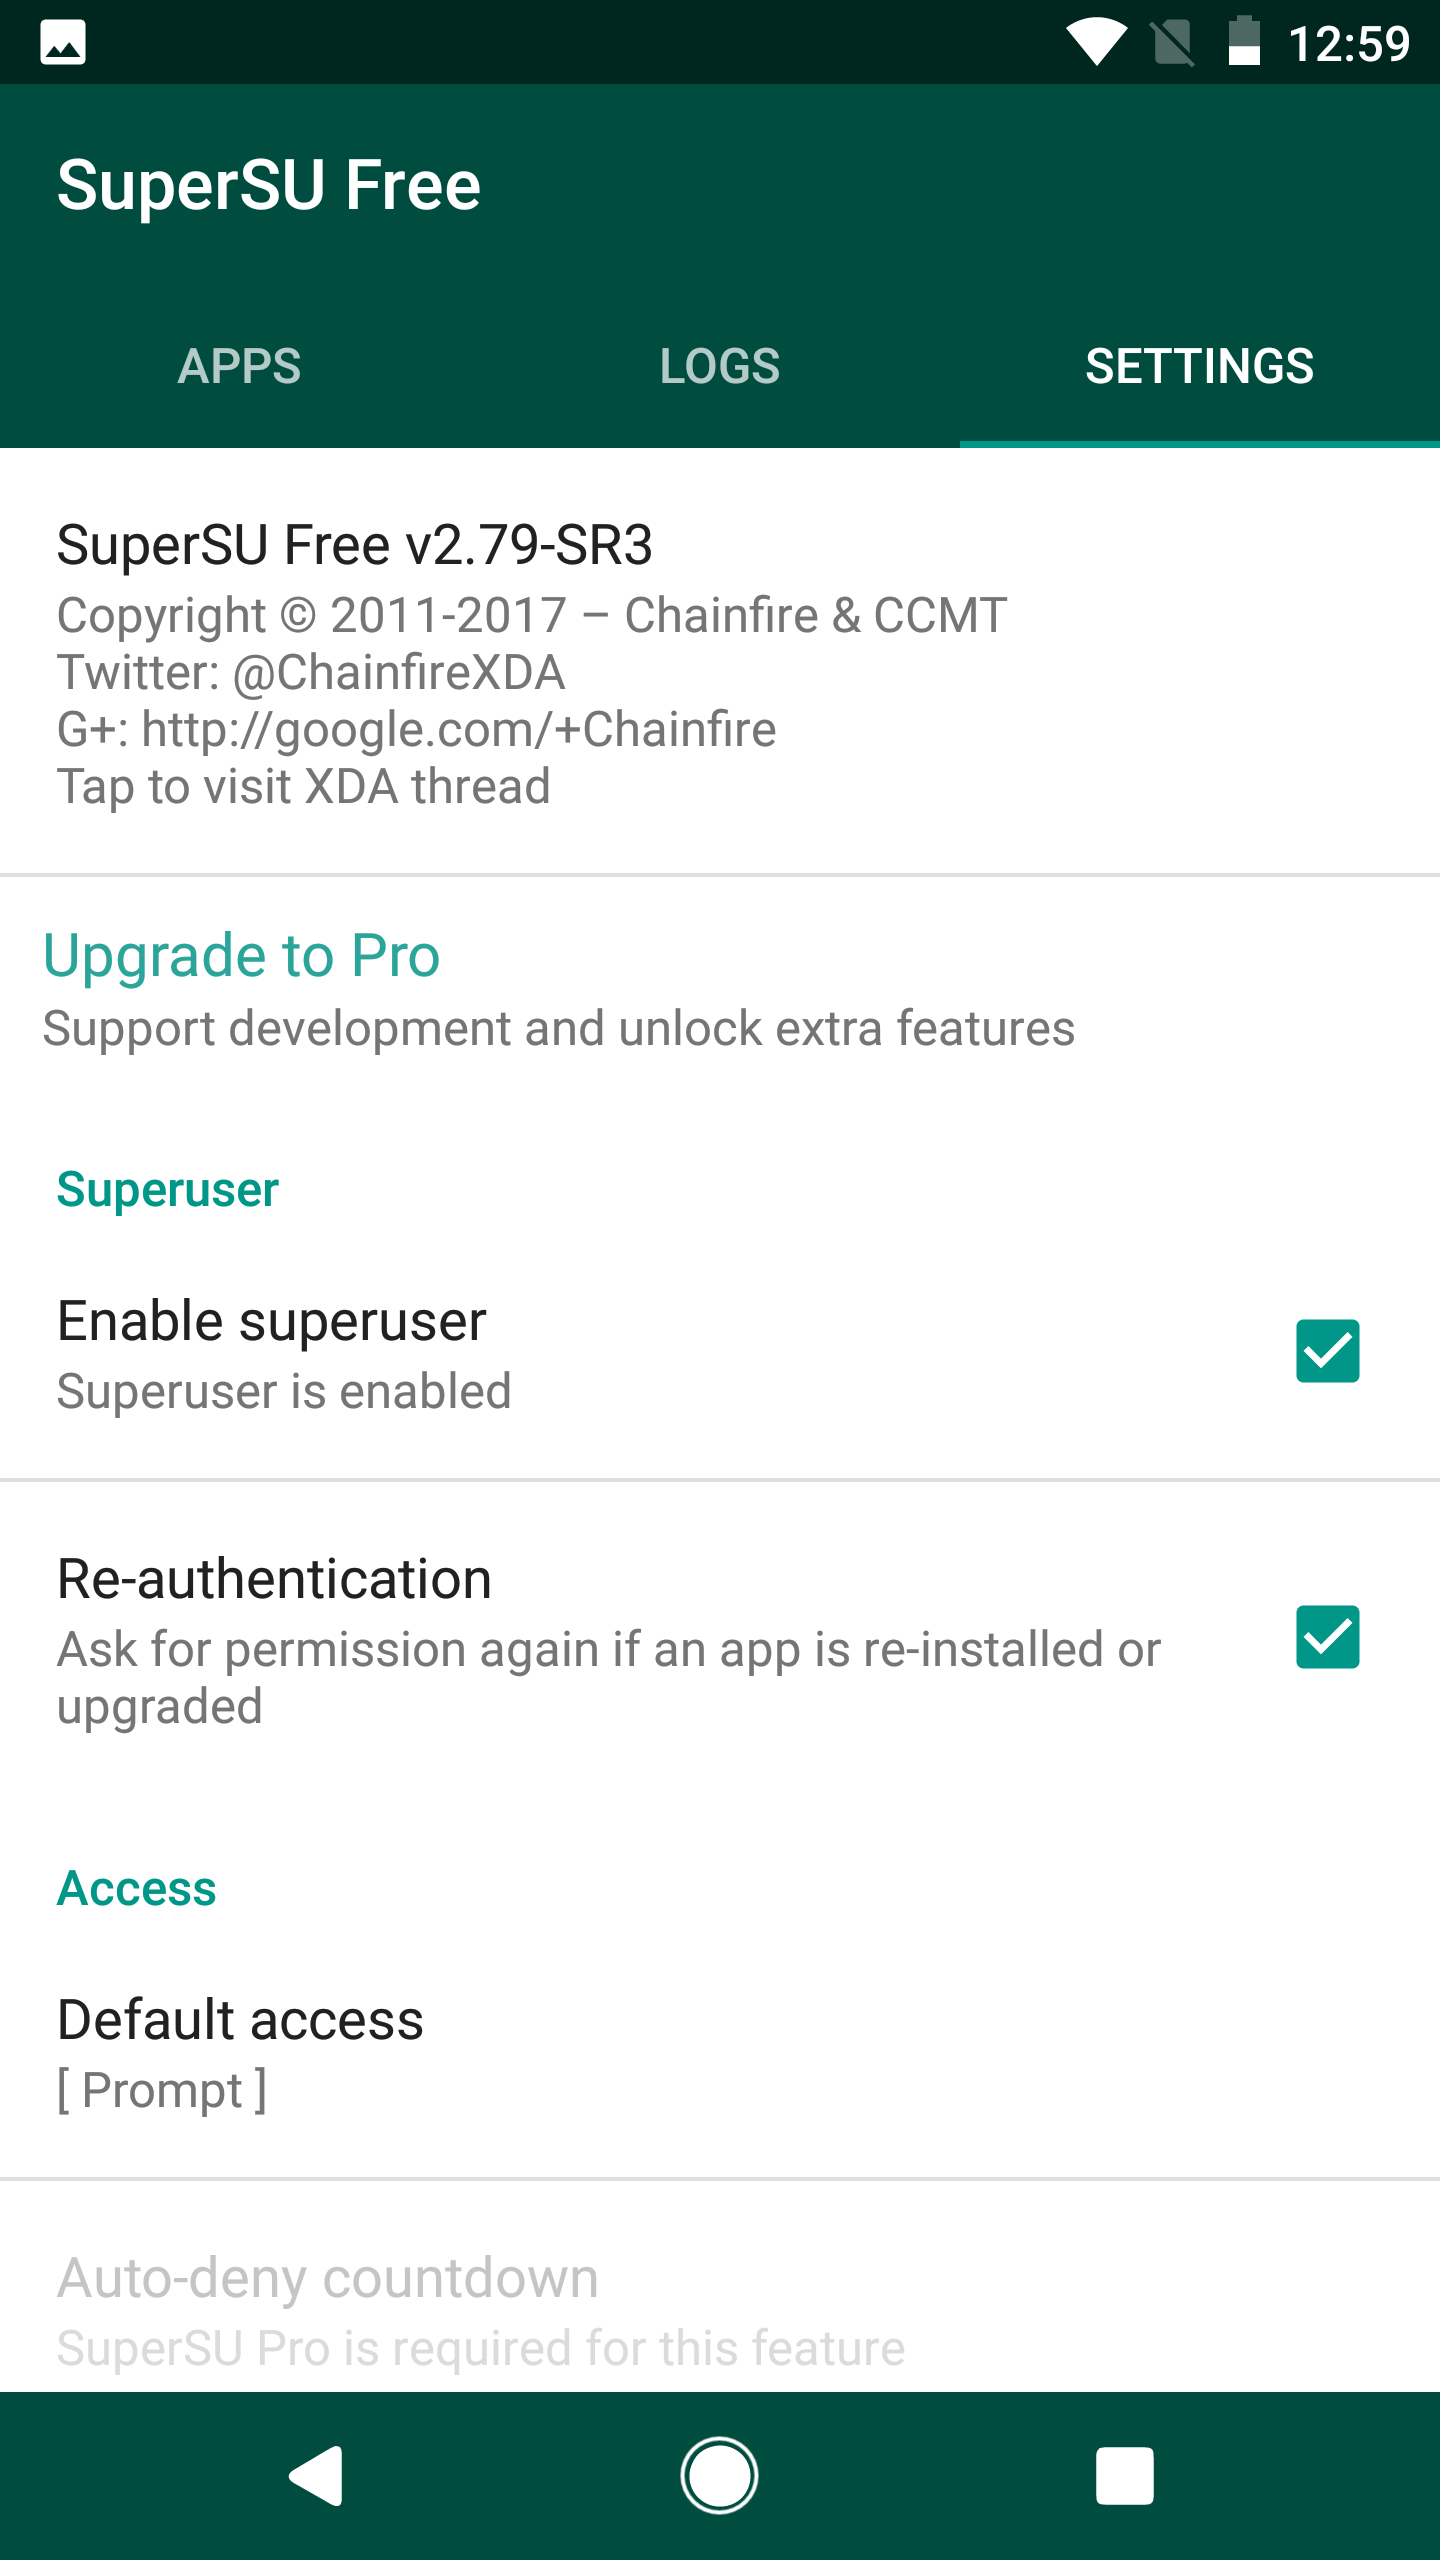
First step is to install a custom ROM or kernel to your already rooted Pixel. At this stage I am assuming you have “rooted” your Pixel and installed the latest TWRP (custom recovery). If you have not done these I encourage you to visit our earlier instructional piece following the XDA links to the most up to date SuperSU and TWRP.
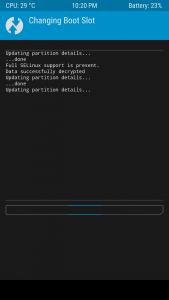
The difficult part to get your head around with the Pixels is that when you boot into recovery it boots into the current boot slot (termed slot a or slot b) — dual boot partitions and dual system partitions remember. Then when you flash a custom kernel or SuperSU it flashes to the CURRENT slot that it has booted from and is currently in in recovery. On the flip side though, if you flash a custom ROM it flashes to the OTHER boot slot (just as Google intended it to work for their “seamless updates”).
The other important thing to remember is that the recovery is once again part of the boot image which means that each time you flash a new boot image you are over-writing the custom recovery you have installed. To circumvent this you just need to flash the custom recovery zip file each time you flash a new boot image/custom ROM (not a custom kernel but a boot image such as that in a custom ROM).
Okay, now that you know why we have to do things differently, here are the steps required to flash a custom ROM onto your Pixel:
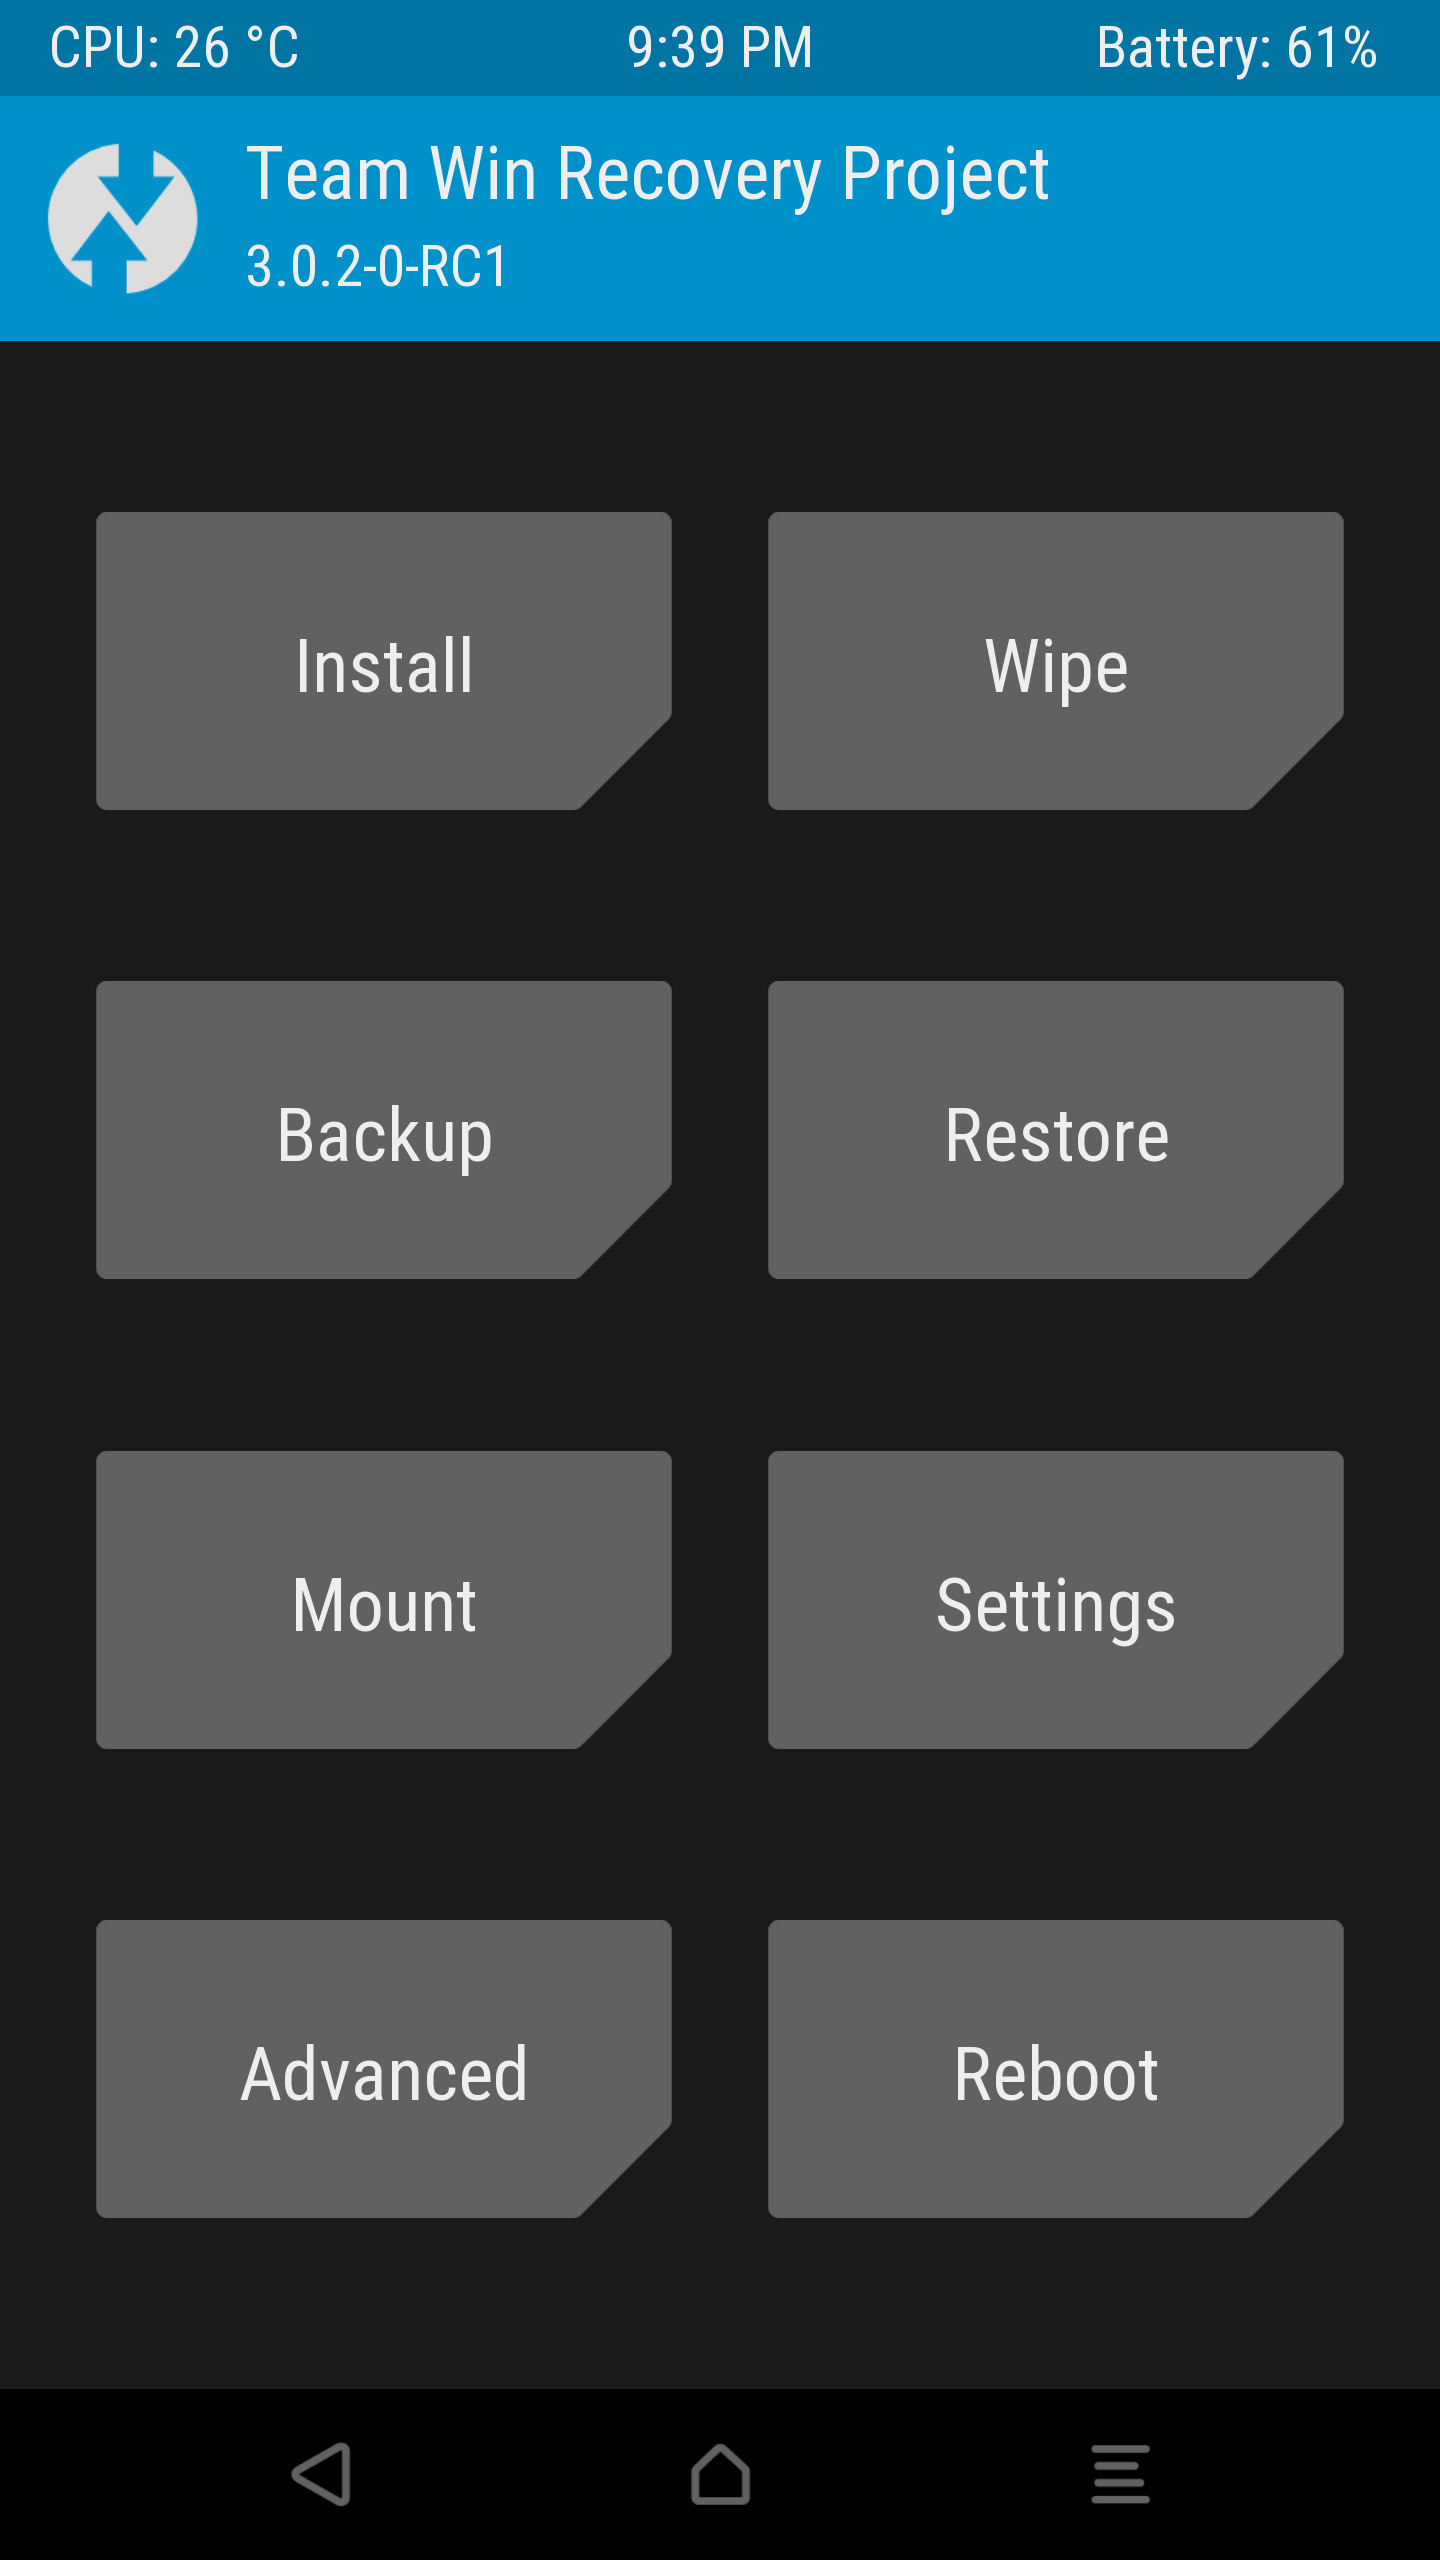
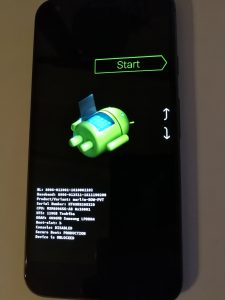
- Reboot into TWRP (either using an app or by booting into bootloader — power on while holding volume down button — and navigating to recovery from the bootloader menu using the volume buttons)
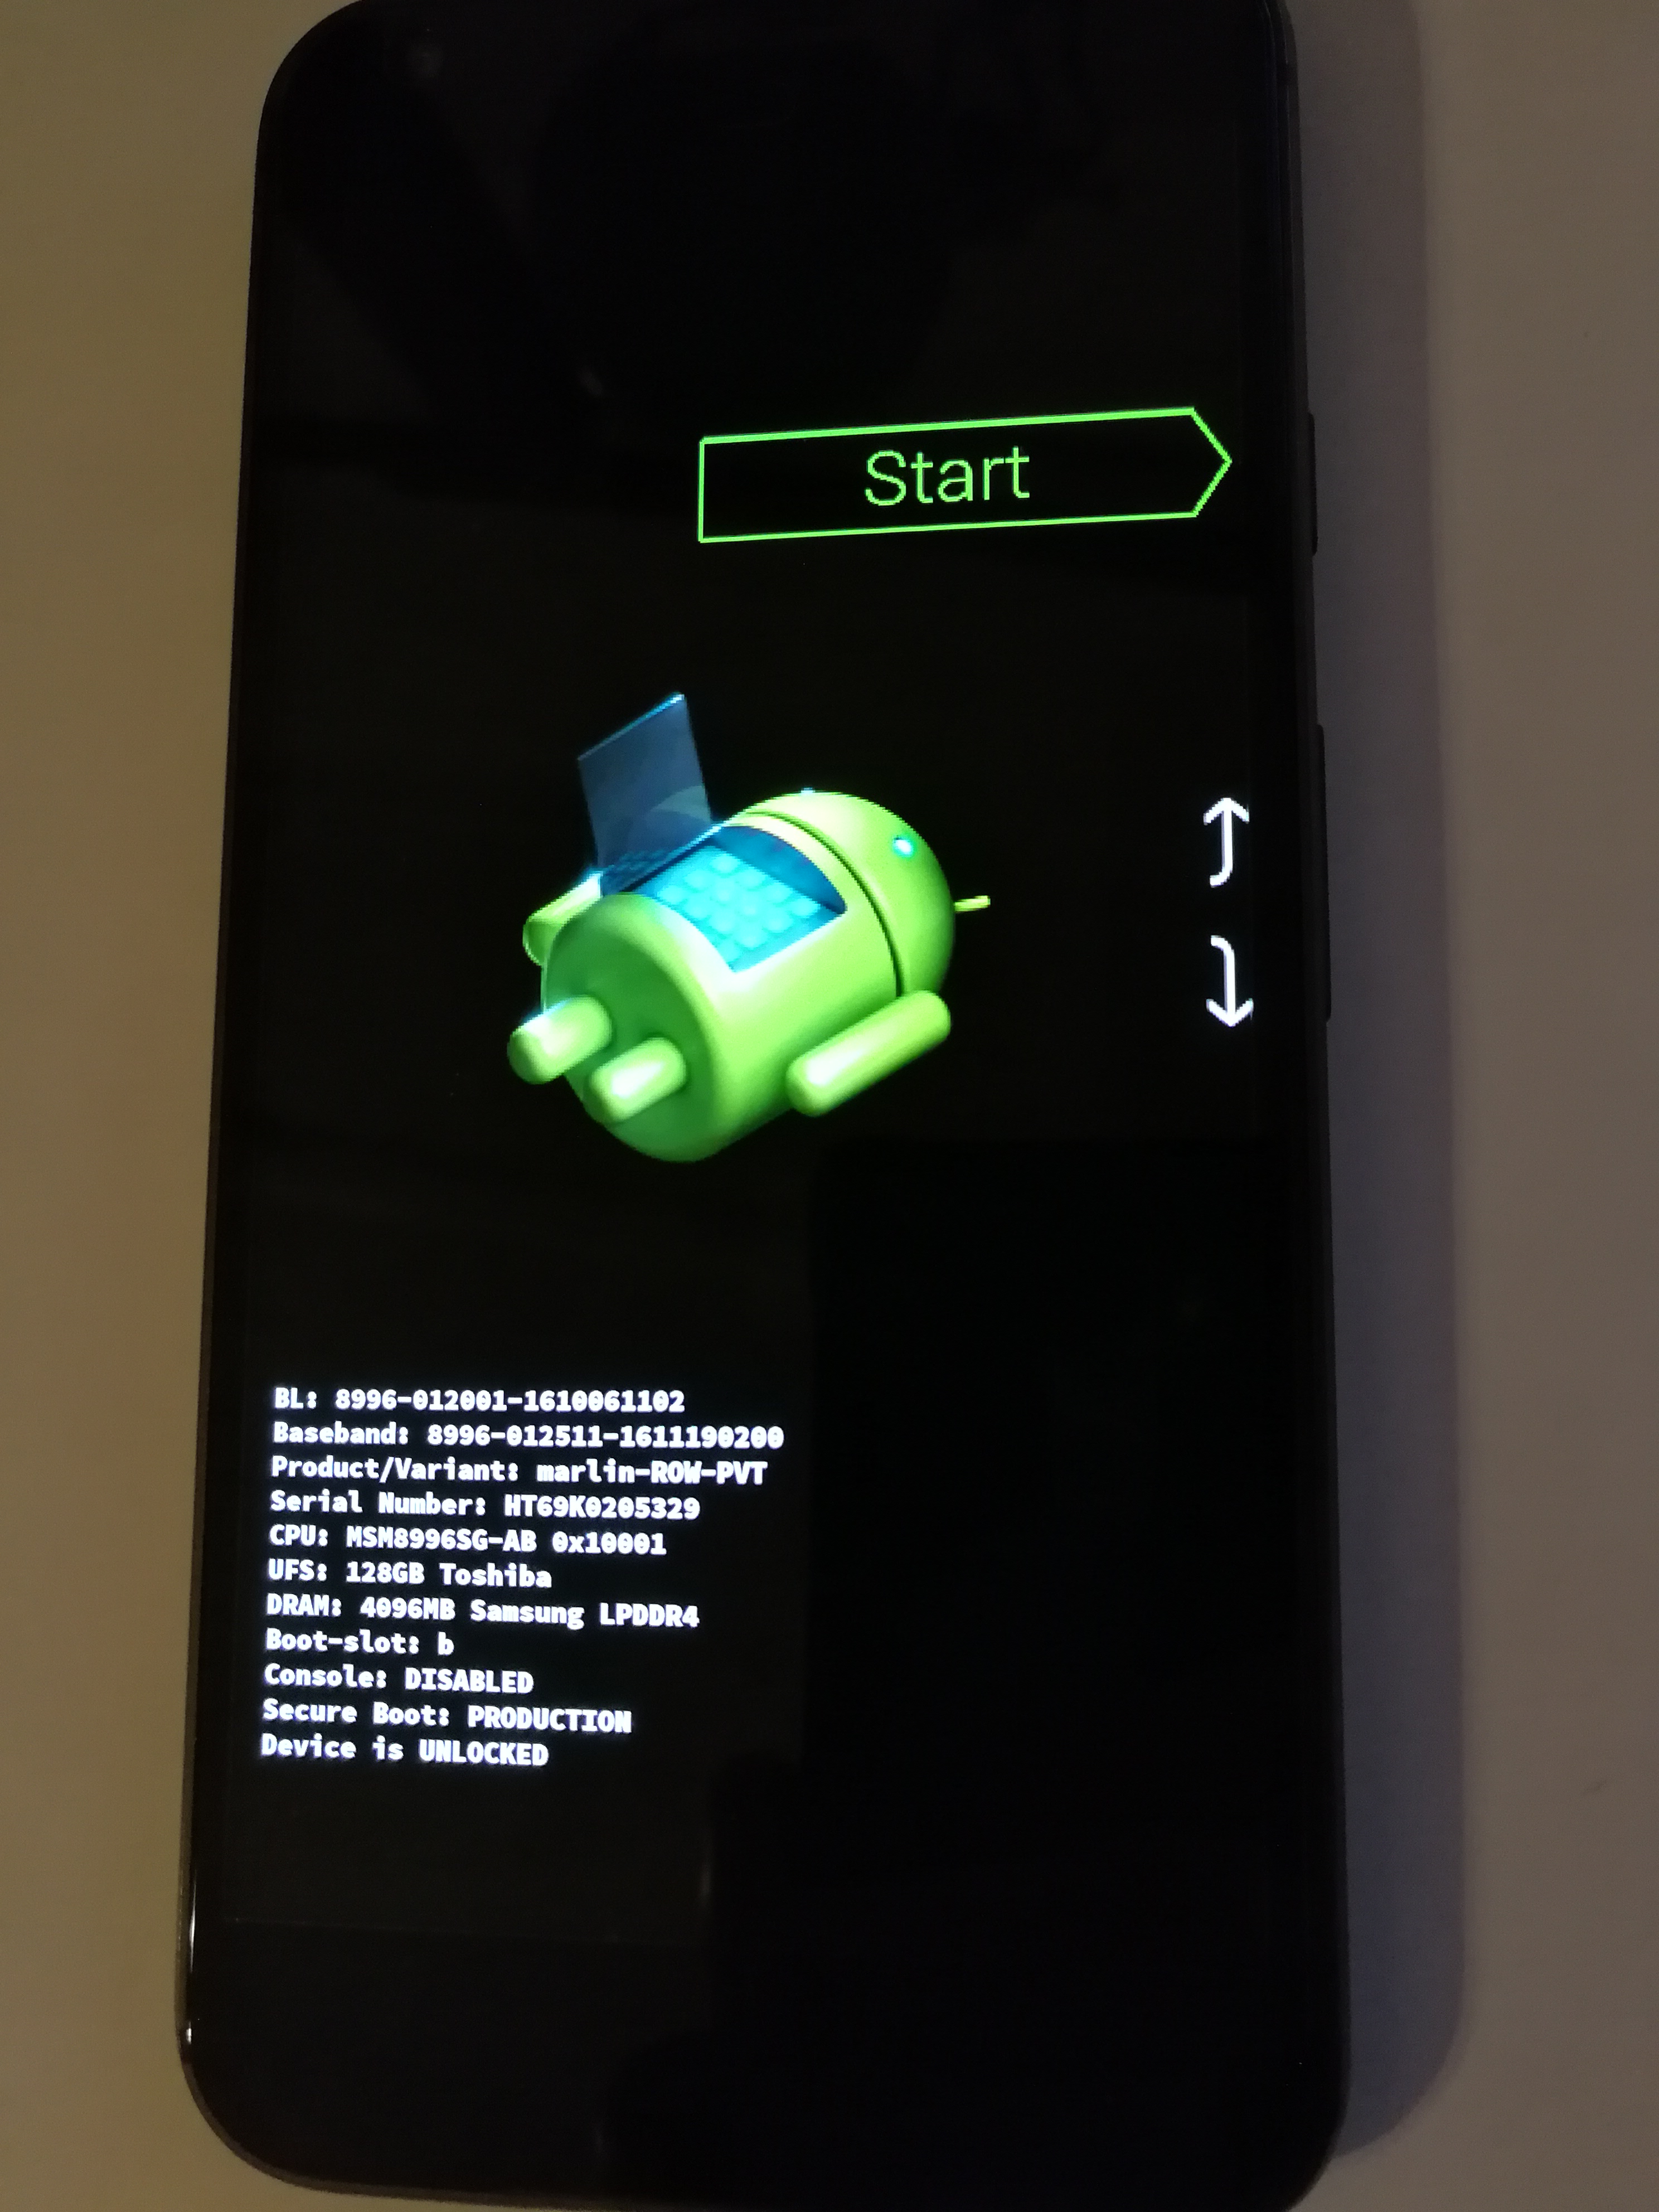
- Take note of the slot that is active by going to the Reboot screen of TWRP (or it is also listed on the bootloader display) and check what the display says is the current slot

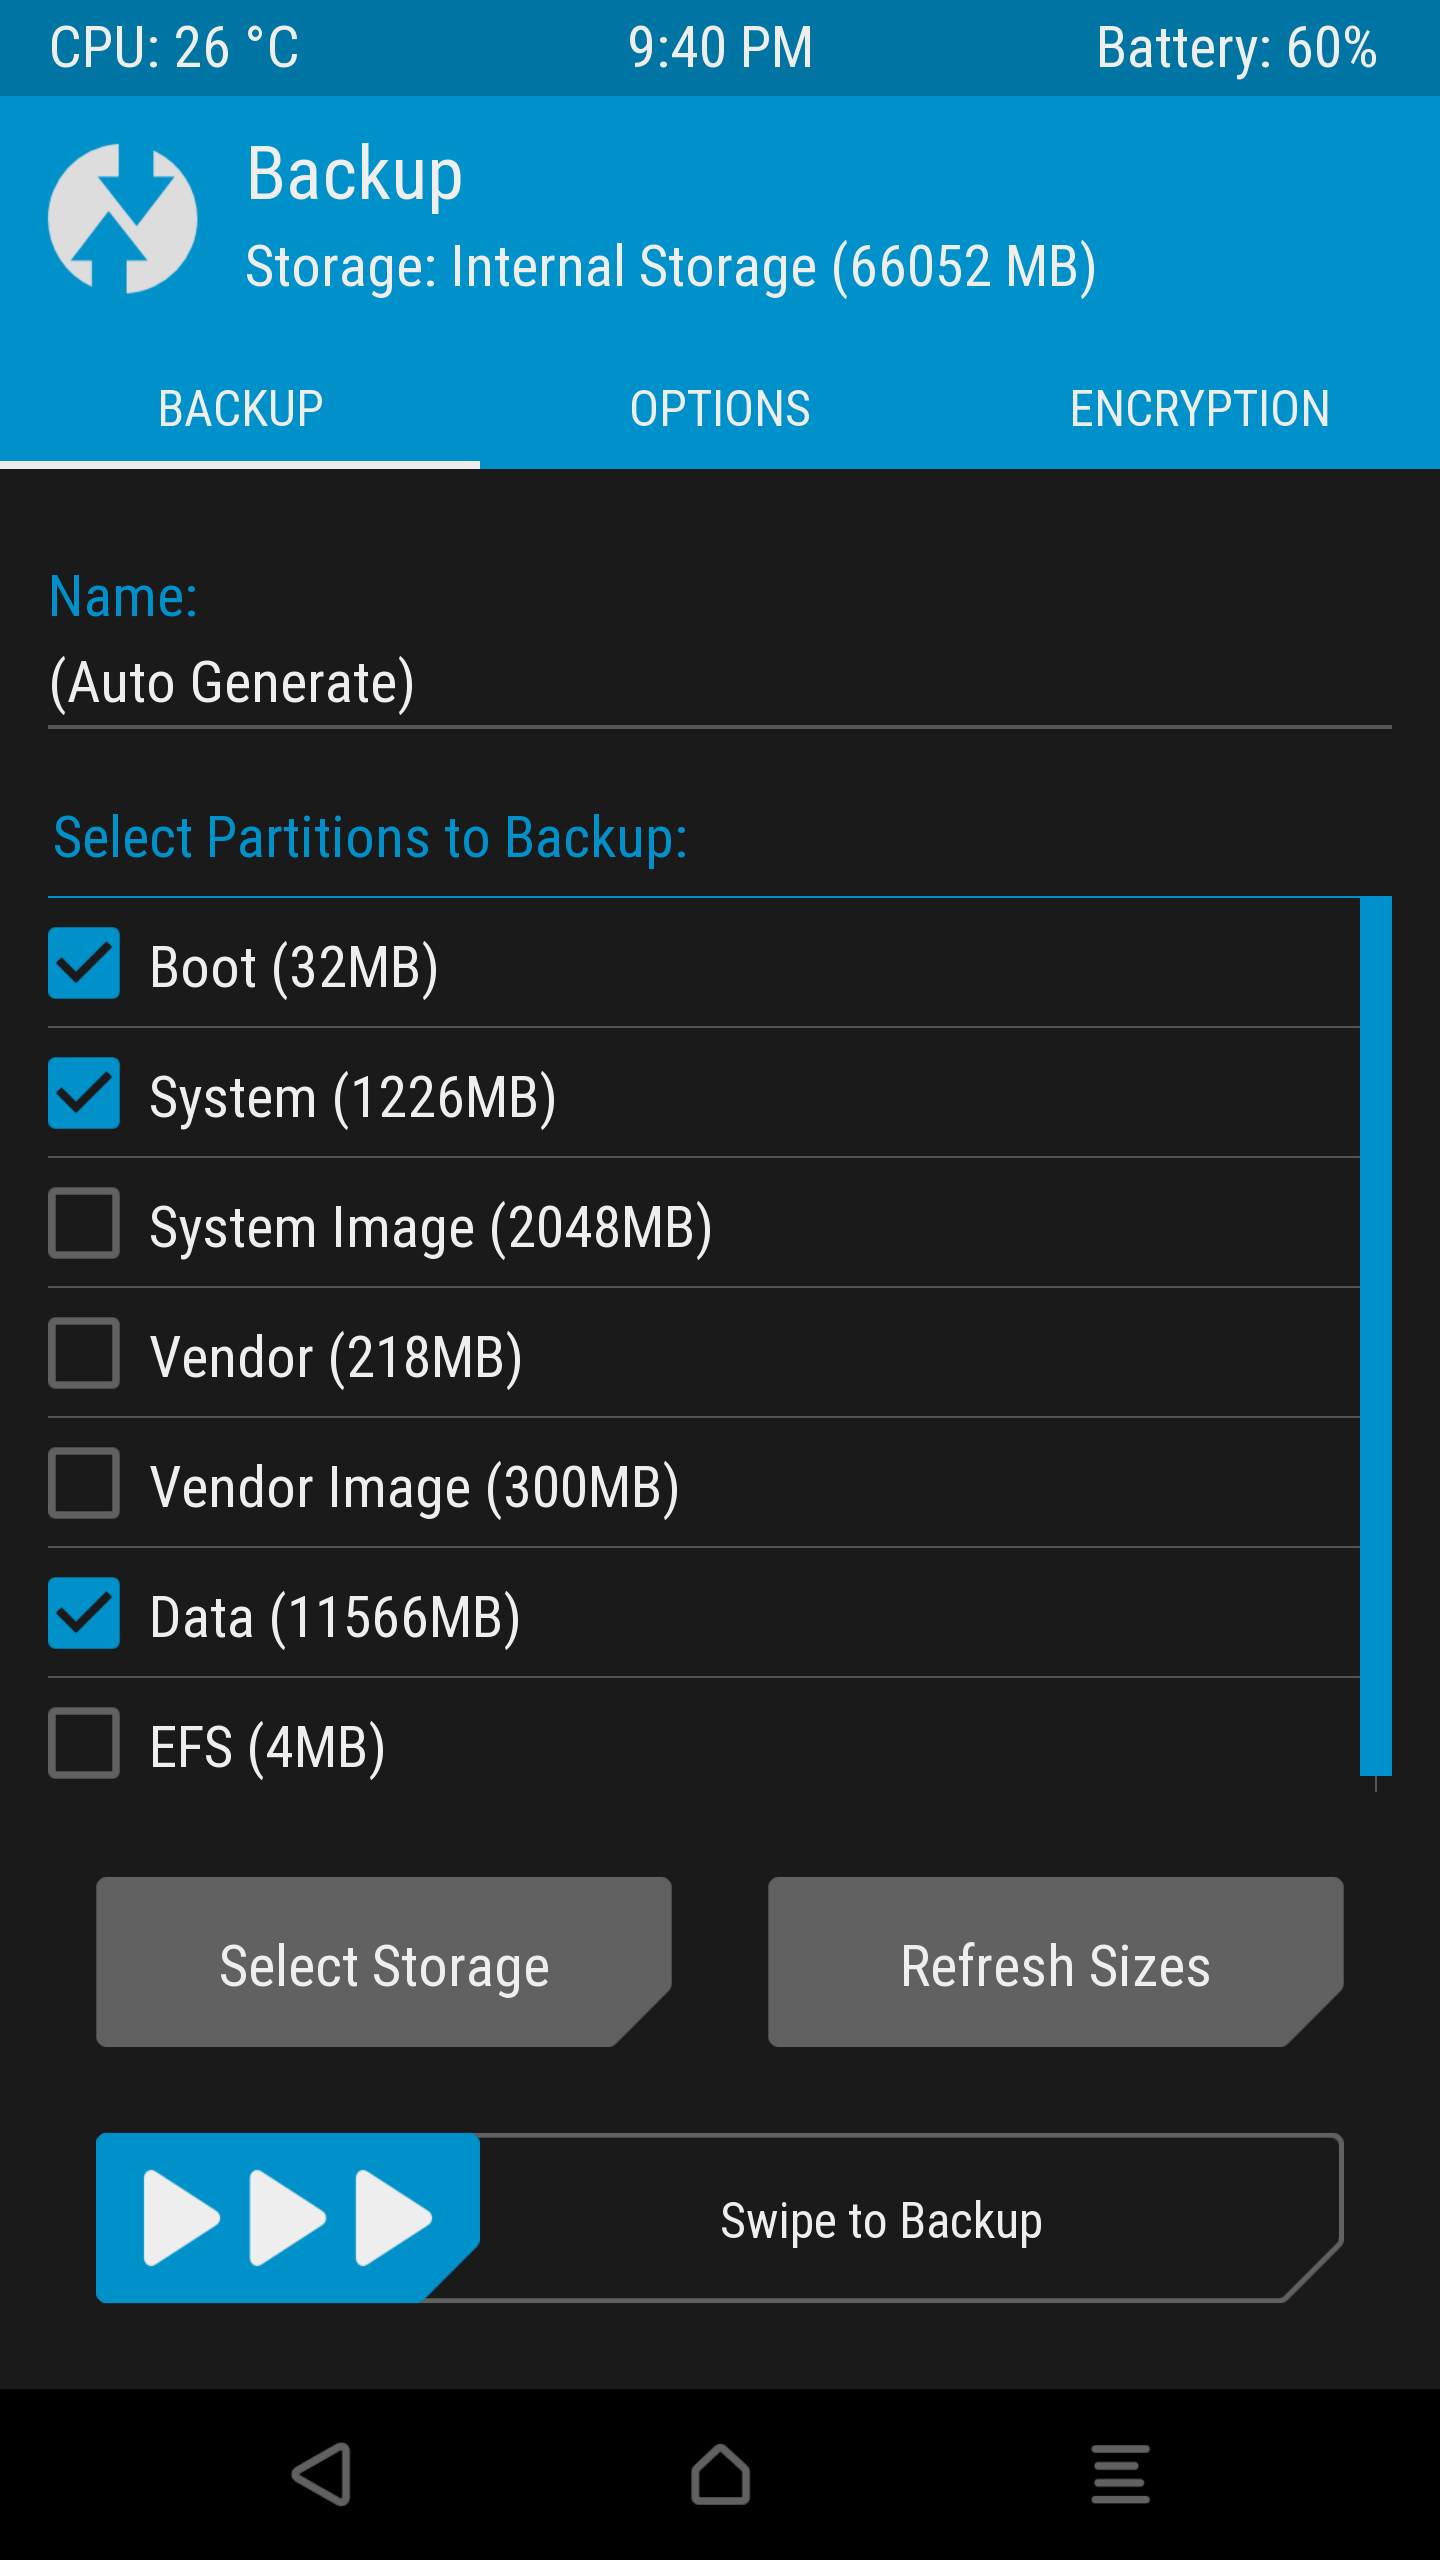
bootloader slot - Perform a backup in case something goes wrong (I always backup apps using Titanium Backup as well)
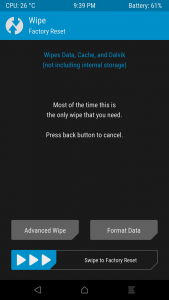
- Wipe “Data, Cache and Dalvik” (factory reset) (not the sd card)
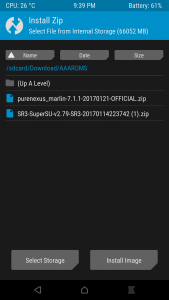
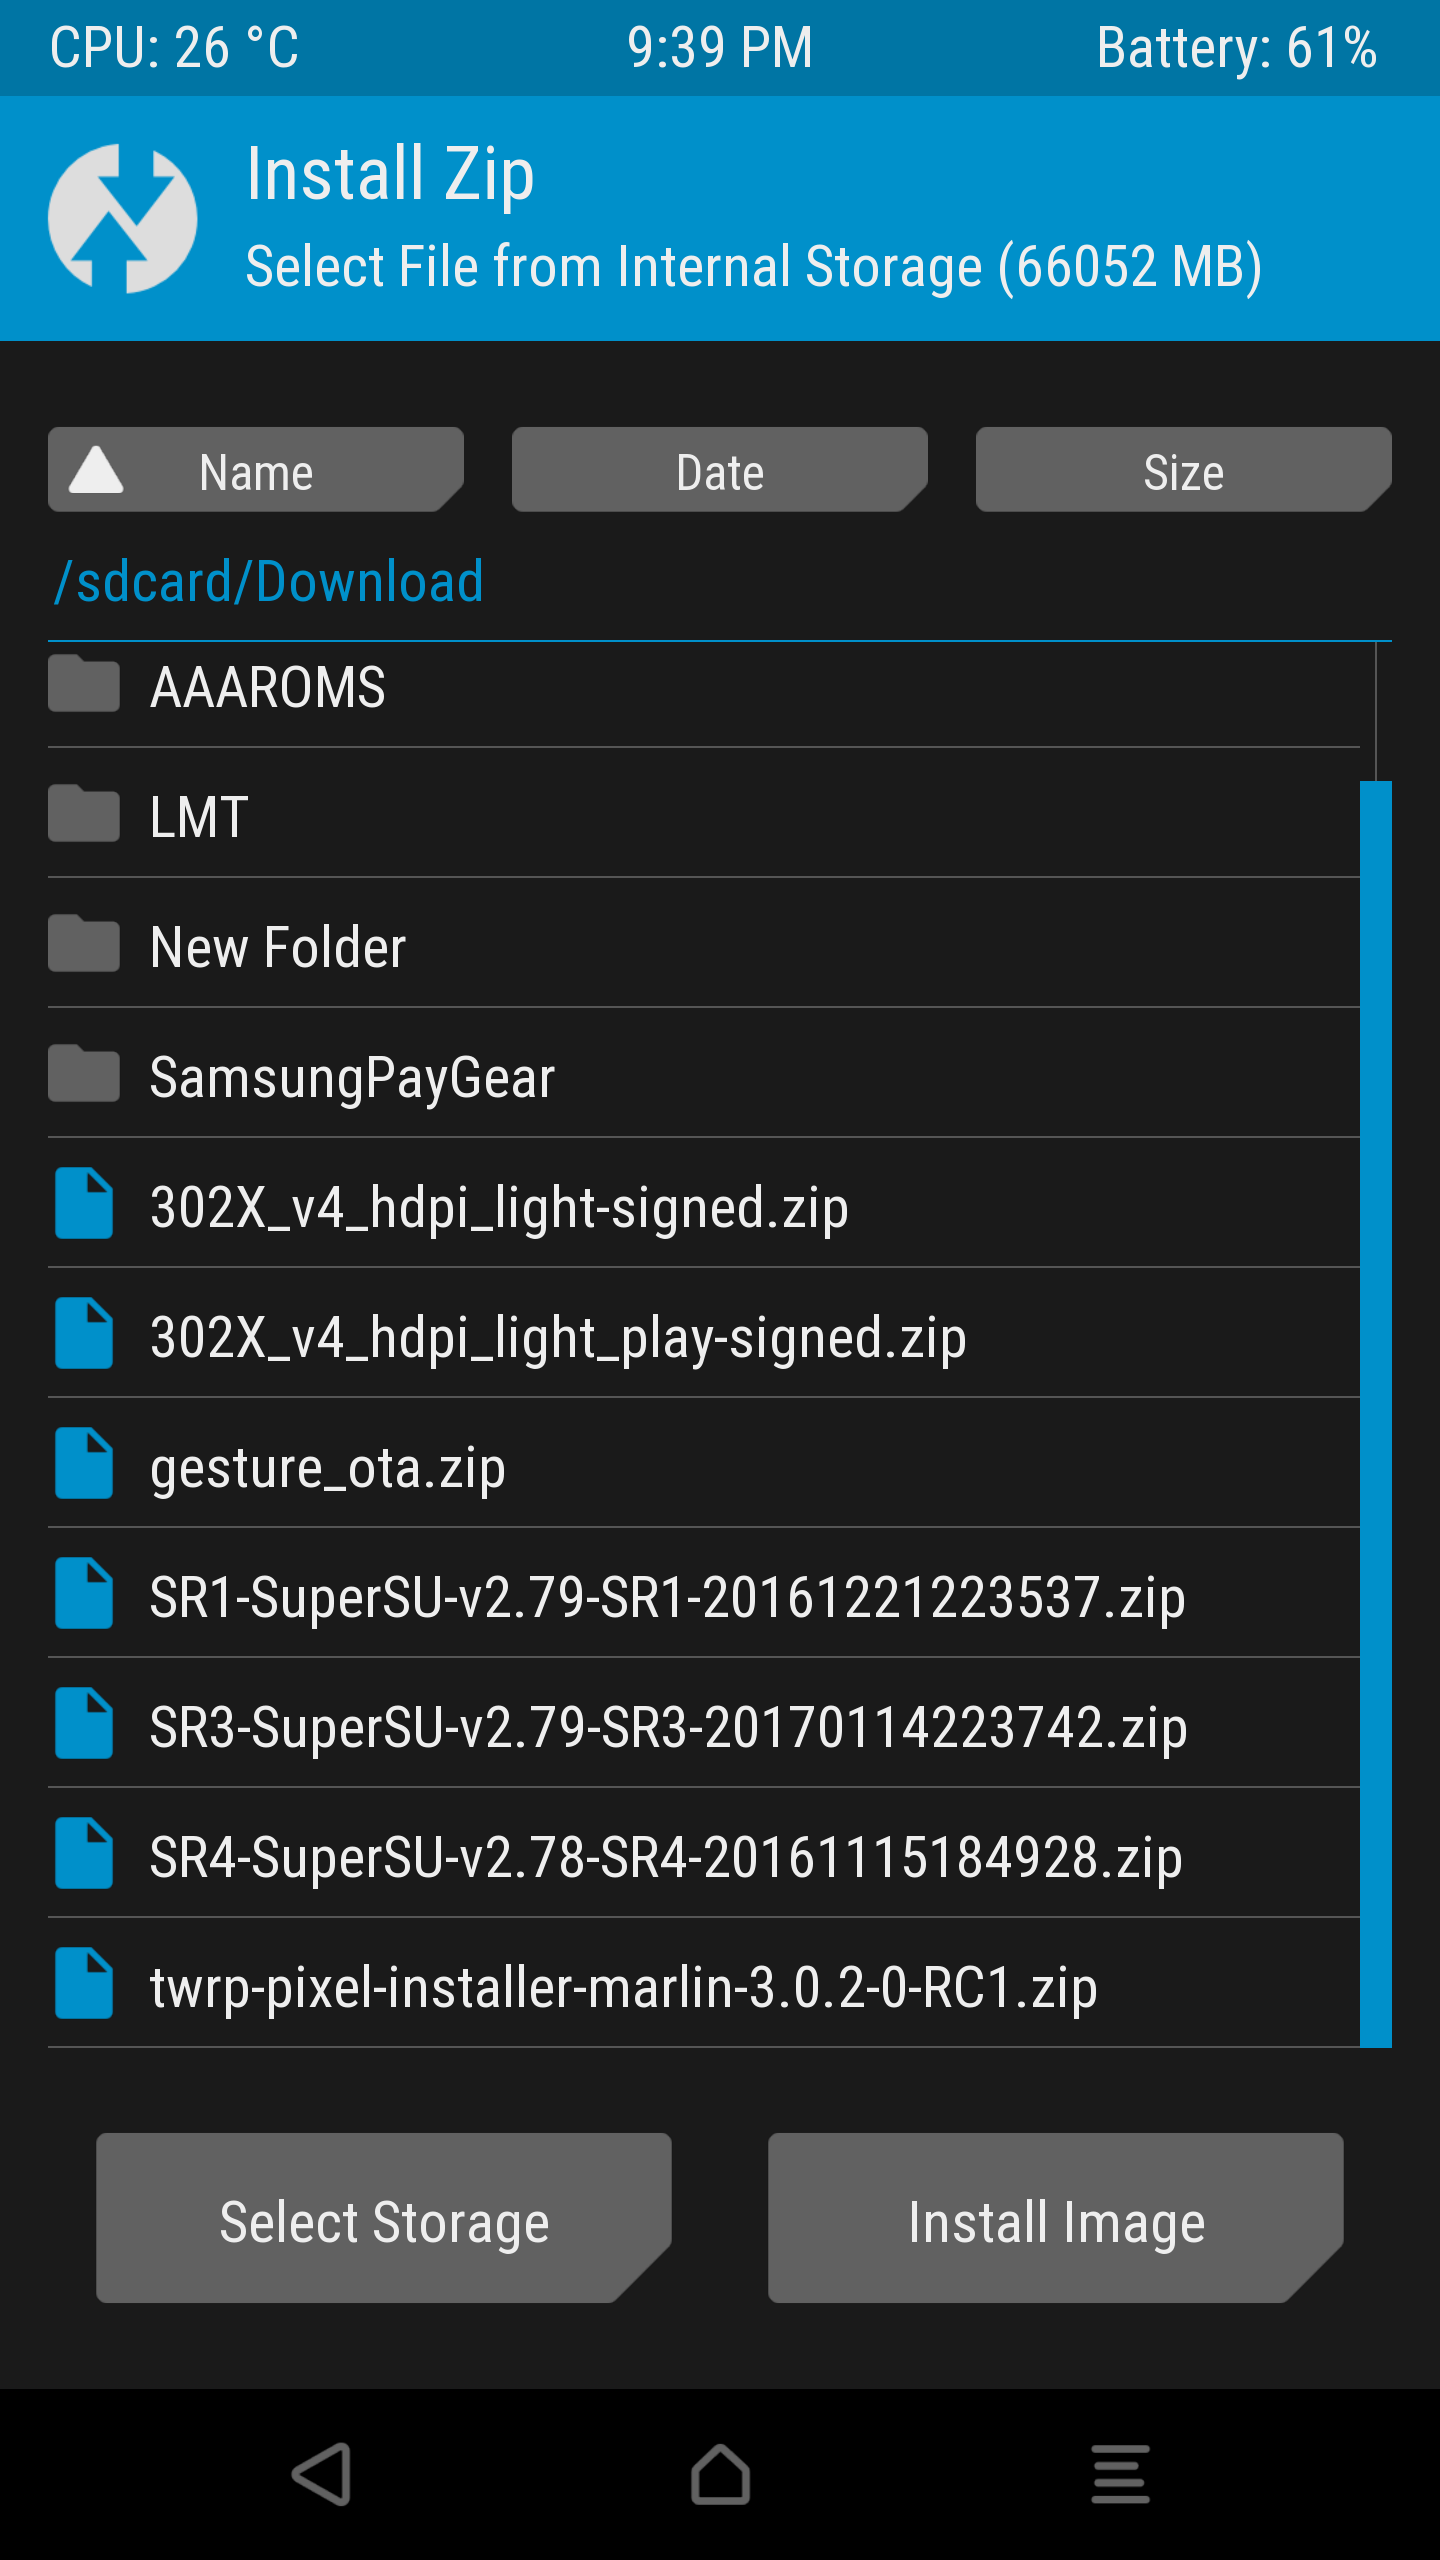
- Install ROM — navigate to where you saved the ROM on the memory and install it
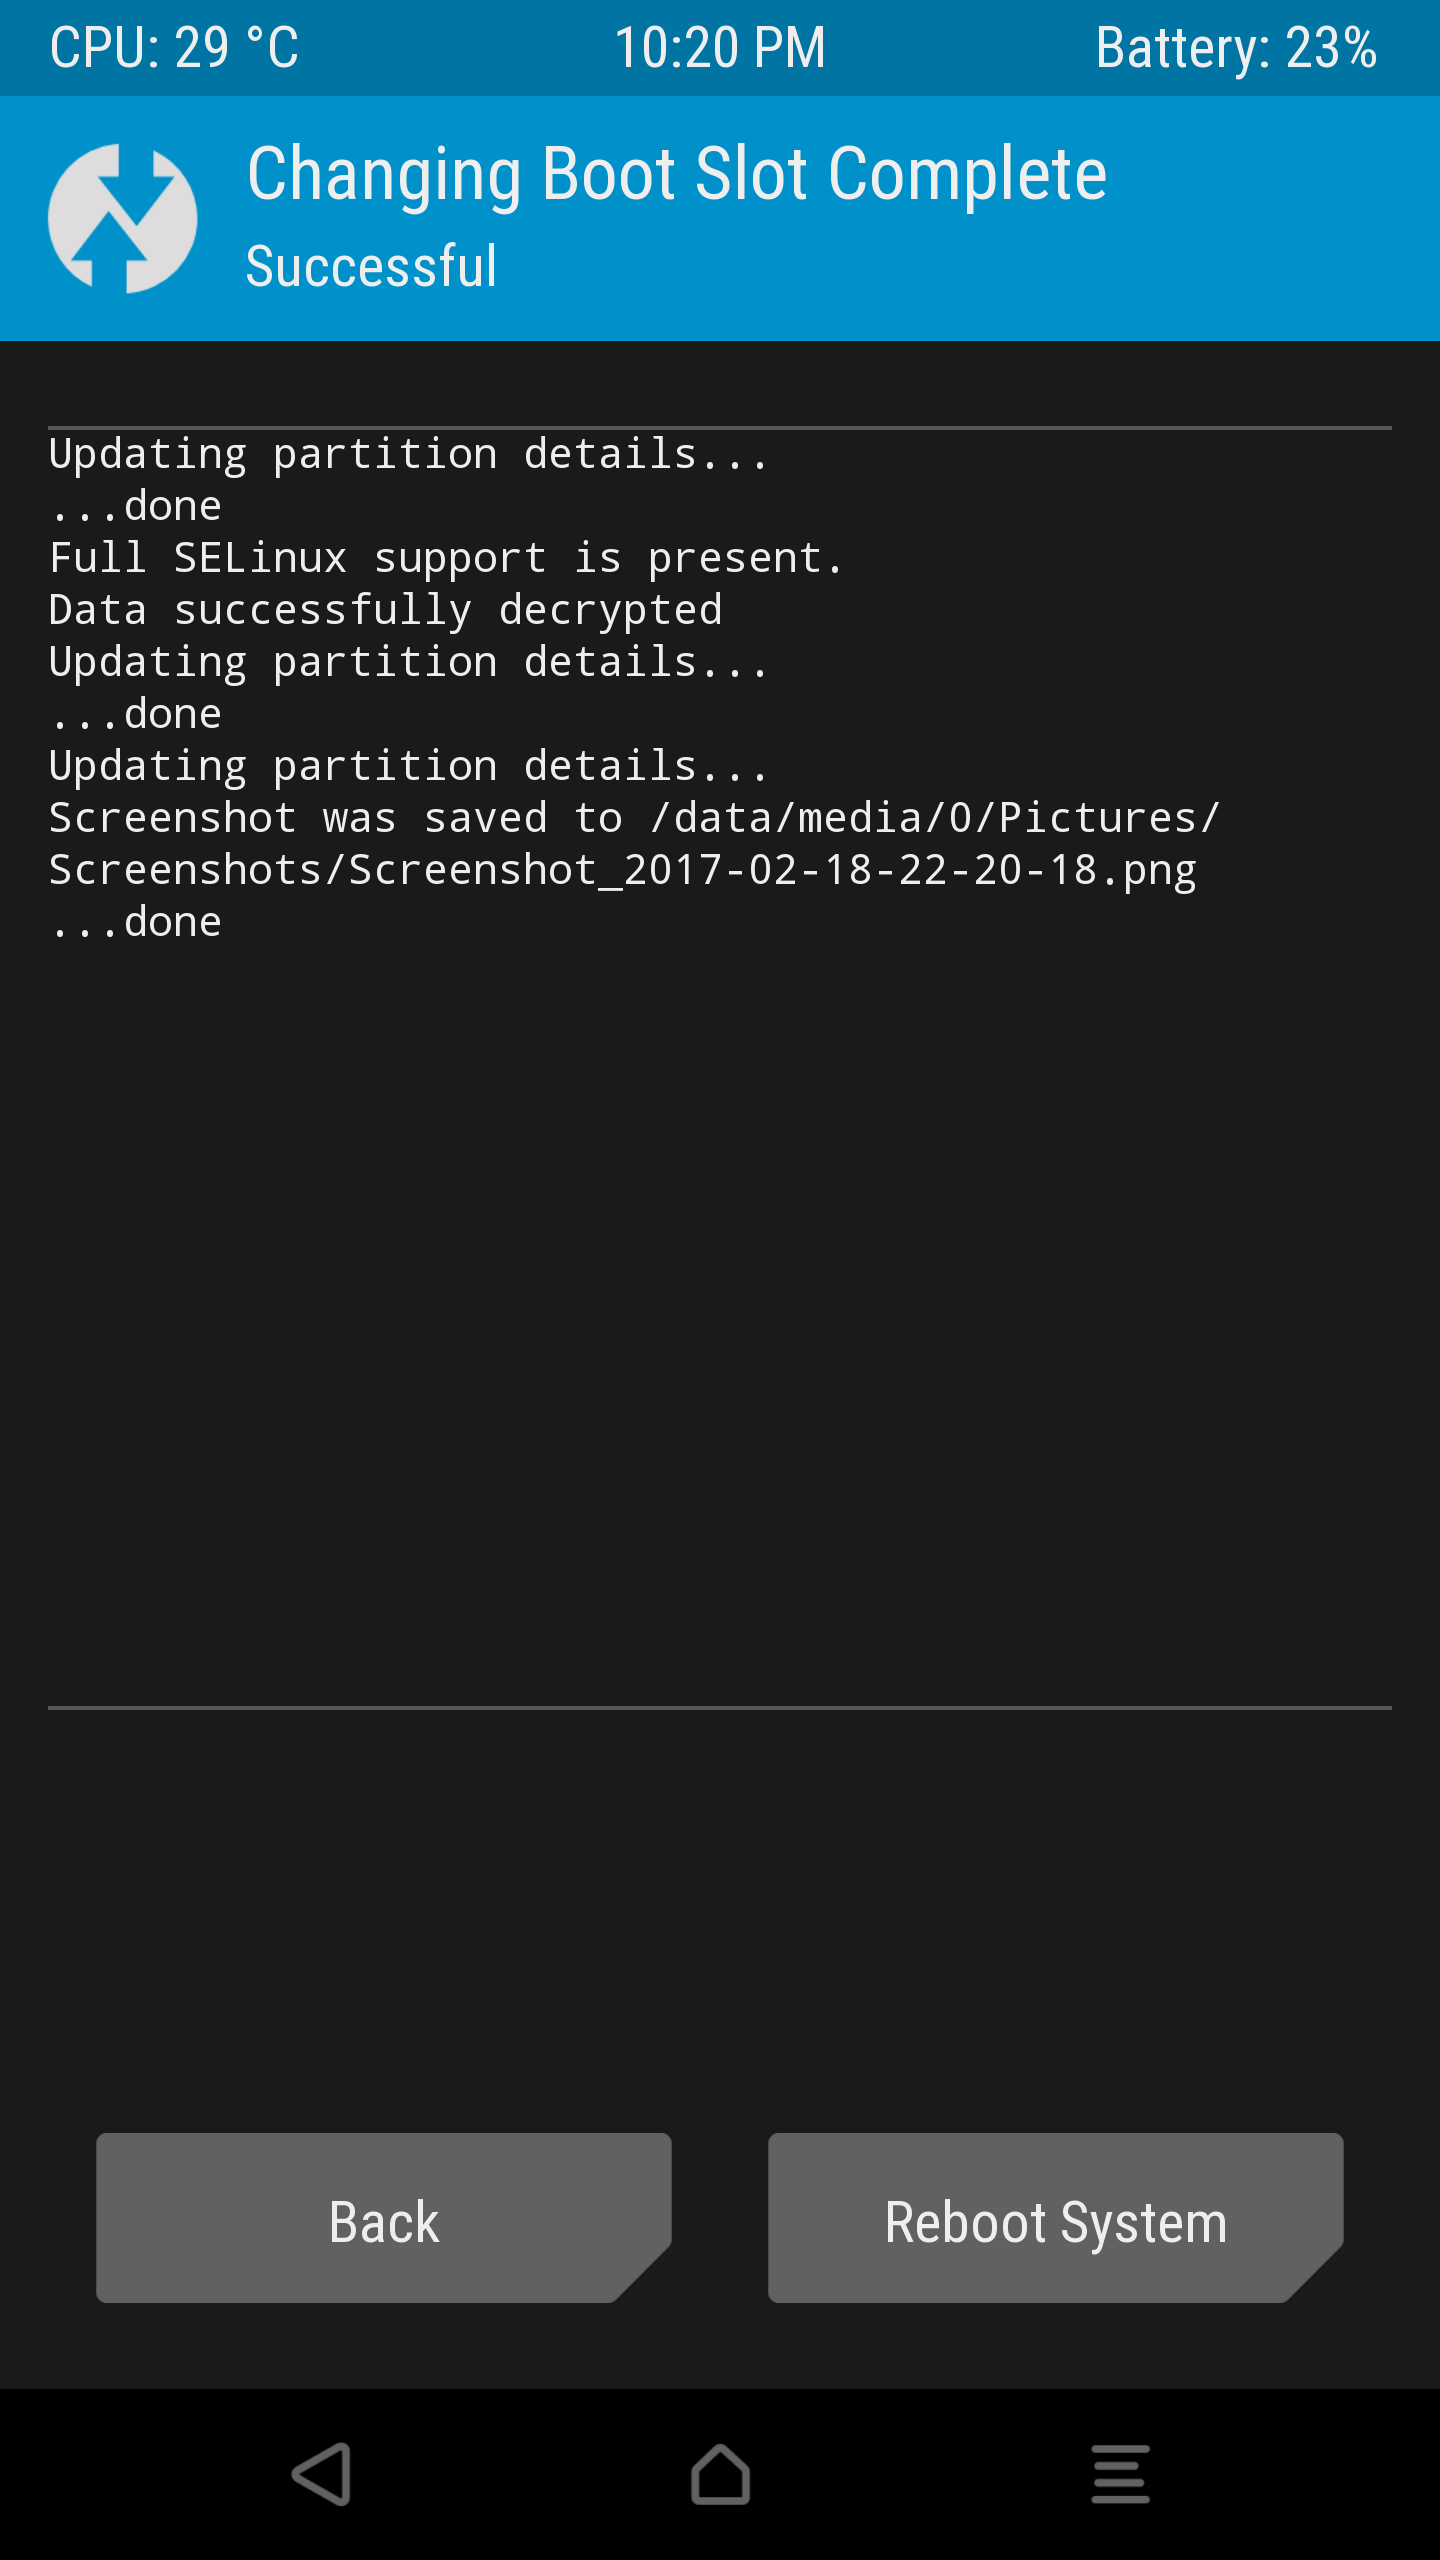
- BEFORE YOU REBOOT reinstall TWRP from within the active custom recovery using the TWRP zip or image file (remember the custom ROM overwrites the recovery)

- Reboot System
- Once the system has rebooted, unlock the phone and give it a few minutes to finish all it’s processes
- You can leave it here if you do not care about root access but without a custom kernel the SafetyNet Check will be tripped so even if not rooting I suggest you install a custom kernel — my favourite is ElementalX but there are also stock kernels with the SafetyNet patch
- Reboot back into recovery as before
- It will boot into the slot that you just flashed the ROM to. This is where it gets tricky — flashing a custom kernel now will flash it to the ACTIVE slot, ie. the one you just flashed the ROM on to. Install/flash the custom kernel (after SuperSU if you want that)
- Personally I prefer to flash SuperSU first, reboot and then boot back into recovery so that the Aroma installer for the custom kernel detects the root access and gives me more options — these can be changed later though using most kernel tweaking apps
- You will now have, in the above example, a custom ROM running a custom kernel (with or without root access)


Now for the interesting and surprisingly easy part — installing the same ROM as a dual boot. For this example we will assume you have a custom ROM like I do on boot slot A, running ElementalX kernel with SuperSU installed. It can also be performed by flashing/fastbooting the stock ROM to the both slots.
- Reboot into recovery and make note of the active boot slot
- While in recovery install/flash the custom ROM that is already running on your phone — remember it flashes to the OPPOSITE slot than the active one. After this you will thus have the custom ROM on both system partitions
- BEFORE YOU REBOOT OR ANYTHING flash the TWRP recovery again
- Go to the reboot screen of TWRP and change the active slot to boot to the opposite boot slot (this is how you will boot into a different partition once you have finished here)

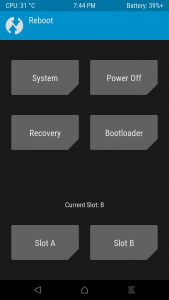
- Reboot into the bootloader again to ensure that the active slot (boot slot B in this case) is the new one you just flashed the custom ROM to
- If the Active slot is in fact boot slot B then boot into TWRP from the bootloader and install/flash a custom kernel that has the SafetyNet Checks bypassed
- Reboot system and it will reboot into the custom ROM that is not rooted and does NOT trip the SafetyNet Checks
- Whenever you want to change ROMs to a rooted ROM or otherwise you will need to boot into recovery and change the boot or active slot before rebooting the system

At this stage I have not managed to get it working on two totally different ROMs, most likely due to the data partition that is shared requiring different data items for different ROMs. It certainly works for a stock ROM running a custom kernel (there is a stock kernel with the SafetyNet check patch over at XDA if you want to do this on the stock Google ROM).
For me I have it functioning fully with Android Pay, Pure Nexus ROM, ElementalX kernel WITHOUT root access on boot slot A and on boot slot B I have Pure Nexus ROM, ElementalX kernel WITH root access but NOT Android Pay (root will trip the SafetyNet Check). I live mainly in slot B due to the large number of root access apps I use.
Although the Pixels have been out for several months now it is still early days around the developers’ understanding of the security features and partition scheme of this new device. In the future I can envisage this whole process being semi-automated by a specialised recovery or app. Until then though if you have a use for it, or if you just like to tinker like me then you now know it is possible and how to do it.

