Just over a month ago, Wyze officially announced that the company is landing in Australia and has brought with it, multiple devices. The DIY security space is getting pretty crowded, so it’s perhaps a brave move to take on the incumbent manufacturers. Whether this is good or not, it’s fair to say that the Australian range from Wyze is limited for now, there is intent to steadily bring more in and that is something that has the potential to shake the tree. But for now, let’s look at the two cameras we have had on review for a month or so now.
Two options: Wyze Cam V3 and V3 Pro – What are they?
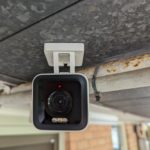
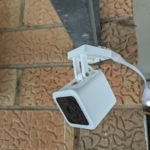
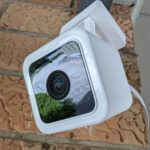
Both cameras are physically very small; picture the size of a couple of matchboxes stacked on one another. But don’t let the size fool you because — particularly the Pro — there are plenty of features to offer in both cases. Both devices have a number of common features, with the Pro having a few standout features.
Both of the cameras we’re looking at today are compact and come with the same gear in the box. You’ll get the camera, mounting options (double-sided tape + metal ring or mounting screws), a wall plug, power cable and basic instructions. I’d really like the power cable to be noticeably longer because, while it’s functional, it’s also restrictive, and you’ll need to be within a couple of meters of a power plug. I understand why with a reasonable range of accessories to assist with mounting and flexibility of positioning your cameras.
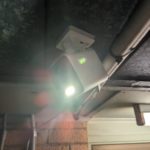
The main difference in hardware between the two in terms of physical hardware is that the Pro has a spotlight. A mighty spotlight too, given the small size of the camera, it’s enough to illuminate a significant area around your home, providing visibility and safety at entry points to the premises.
The app, setup and daily use
Setting up both cameras fits the current standard of consumer ease. You install the app, follow the on-screen prompts to connect to your Wi-Fi and configure your camera. The process of connecting individual cameras to Wi-Fi and having them visible within the app took only a few minutes per camera.
As with any camera, we recommend before you go through the process of physically placing and installing your camera, that you ensure that it connects to your Wi-Fi first and that you’re getting full connectivity and functionality.
The app itself is a great example of a simple interface. The navigation is intuitive, and the settings for individual connected devices are easy to understand. With the number of Wyze devices available within Australia expected to rise, that simple and intuitive device navigation will only become more useful to users.
Placing cameras: It’s an art form
Much of the planning and thought processes around camera placement have been covered in the past. The basics, though, are that you want to:
- Get the cameras high enough that they’re out of reach, without losing visibility on faces
- Provide maximum visibility on access and egress pathways to your property
- Don’t waste visibility on creating a great view of the sky
- Setup detection zones when they’re available
- Choose cameras or a camera system that suits your coverage and connectivity needs
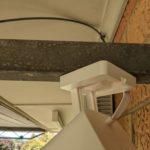
Both Wyze cameras have a number of mounting capabilities, from the standard screw mount, to the – earlier mentioned — double sided tape and metal ring. Or, if you’ve got somewhere suitable, the base is magnetic so you can simply place the camera and rotate the mount to the best view for your desired position.
Feature differences
Specifically, with the Pro version, you’ve got the additional feature of the spotlight which can do two things. The first is making the camera and its position far more obvious to others visiting your property, the second is adding an element of safety to your entryways with additional lighting as required.
Moving on to the features available on the Wyze V3 and V3 Pro, they tick all the boxes that users have come to expect. Both the V3 and the V3 Pro deliver 2K resolution, IP65 weather resistance and, as already mentioned, versatile mounting options. You can engage in two way conversation with people who are near your cameras or trigger the siren to ward off unwanted visitors and animals.
The main differences between the two in terms of functionality are:
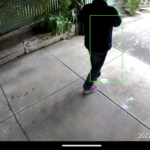
- More granular controls over the AI detection: Person, Vehicle, Pet etc on the Wyze Cam V3 Pro
- Smart Focus: Automatic zooming onto movement events with a PiP un-zoomed view also available
- Quicker access to trigger the siren on the Pro camera
- The light on the Pro camera
While they’re not individually huge differences, I wouldn’t hesitate — based on my experience — to recommend people buy the Pro. Particularly the controls for the motion detection, I’ve been very happy to turn off all detection except person detection because that is by far the most accurate.
I like the fact that the Wyze app and pricing structure don’t try to force you into a system immediately. You can easily purchase a single camera and build on that, creating a more comprehensive surveillance system over time.
I’d really like the app to give a longer trial of the Cam Plus subscription so you can get more of an idea how it’s a benefit. With other things — like life, Christmas and holidays — going on, it’s really easy for the fortnight to disappear with no real interaction with the camera.
I’m exceedingly happy with the speed of notifications to my phone through the Wyze app. I’ve got these cameras very close to existing cameras on another system and despite the fact that coming up my driveway goes past the other brand, then Wyze, I typically get the Wyze notification first.
Video quality and recording
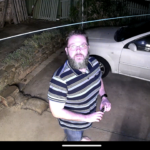
The video feed quality is excellent and exactly what you’d expect of cameras that are delivering 2K video. It’s crisp, clear and, providing you have sufficient upload speeds, really smooth. So you can see what’s going on around your property, get reasonably intelligent AI supported notifications (reducing false positives and aggravation of incorrect notifications) and follow movement accurately.
We mentioned earlier you get a fortnight of access to the Wyze Cam Plus subscription. As part of this you’ve got access to several features including:
- Longer recording time for events when detected
- Event fast forwarding
- More options for event detection including: Package, Vehicle, Person and Pet
Short of paying for a professional installation or getting PoE cameras and storing your footage locally, a subscription is almost a necessity with any DIY security options to ensure you get the full feature set.
Closing Thoughts
As with any cameras in this market range, Wyze cameras can be connected to either Alexa or Assistant to be part of your smart home. From there, then include in routines and alerts further adds to their value.
While I’d recommend — particularly if you’re subscribing to Wyze services — the Pro over the V3, both cameras have their place. They offer amazing value for money in a physically tiny package, which creates further versatility over some of the other price-competitive products.
The ease of being able to have a single camera or buy multiple cameras and build your system over time means that the Wyze offering isn’t huge out of pocket expense to start with. You really can build your system over time as your budget allows, where some of the bigger names have — albeit very good — multiple camera systems that cost a lot as an immediate outlay.
Being highly critical of the Wyze Cam V3 and V3 Pro for a moment, there isn’t anything groundbreaking on either camera, but all features offered have been delivered well. This puts them in a good position to attack a number of the lower-cost competitors. Still, with companies like Ring, Swann, Arlo and eufy already established in Australia, there’s a tough battle ahead.
If you’re interested in exploring the Wyze Cam V3 or V3 Pro further, you can check them out online. The Wyze Cam V3 will set you back AU$59.99 and the V3 Pro costs AU$99.98
Disclosure Statement
Due to the items low cost, Watterson have not requested the units be returned following review.





the 2k quality looks amazing