An air fryer. Not really something you would normally find on Ausdroid for review, but it has an app, and you can use the Alexa assistant to control it so…
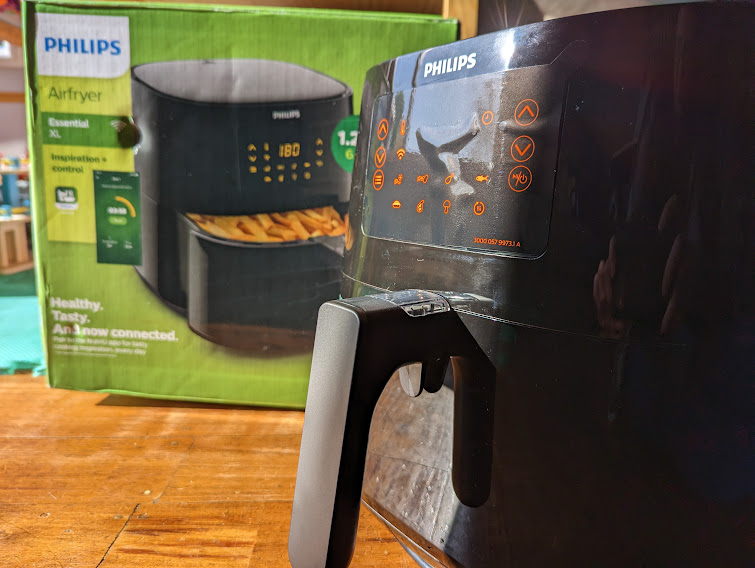
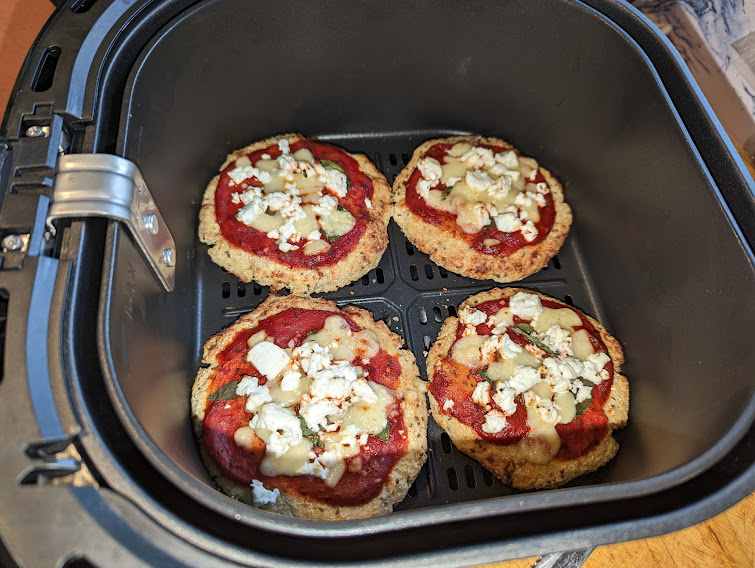
As the name suggests, the Philips Essential Airfryer XL is quite large – the tray inside is 22cm wide, 21cm long and 10cm deep, and can accommodate six regular sized cupcakes or four mini pizzas comfortably. The generous amount of cooking space means the machine itself has to be quite large. It’s 111cm around (including the handle), 30cm wide and deep, and the handle on the front protrudes about 7cm, so while this unit will fit in a standard kitchen cupboard, not much else will fit in there with it.
You also can’t tuck this unit out of the way when it’s cooking – nobody puts Airfryer in the corner. The XL has to have 10 cm clear space around it on all sides, including the top, to allow the heat from cooking to vent.
The XL features include:
- Automatic shut-off
- Cool wall exterior
- Dishwasher safe
- Temperature control
- LED display
- Patented Rapid Air Technology
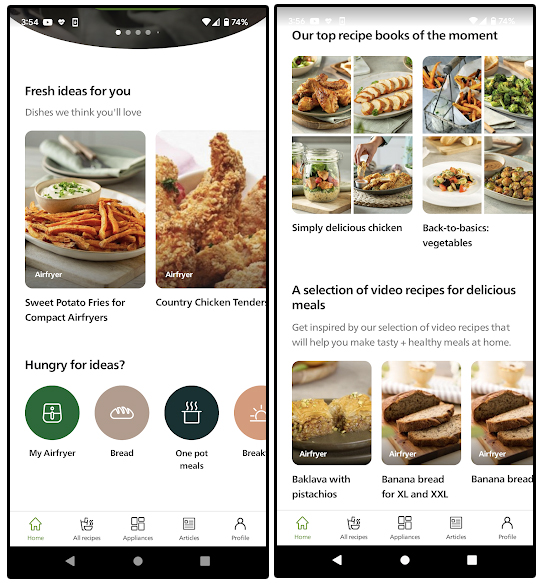
Before getting to the actual cooking side of things, you need to set up the Philips NutriU app. The app install and account creation is pretty straightforward and really are recommended since all the recipes which come with the unit are on the app – no physical cookbooks here!
https://play.google.com/store/apps/details?id=com.philips.ka.oneka.app
On initial start-up, Philips uses the common method of switching your device to
‘Philips WiFi’ to connect the Airfryer XL to your device, then use your device to connect the XL to your network. This process was very simple and worked with no hiccoughs at all.
On to the tasty part!
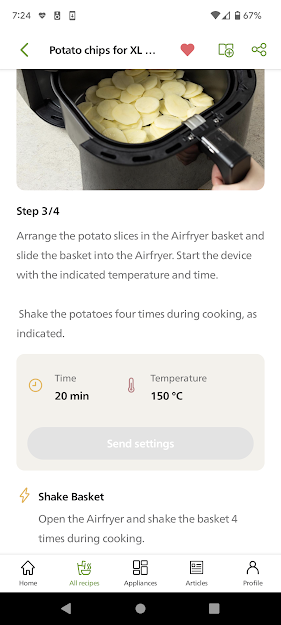
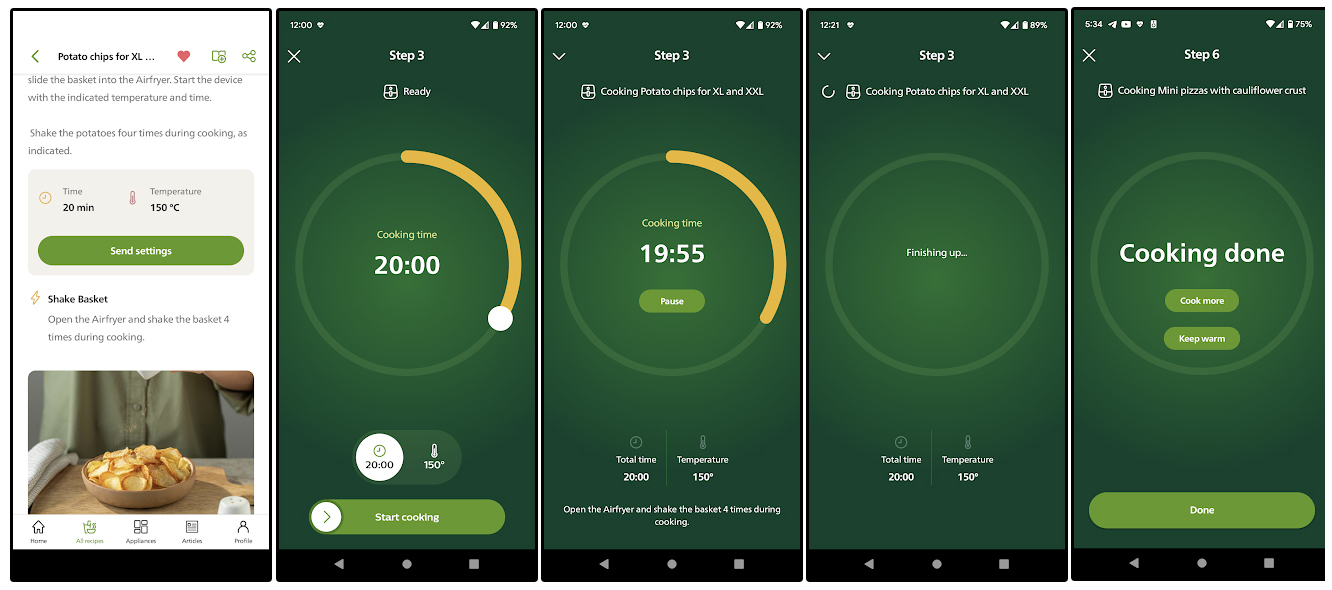
I started my cooking adventures with an air fryer classic – thin potato chips. The recipe said to shake the basket four times during the 20 minute cooking cycle, but there’s no timer or alarm on the unit, other than the full 20 minutes. There’s also no notification or alarm in the app to remind you to do so. You have to be watching the timer countdown on the app or else have a separate timer set.
The recipe called for 400g of thinly sliced potato – and as my two tubers gave me slightly more than was needed, I did some of the potato slices in the oven at the same time for the purposes of comparison.
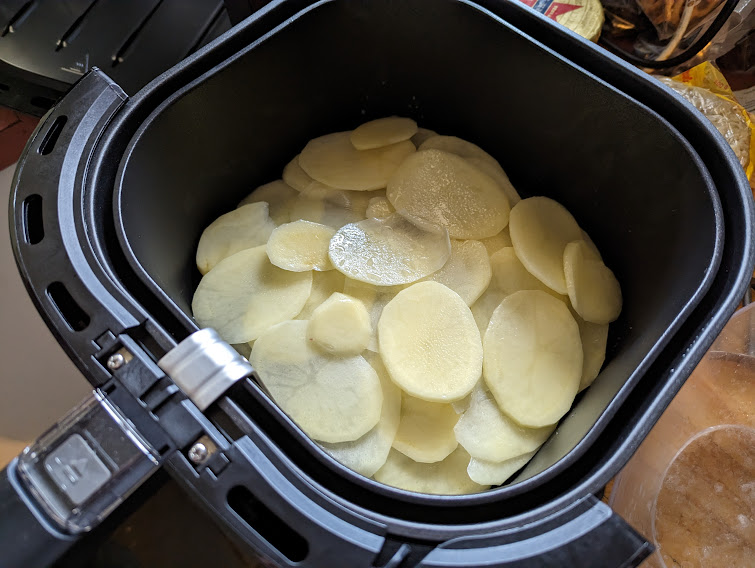
This recipe was one designed for this model, and I followed the instructions to the letter, yet opening the tray at the 20 minute mark, I was presented with slices of raw potato.
The XL beeped when the time was up, and the app gave options for either ‘done’ or ‘cook more’, so I selected cook more. In fairness, the oven-cooked chips were also not done in 20 minutes.
An extra 10 minutes at a time, I cooked both sets of chips until they were done – sort of.
Any cooked chips were removed every time I checked on them, so the volume of potato reduced as time progressed, but most of the chips were cooked to either a thoroughly overdone brown or not quite done and still floppy. Some chips were a bizarre mixture of the two; the oven chips in comparison were more evenly cooked.
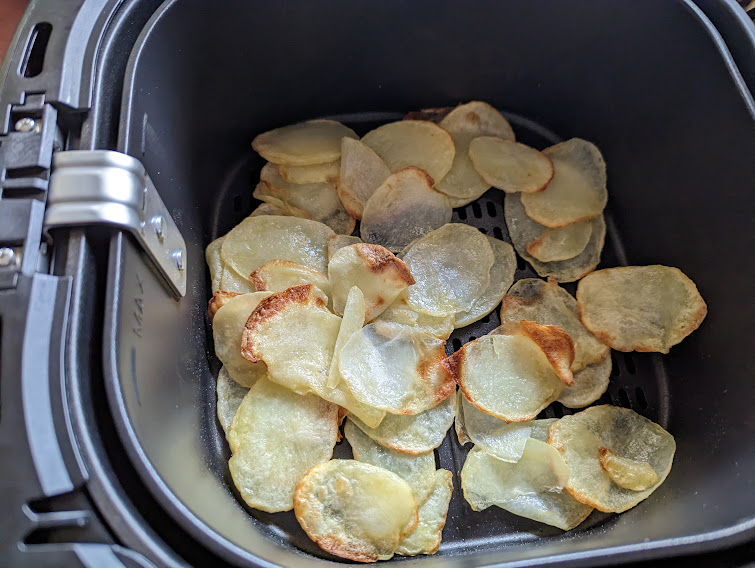
The oven-cooked chips were done in 40 minutes, and the ones cooked in the XL took 60. This time difference was, I think, because the oven-cooked chips, while they had less air circulation on their solid baking trays, were laid out in a single layer. Even though the chips cooked in the XL had airflow on all sides, they were all piled on top of each other, which hampered the cooking process.
Even though I did follow the recipe as it was written, I think 400g of sliced potato was just a bit too much – it would probably have done better with only a thin layer of potato slices – as I had done in the oven – but that would have resulted in many batches having to be done, and consequently an increased amount of time.
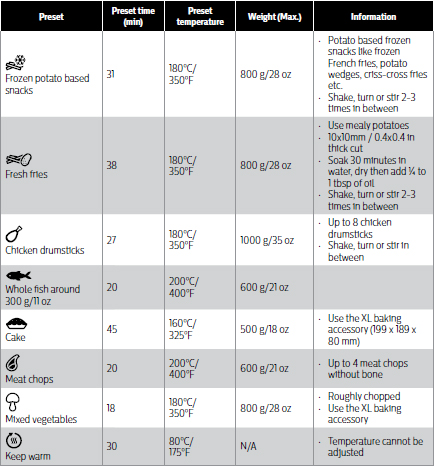
Interestingly, the XL does have a preset function for fresh fries – the cooking time is listed as 38 minutes at a temperature of 180 Celsius, while the recipe in the app designed for the XL model specified a cooking time of 20 minutes and a temp of 150 Celsius.
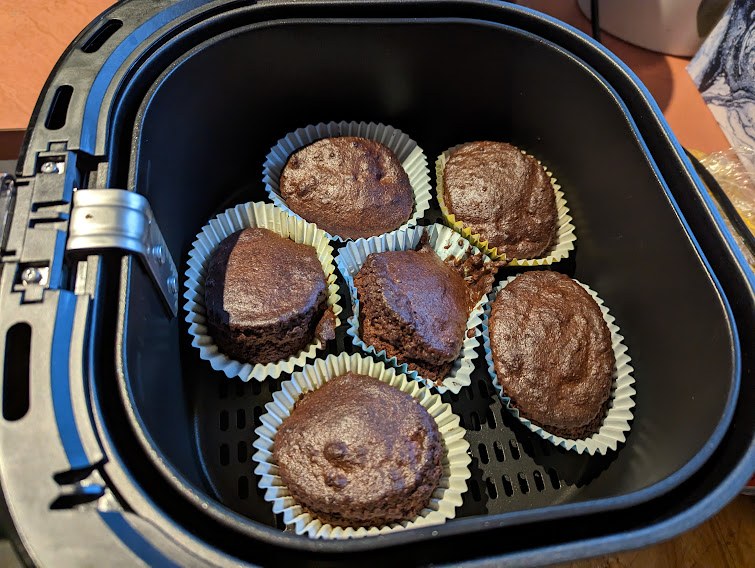
Undeterred, I tried a different recipe – chocolate coconut cake. This was labelled as not being for this model with the warning about possibly needing to adjust the settings, and was supposed to be done in the Philips ‘baking accessory, sml’. Since I didn’t have the accessory, I just used a few regular paper cupcake liners and pressed on.
The recipe made 6 cupcakes which I was able to fit into the fryer but due to the lack of a metal form surrounding them as you’d normally get with a muffin tray, they came out in… interesting shapes.
I let them go for the stated cooking time and temp, and they came out a little overdone – as the app had said, the cooking time needed to be adjusted – NBD. However, I had to make the batch in the first place to see what happened, to know which way and how much adjustment was needed – the app told me I’d need to adjust the time and temperature but gave me no clues as to which way or by how much.
The recipes on the app cover many different air fryer models and the recipe will tell you if it’s not specifically for your model, along with the warning about the time and temperature possibly needing adjustment.
“Cooking time may differ.
Please note that this recipe was not optimised for the Airfryer model you own. Cooking times may need to be adjusted for your appliance.”
You can filter recipes by appliance, but if you are just browsing, most recipes don’t visibly state which model they are for – just if it’s not for yours.
The cake still tasted amazing – but they were more scones like than muffins. 10 minutes less and they would have been perfect, but that leads me to one of my downsides to an air fryer – you can’t see through the door. In a conventional oven, I could easily keep an eye on the muffins and if they looked done earlier it’s a simple matter to then check. Yes, you can pull the drawer out and check the fryer, but some recipes are sensitive to having the door opened mid-bake and you can easily ruin your hard work by opening the door too early.
Recipe 3 was a cauliflower based gluten-free pizza, which was again not ‘optimised’ for this model, but after cooking for the full time and temp, I found this one needed extra time, not less. After cooking for a bit longer, the resultant pizzas were delightful.
When cooking is done the whole tray is super hot and also really big. You will need to plan ahead and have a large space and a trivet or cooling rack to put it on.
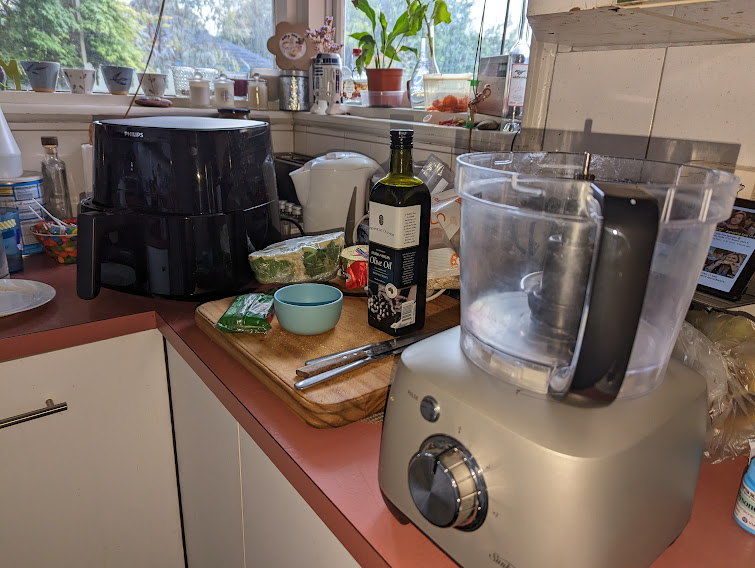
Another thing to consider if, like me, your kitchen counter space is limited is that some recipes involve more equipment than just the air fryer. If you need to use your food processor or some other large appliance, as well as the air fryer, you will find yourself decidedly short on counter space.
Of the recipes I’ve tried from the NutriU app, they have all been easy to follow and very tasty, and using the app to start the XL cooking is simplicity itself – select the recipe, follow the directions and with a single tap on ‘send settings’ the cooking time and temperature are sent to the Airfryer. Once the basket is in place, swipe across ‘start cooking’ and let the Airfryer do the rest.
There are a few things to be aware of though:
Many recipes listed in the app require an extra piece of equipment – a ‘baking accessory, sml’ or silicone muffin cups (though you can just use regular paper ones), snack cover, pizza trays etc. and most of these accessories are priced upwards of $50 each.
Getting the food into the fryer was, in most cases, pretty easy since the tray comes completely out of the unit, however, there were a few tricky items. Putting 6 cupcake liners filled with batter into the tray without spilling any was a definite challenge (trying to fill them while they were already in the tray was a messy and ultimately unsuccessful experiment), as was trying to extract a mini pizza once it was done, simply due to the high sides of the basket relative to its width.
The XL cooks really well, but there is a definite learning curve when you start to use it, particularly if you are trying a recipe not specifically for your model. Like any new appliance – particularly an oven, or oven adjacent one in this case – there’s plenty of trial and error involved before you find what works best.
One big plus is that the Airfryer uses way less power than my oven (though in fairness my oven is nearly 18 years old!) drawing only 0.3kw where my oven usually draws around 2kw.
Our electricity is charged at 40c per kilowatt hour (thank goodness for solar!) so it costs us roughly 80c per hour to run the oven, but only around 17c per hour to run the XL.
Because it’s heating a much smaller space and using ‘Rapid Air Technology’ the XL is much more energy efficient while still delivering tasty and well cooked food.
The ‘Rapid Air Technology’ is a method of circulating the hot air in a, and I quote, ‘unique “starfish” design’ to ensure that all the food is cooked or heated evenly.

This unit can not only be controlled by the NutriU app, but also via the Alexa assistant.
It will only control certain functions, and at this point this connectivity is exclusive to Amazon Alexa – Google assistant need not apply.
You need to enable the Philips Kitchen Plus skill in the Amazon Alexa app and then simply say:
”Alexa, tell kitchen plus to set Airfryer cooking time to 6 minutes and temperature to 200 degrees.”
or
“Alexa, tell kitchen plus to turn on my Airfryer.”
or
”Alexa, tell kitchen plus to turn off my Airfryer.”
While it is amazing to have this functionality, and it will be a very useful tool for those with certain disabilities, it really is much easier to use the app than the assistant. A few quick taps on your device versus quite a mouthful of instructions.
Pros:
If you’re using a dorm or hotel room, if you have limited space or no oven, or if you are only cooking for one or two, the XL is perfect for quick, small scale, convenient cooking.
Courtesy of its size and weight (5.5kg) the XL is easily portable, making it ideal for camping/caravaning or even picnicking if there’s a power source available.
It’s easy to use, and more importantly, easy to clean, and is pretty quiet while it is cooking.
There are loads of recipes provided in the NutriU app, plus the 7 preset cooking options, as well as a ‘keep warm’ function.
Since it’s only heating a small space the XL is very power efficient, and the size of the cooking area means the XL gets to temperature and cooks faster than a conventional oven.
Most importantly for all the StarWars enthusiasts out there, the Essential Airfryer XL is absolutely rocking a serious Darth Vader aesthetic.
Cons:
To every good there is a bad, and the Philips Essential Airfryer XL does have a few downsides. In terms of counter top kitchen appliances, the XL takes up a lot of counter space, and despite its overall size it is limited on amount of food it is able to cook.
While the XL is useful as an oven substitute, it doesn’t do anything a conventional oven can’t. It simply offers a quicker, more energy efficient way of cooking smaller batches of food. And while things may cook faster in an air fryer, that doesn’t in any way change the prep time needed to make the food in the first place. The cauliflower pizza crust I made cooked in 12 minutes, but I had to get out my food processor and spend 20 minutes or so actually making the ‘dough’ prior to cooking, and clean up everything afterwards.
The accessories are quite expensive, and while there are workarounds, typically you get the best results when using an accessory designed for the device you are using. In this case though, the quest for ‘best results’ will take quite a bite out of your wallet.
You can see a list of Philips Airfryer Accessories here.
There are literally thousands of recipes for air fryers out there, but if you want to cook an existing family favourite in the fryer you’ll need to scale the recipe to suit the capacity of your device, which isn’t always as easy as you might think.
Conclusion
The Philips Essential Airfryer XL is a fantastic machine for what it is, energy efficient and good at what it does, but for me, who feeds more than one or two people, likes to bake and has limited counter space, it wasn’t a good fit. However, if you are routinely cooking for one, go caravaning regularly, live in accommodation which doesn’t include a kitchen or don’t have access to a conventional oven, then the Airfryer XL would absolutely be a game changer for you. Add to that the inclusion of literally hundreds of delicious, easy to follow recipes and a magnificently seamless user experience and the Philips Airfryer XL could be the next hero device in your kitchen.
Philips Essential Airfryer XL is available online and in store from The Good Guys, David Jones, JB Hi-Fi, Amazon and Bing Lee at a recommended retail price of $399.00 though you can shop around for a discount.