
Over my Christmas holiday, I set myself a goal: get all of my parents’ photographs into digital form and upload them to Google Photos. Normally, this is something that might be considered biting off more than I can chew, but I had a secret weapon – Epson’s FastFoto 680W scanner.
It’s one thing for us to load all our food pics from that party last Friday night into Google Photos, but the service becomes a powerful tool when it’s tasked with preserving a long history, such as that of a relationship or a family.
A couple of years ago I helped to get a family friend’s photos – already in digital form, but stored on a USB hard drive in a cupboard – into Google Photos; in part to help preserve memories of her partner. As photos that she hadn’t seen in years appeared on her iPad and brought back memories of their life together, she smiled and laughed and eagerly told us stories of the times and places on screen, gasping at some of the recollections of holidays past that hadn’t been called to mind in years.
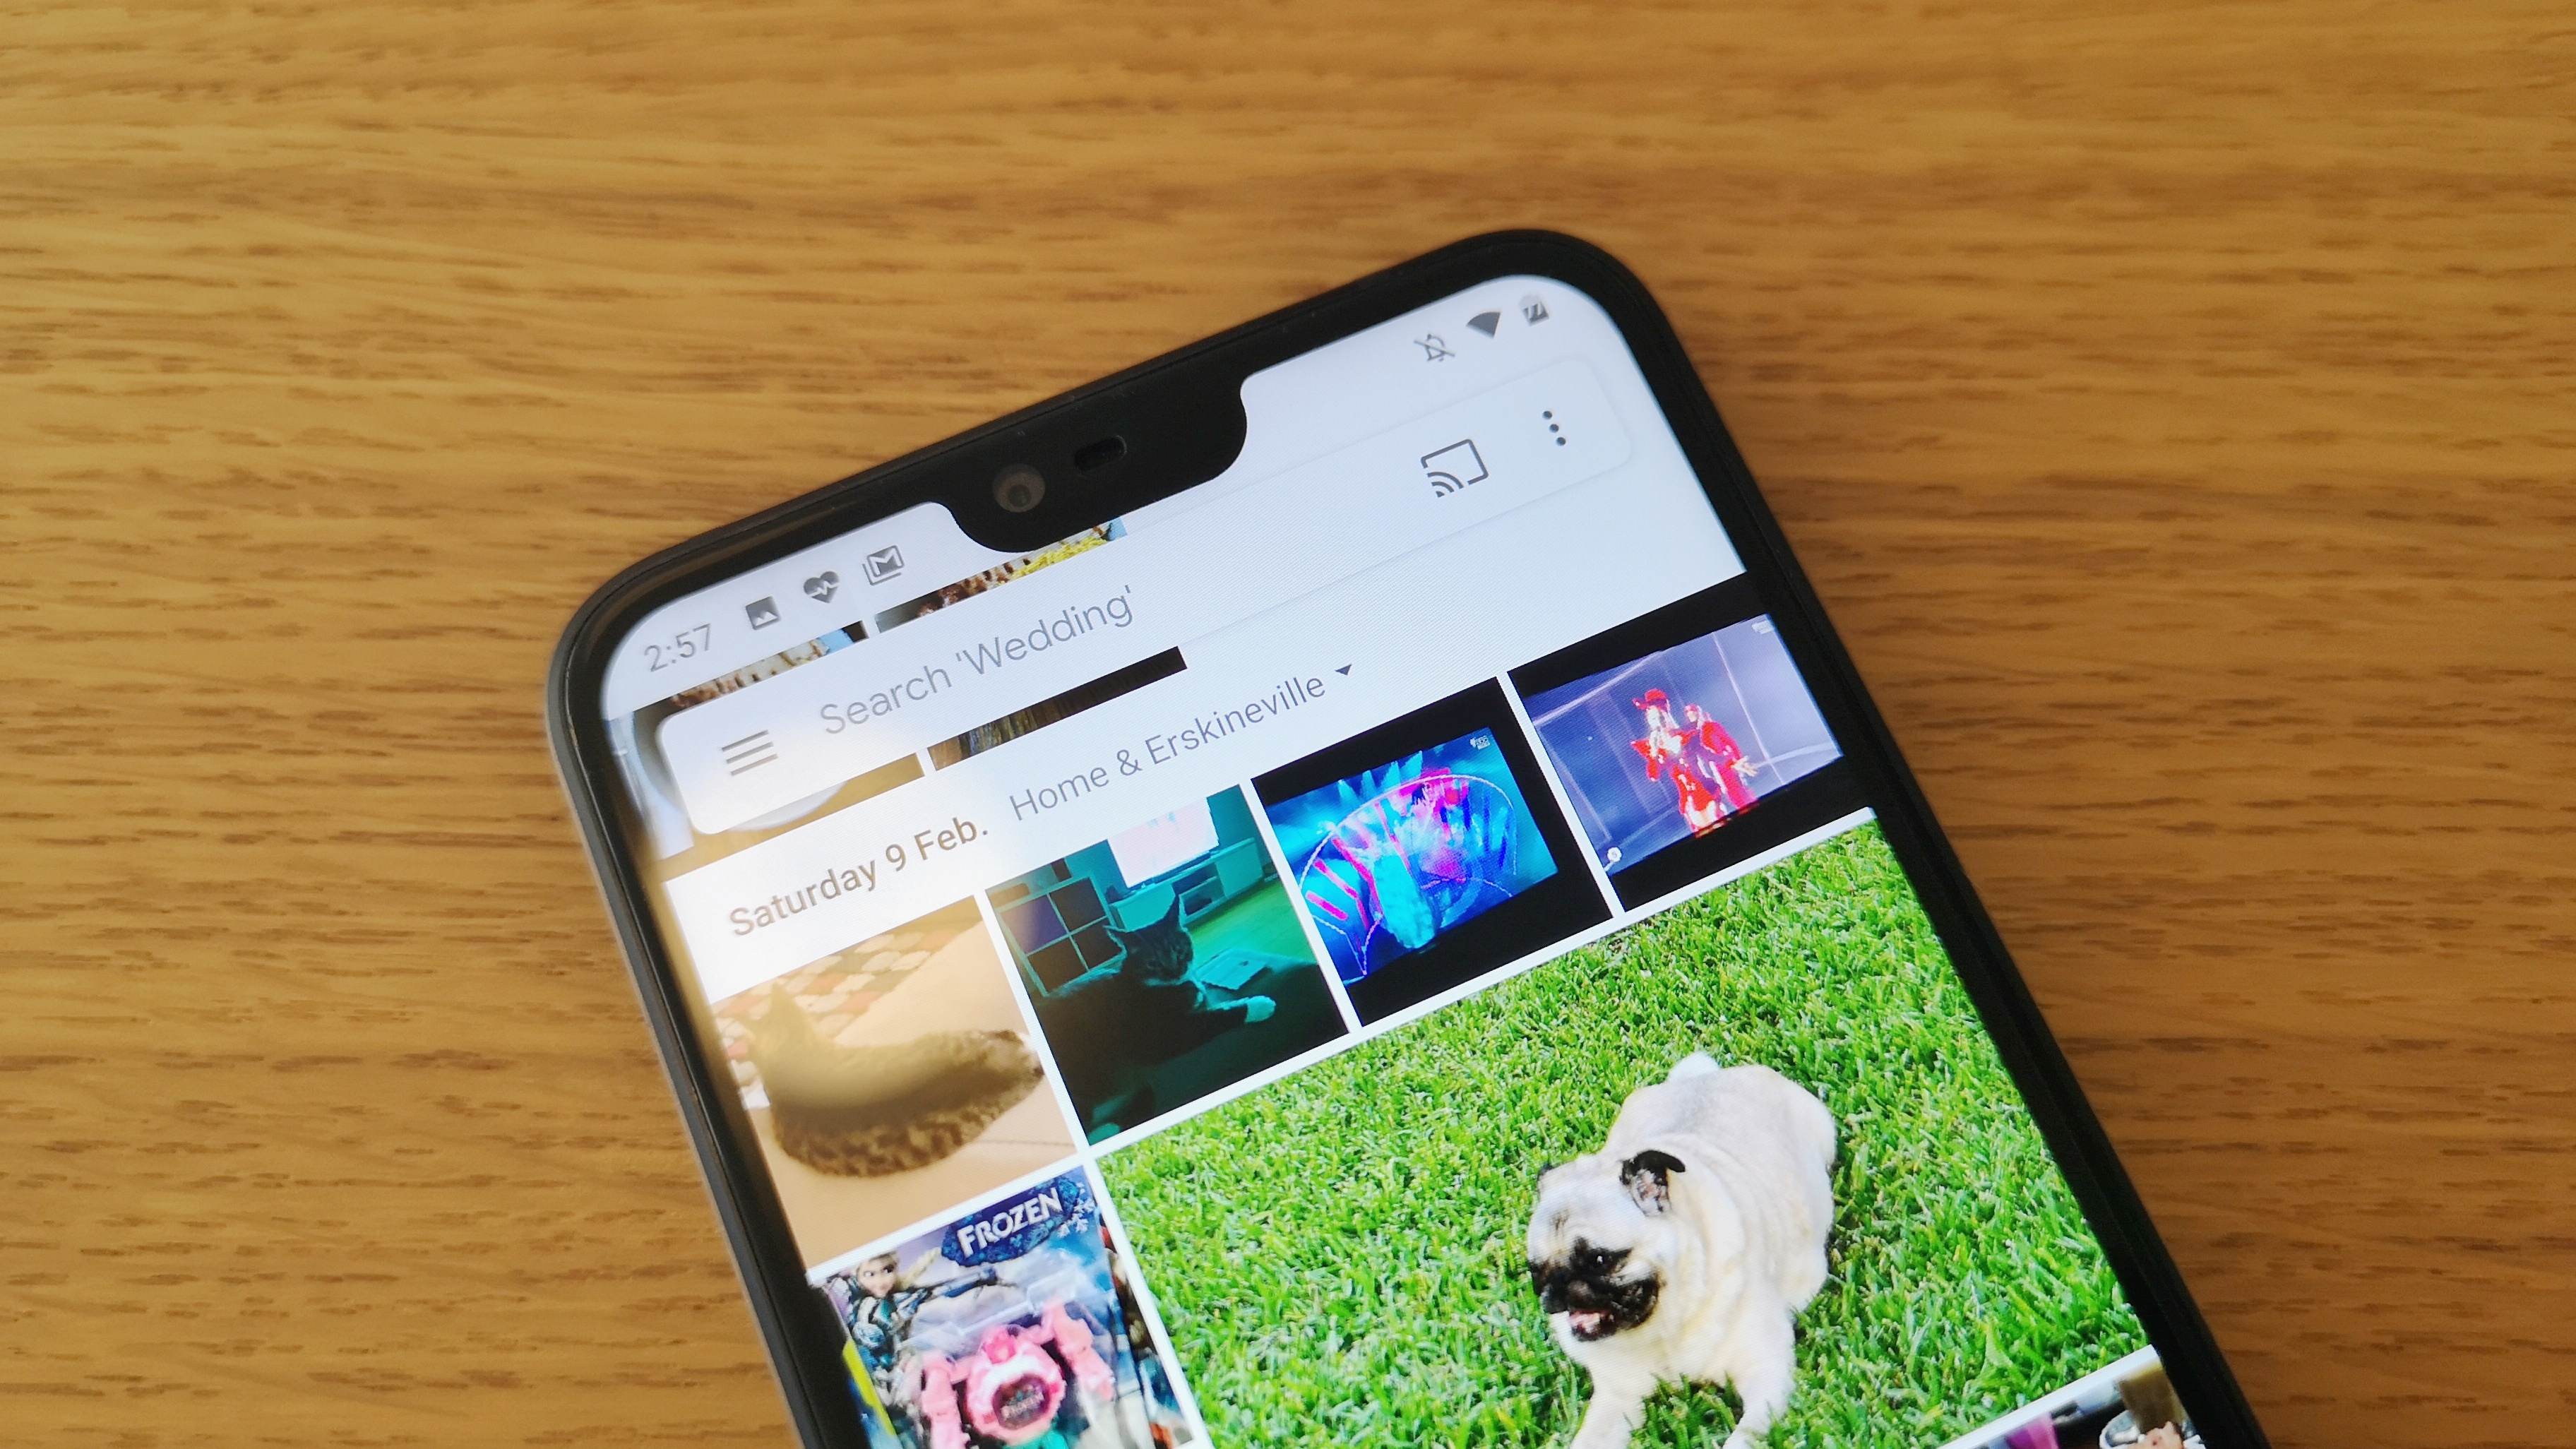
Being an Android user, of course Google Photos is my photo storage service of choice. I use it in its free storage mode, where it allows you to upload unlimited photos to the service at up to 16MP resolution. Photos are recompressed, but they’re fine for digital presentation.
These services and apps (and Google Photos is but one, but it’s my choice) provide us a great opportunity to make photos – and their related memories – accessible, browsable and relatable. You can pick up a device and scroll through your photos instead of lugging photo albums around the house.
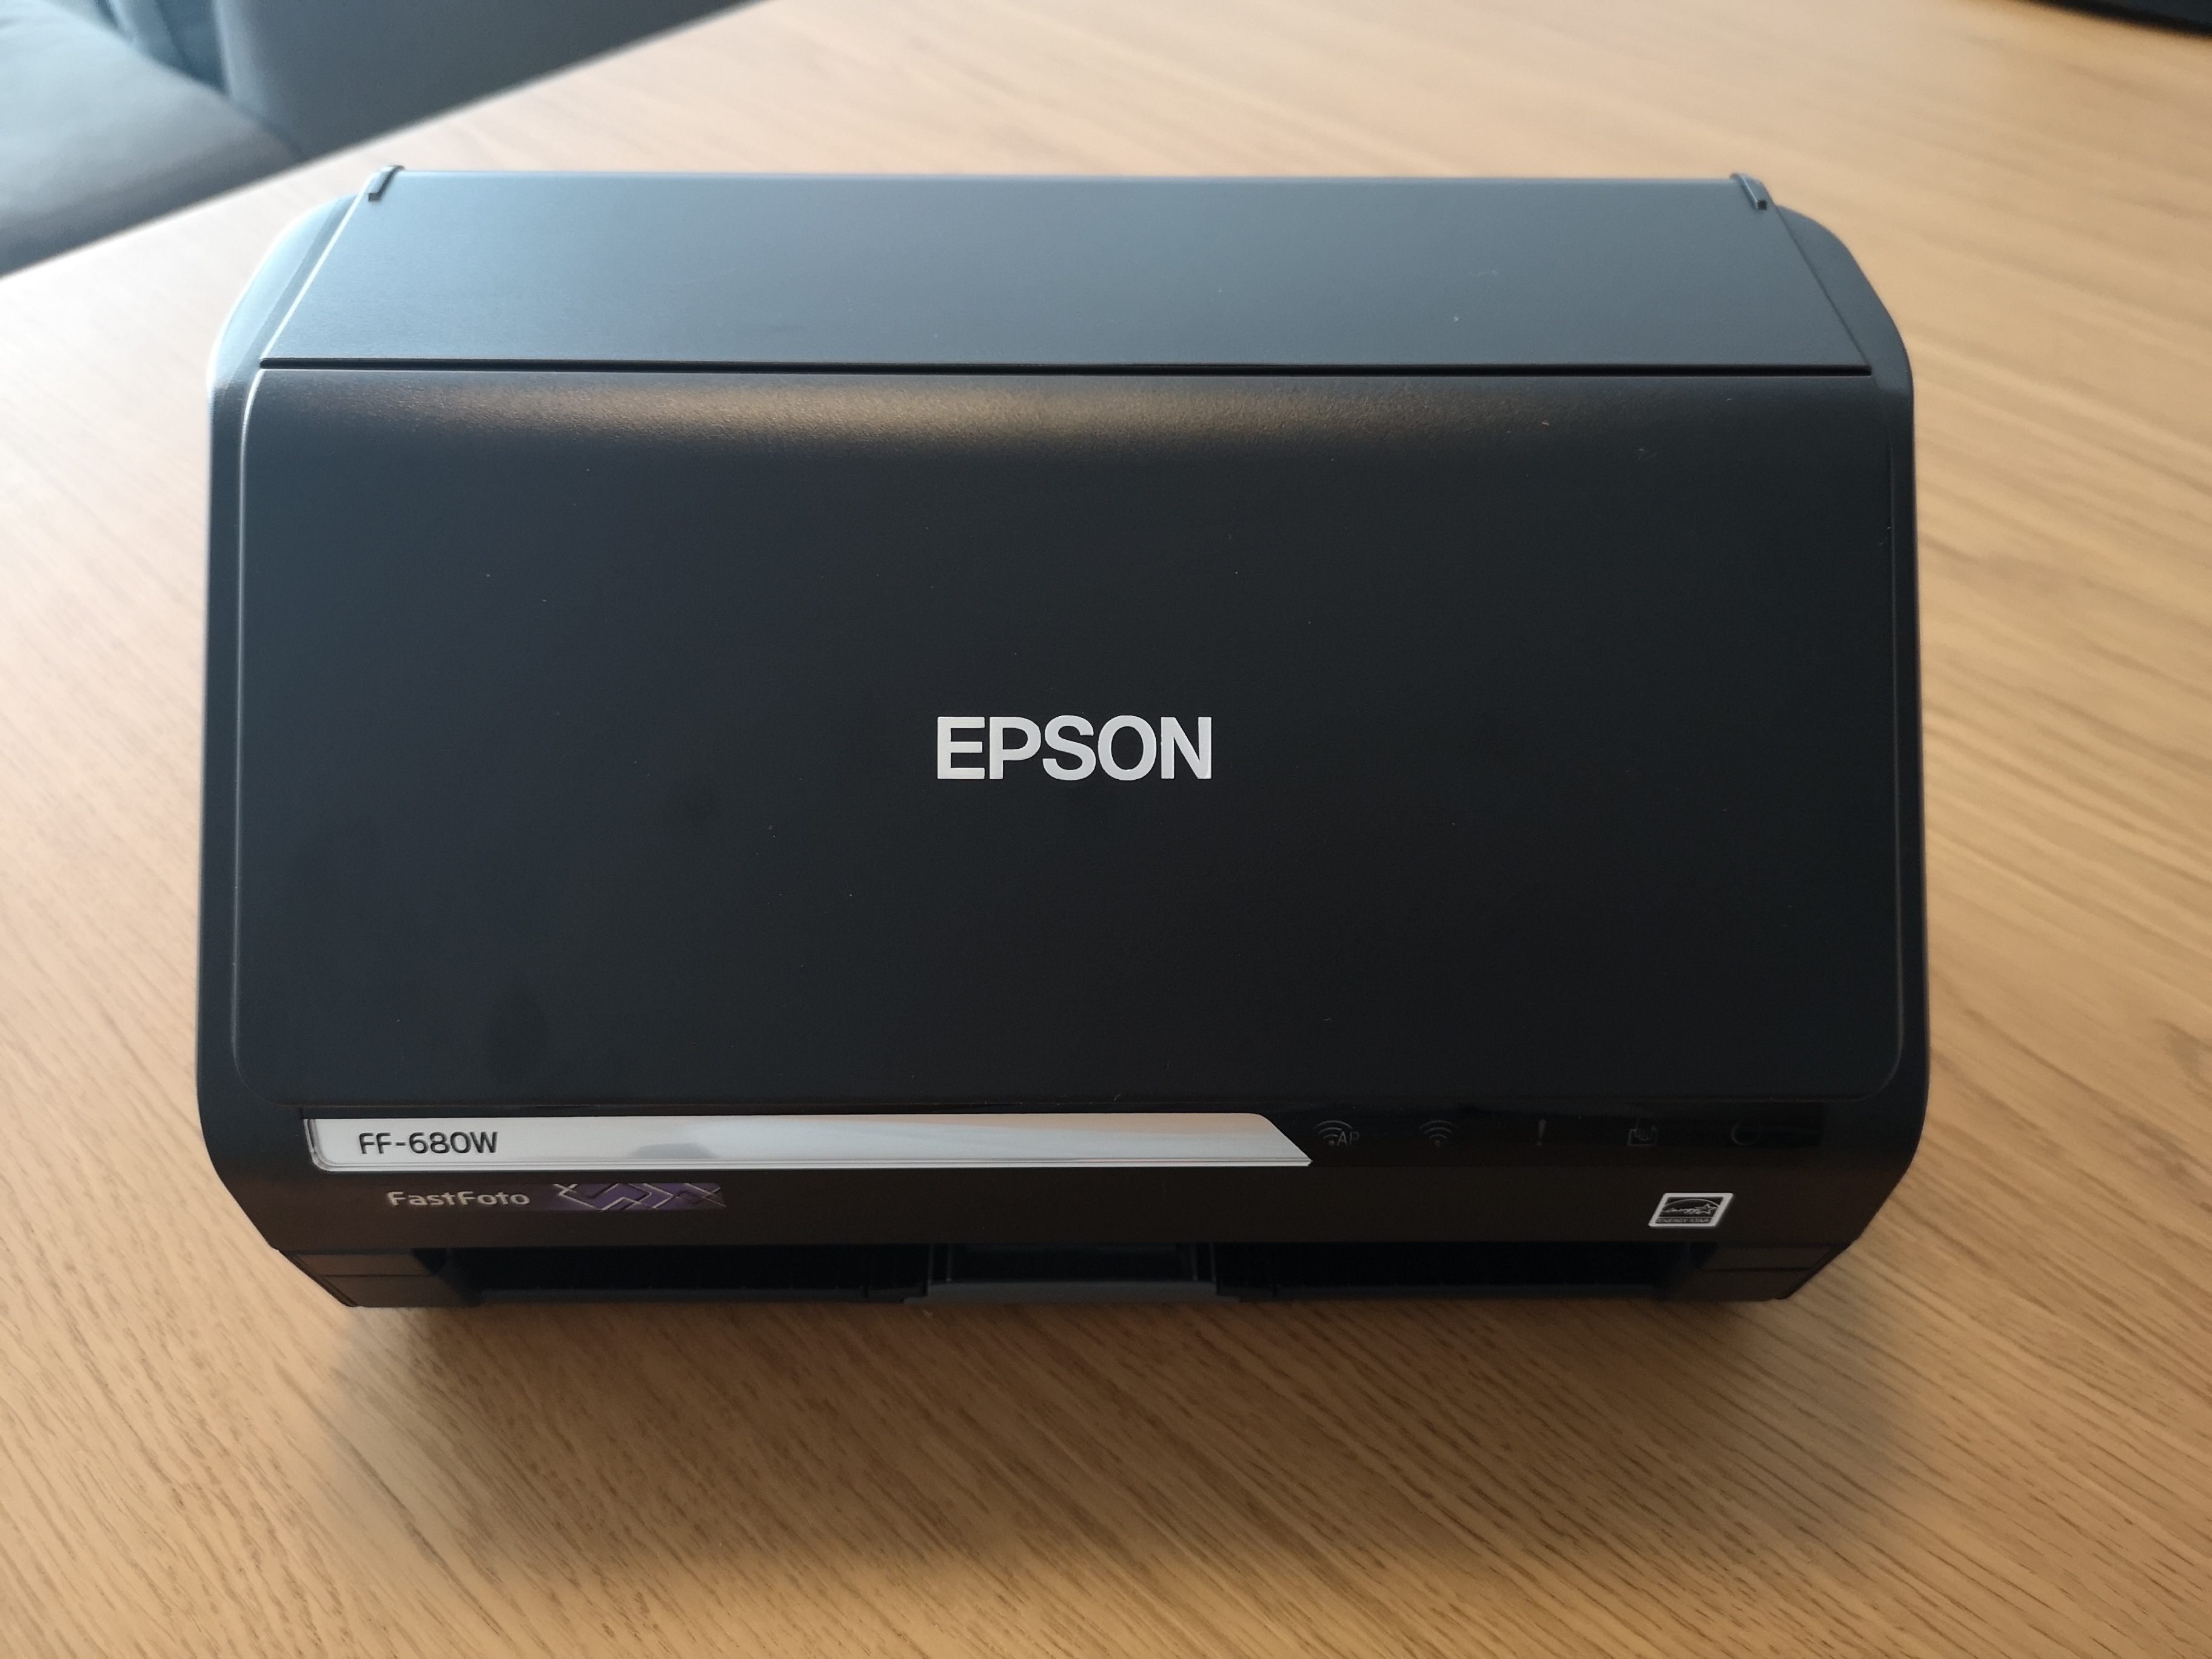
Epson FastFoto FF-680W
If you’ve wanted to make your family photos digital until now, your options have been to scan photos one by one in a flatbed scanner (scan, crop, edit, save; repeat), send your photos (or negatives) to someone else and have them do it for you for a price. It’s a massive time sink and you’d need more time than my two-week Christmas holiday.
Epson’s FastFoto scanner puts paid to this workload and workflow, allowing you to scan a large number of photos in minutes. You can either connect it to your network over Wi-fi, or connect it your computer directly via USB.
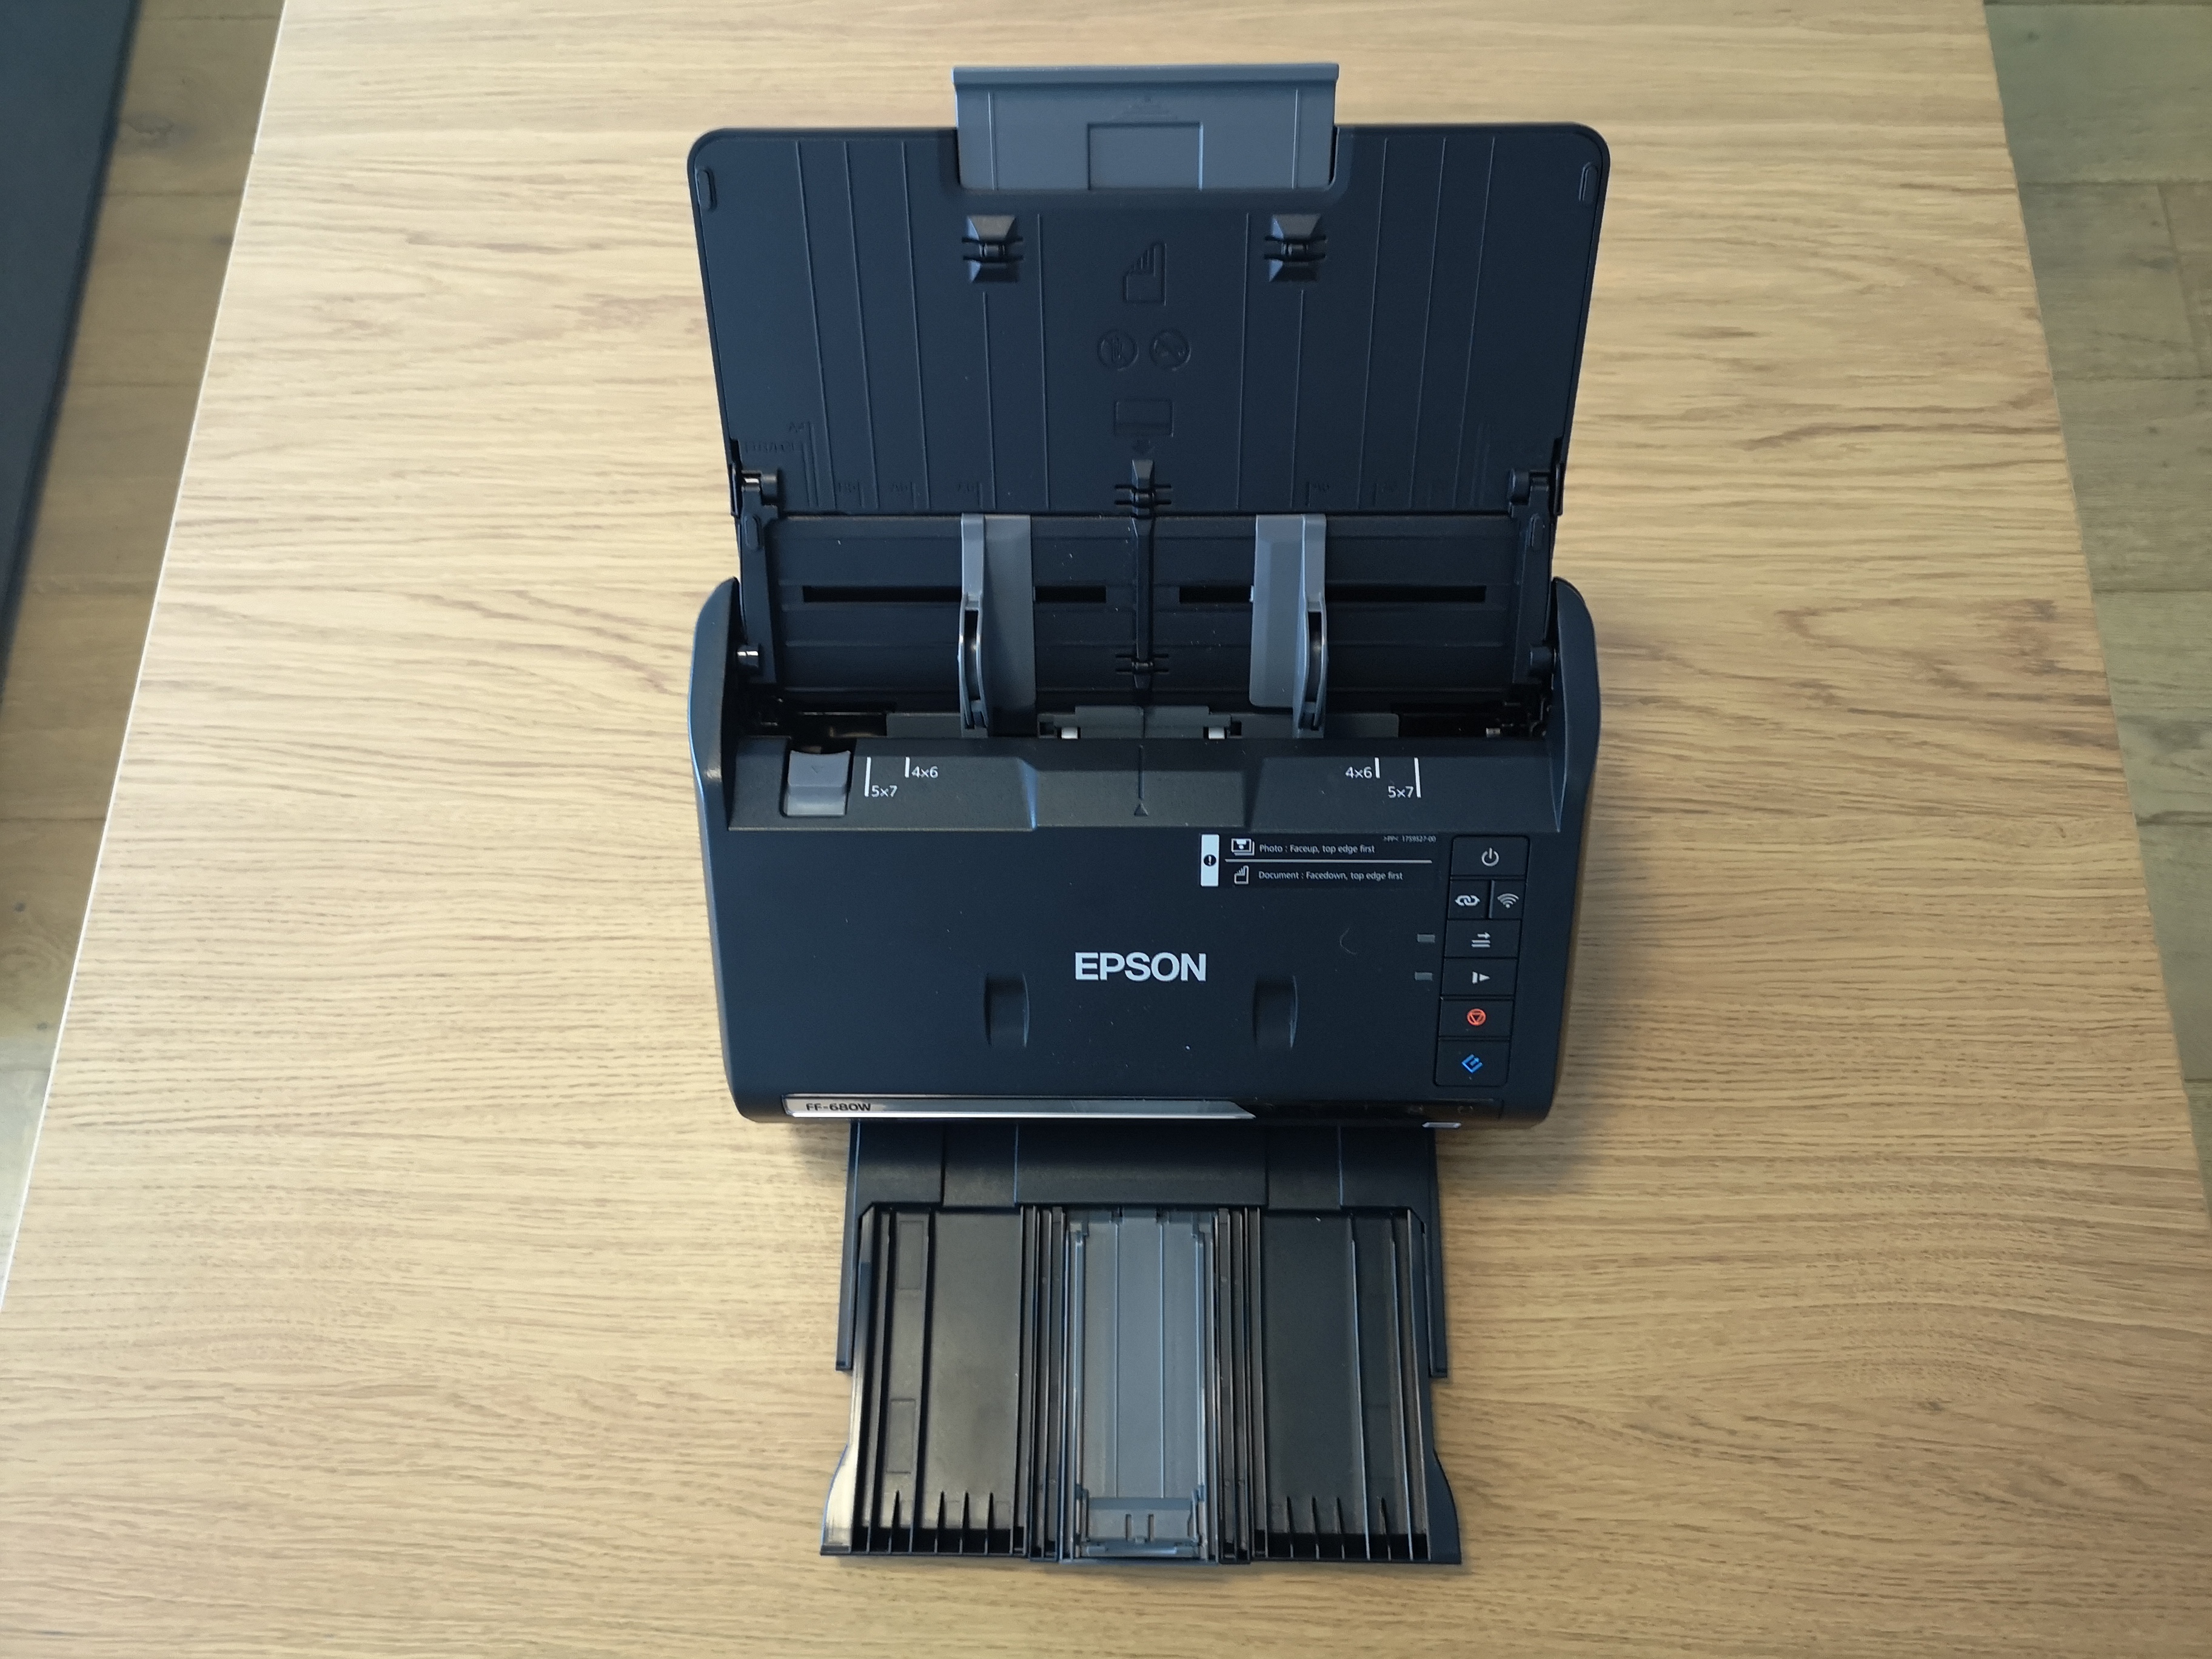
It’s an upright scanner that looks like a printer of old – you load photos or documents (it’s still a normal scanner too!) into the top tray and it feeds them in and scans them one by one, depositing the input photos in their original order in the out tray at the front.
That last part is important – if you’re removing photos from albums for scanning, you’re probably going to want to put them back into the album in their proper original order.
Scanning is straightforward. You can scan a print in about a second at 300dpi. Increasing the scan to 600dpi means that each print takes about 3 seconds to scan. Compared to the time it would take to scan everything with a flatbed scanner, 3 seconds is amazing – so I left the scanner at that setting for the course of the project.
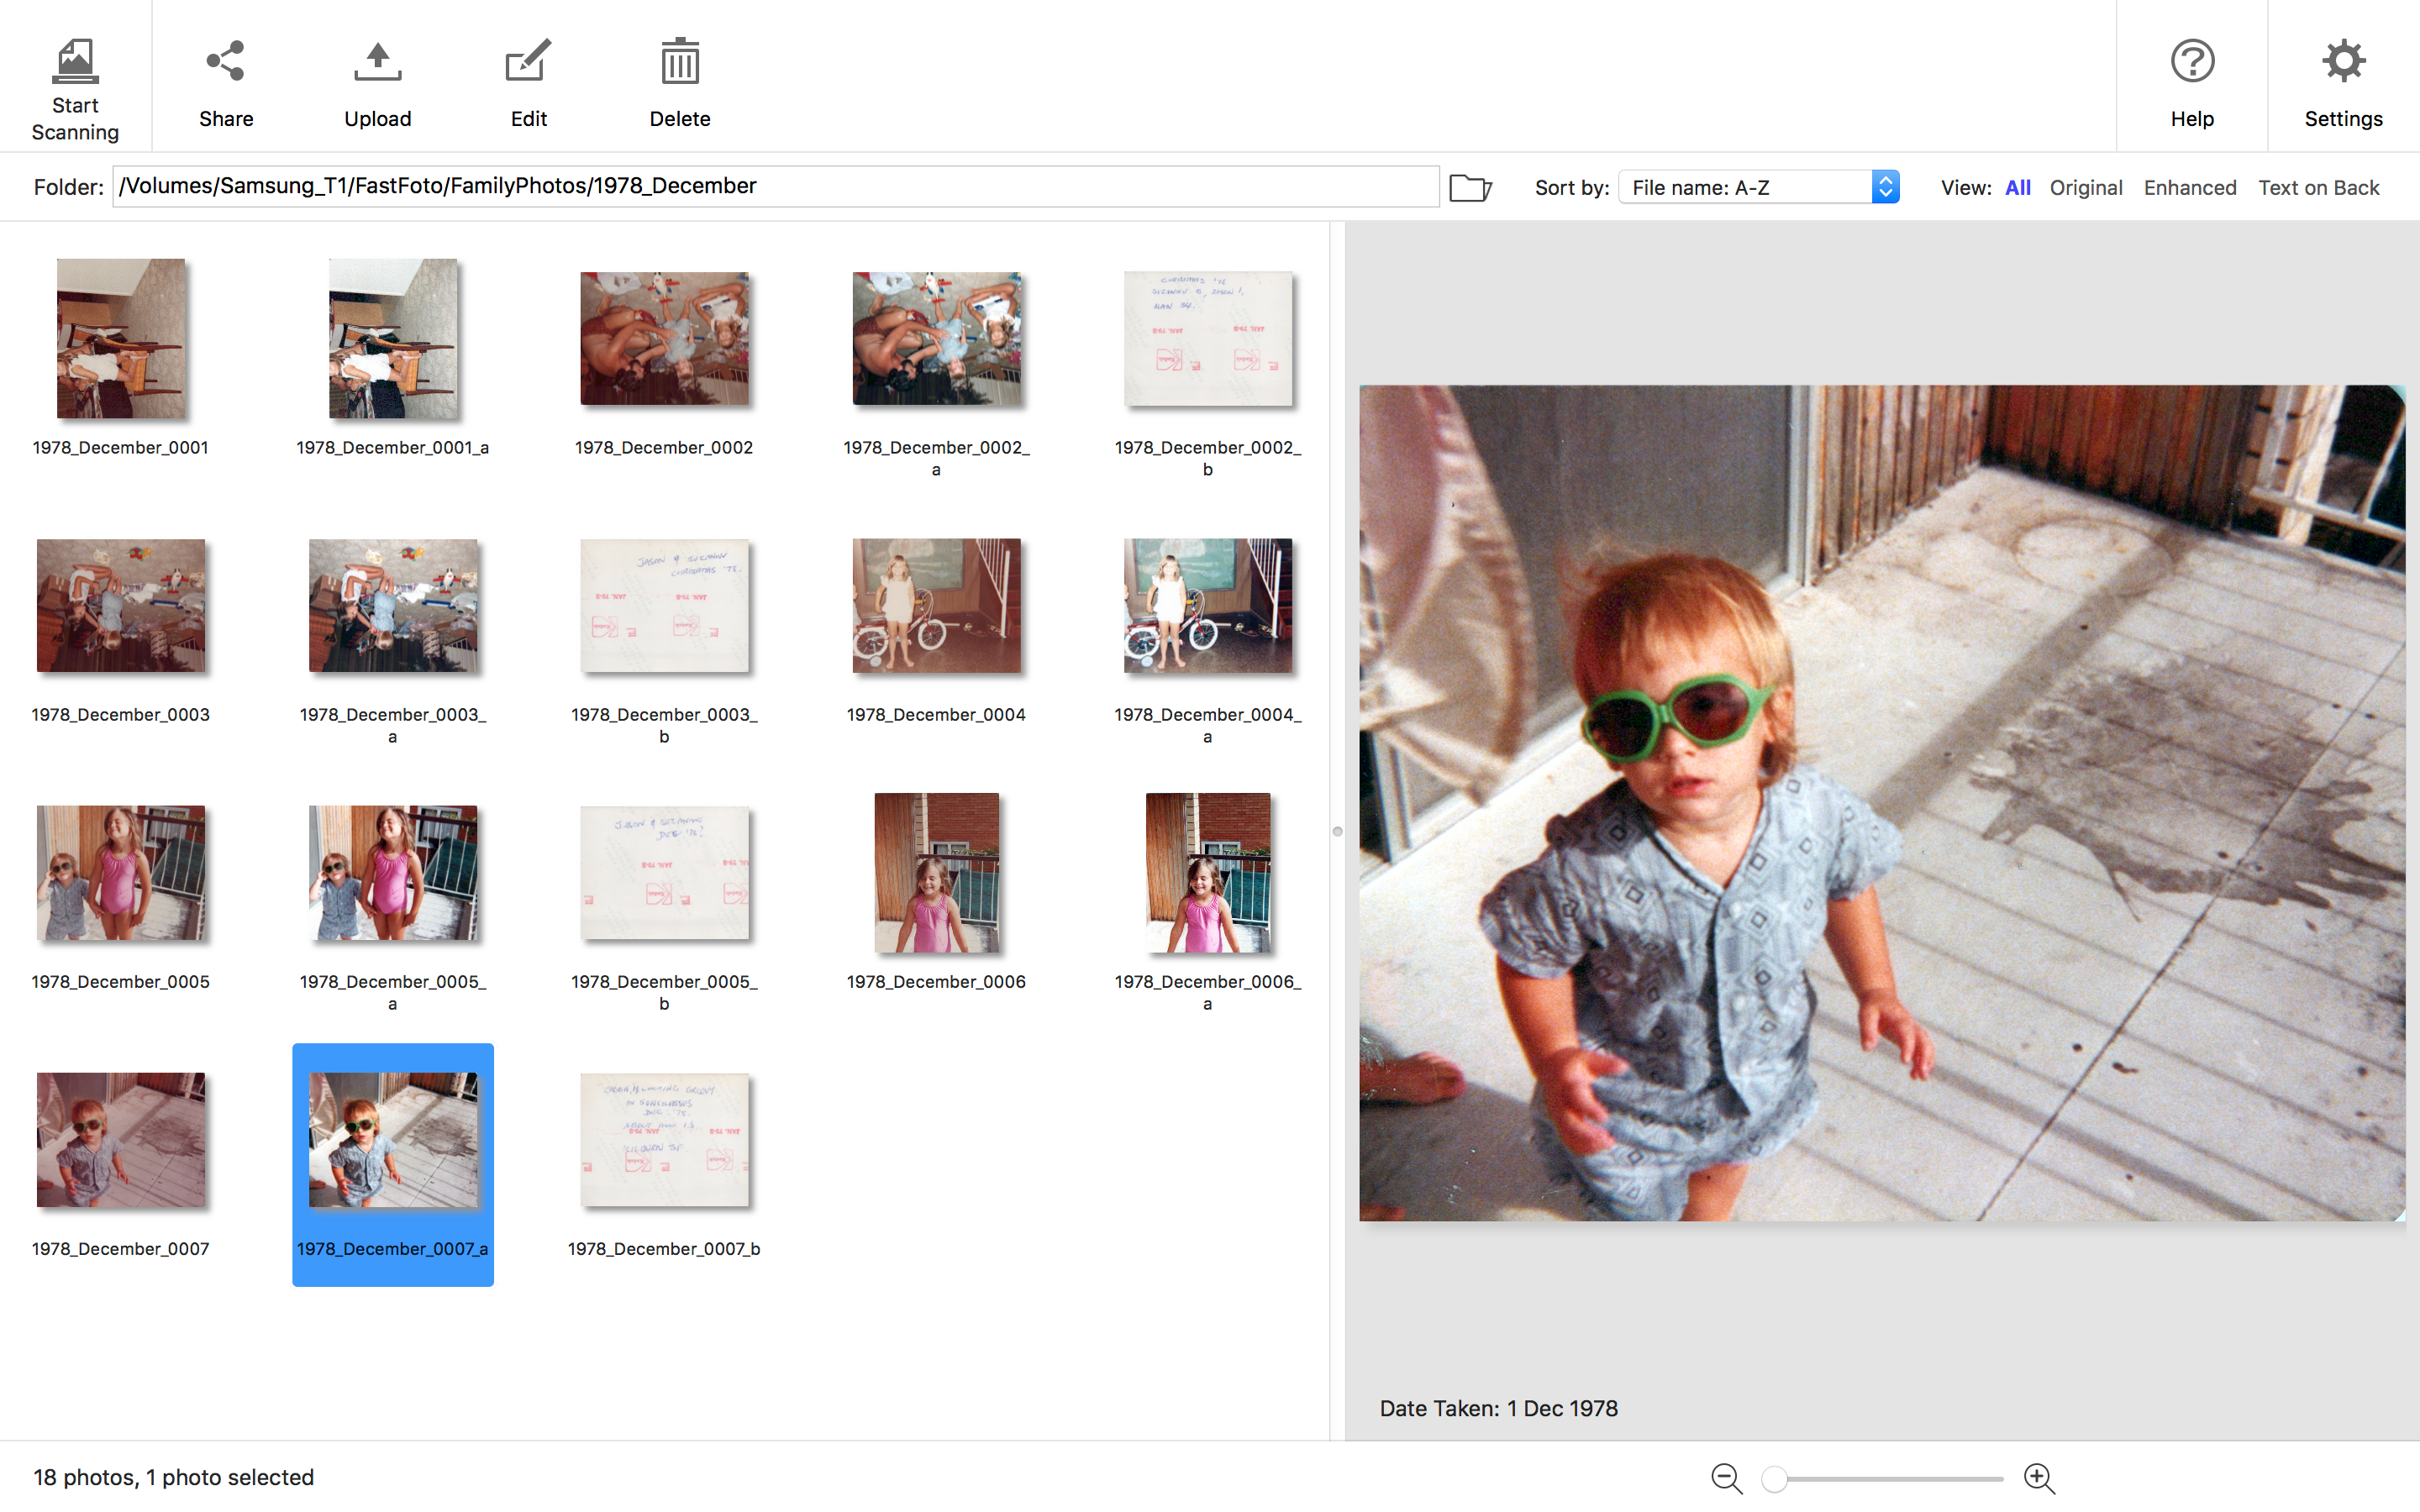
The real workhorse here is the software. Epson’s FastFoto software runs on Mac and PC and makes short work of the scan-and-save workload. It saves the original as-scanned photo, automatically performs some enhancements like exposure and colour correction, red eye reduction and cropping, and saves a copy of the photo with the same filename and a suffix to indicate it’s the enhanced version.
The enhancement of scans is probably something that will divide opinion. It’s changing the photo – the picture you see on the computer is different to the photo in your album – but I tend to prefer the enhanced version of the photos because it compensated for exposure and colours in the original photos and, I think, made them a little more true-to-life.
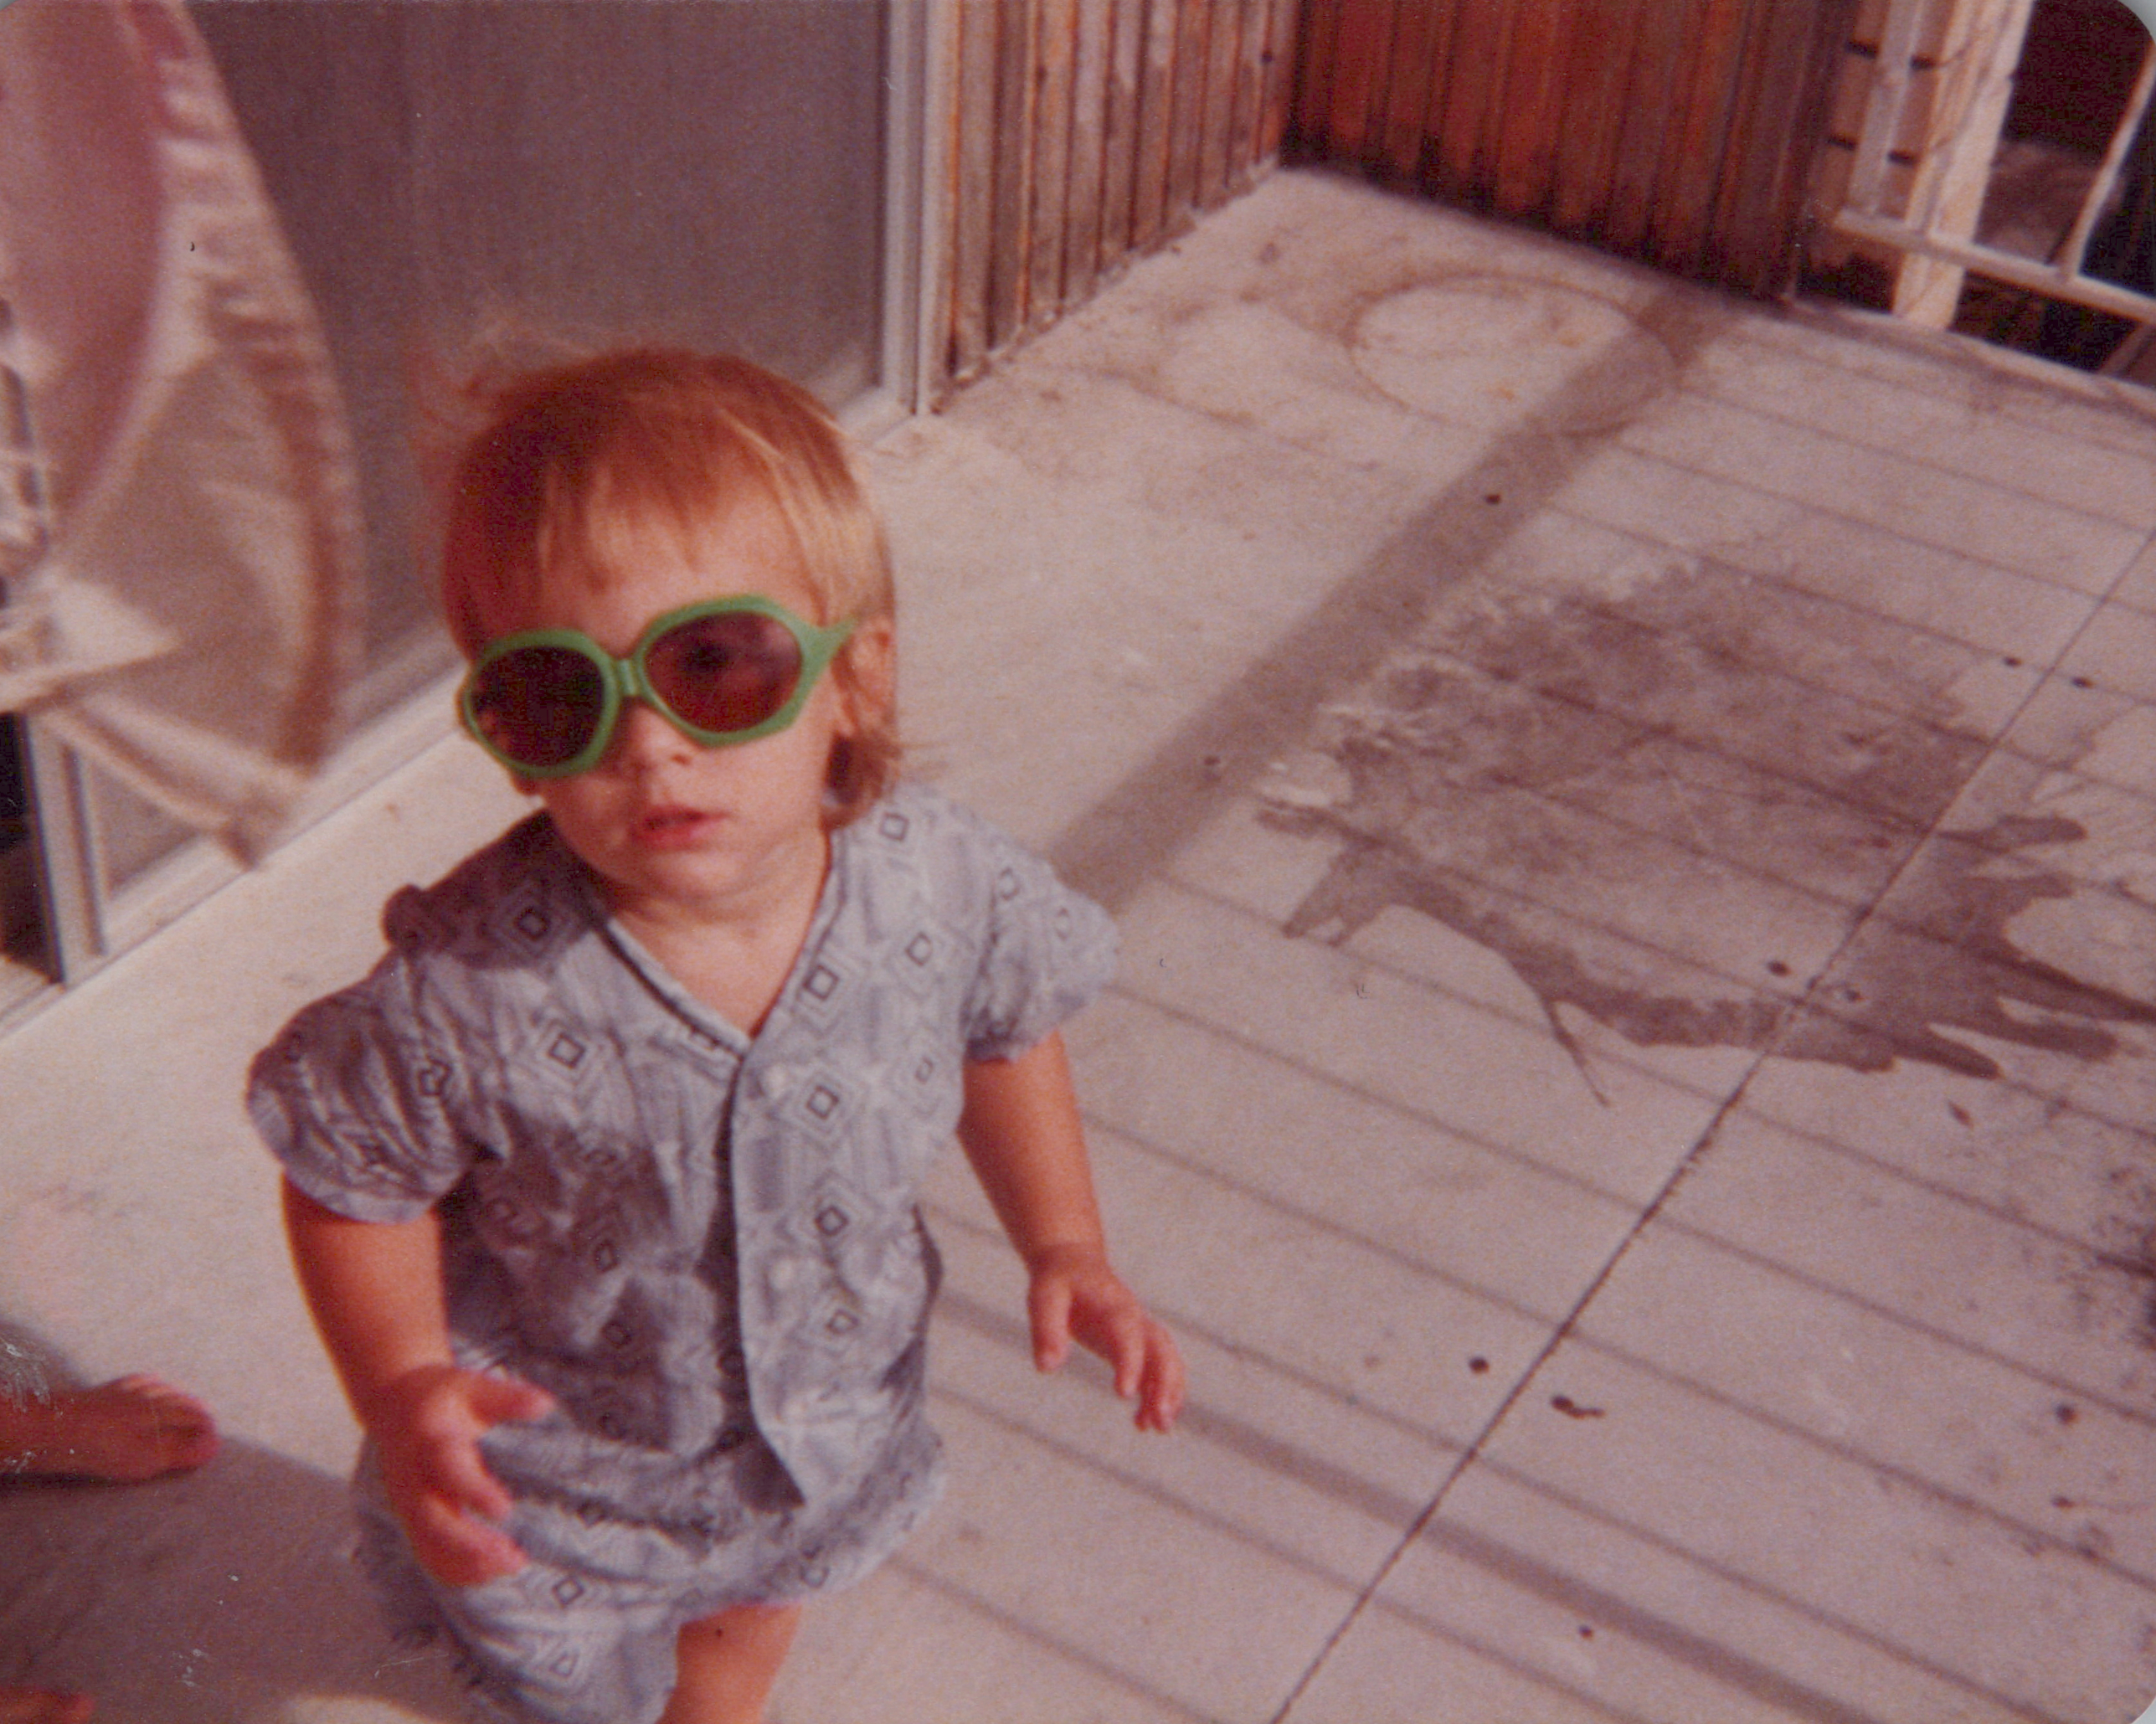
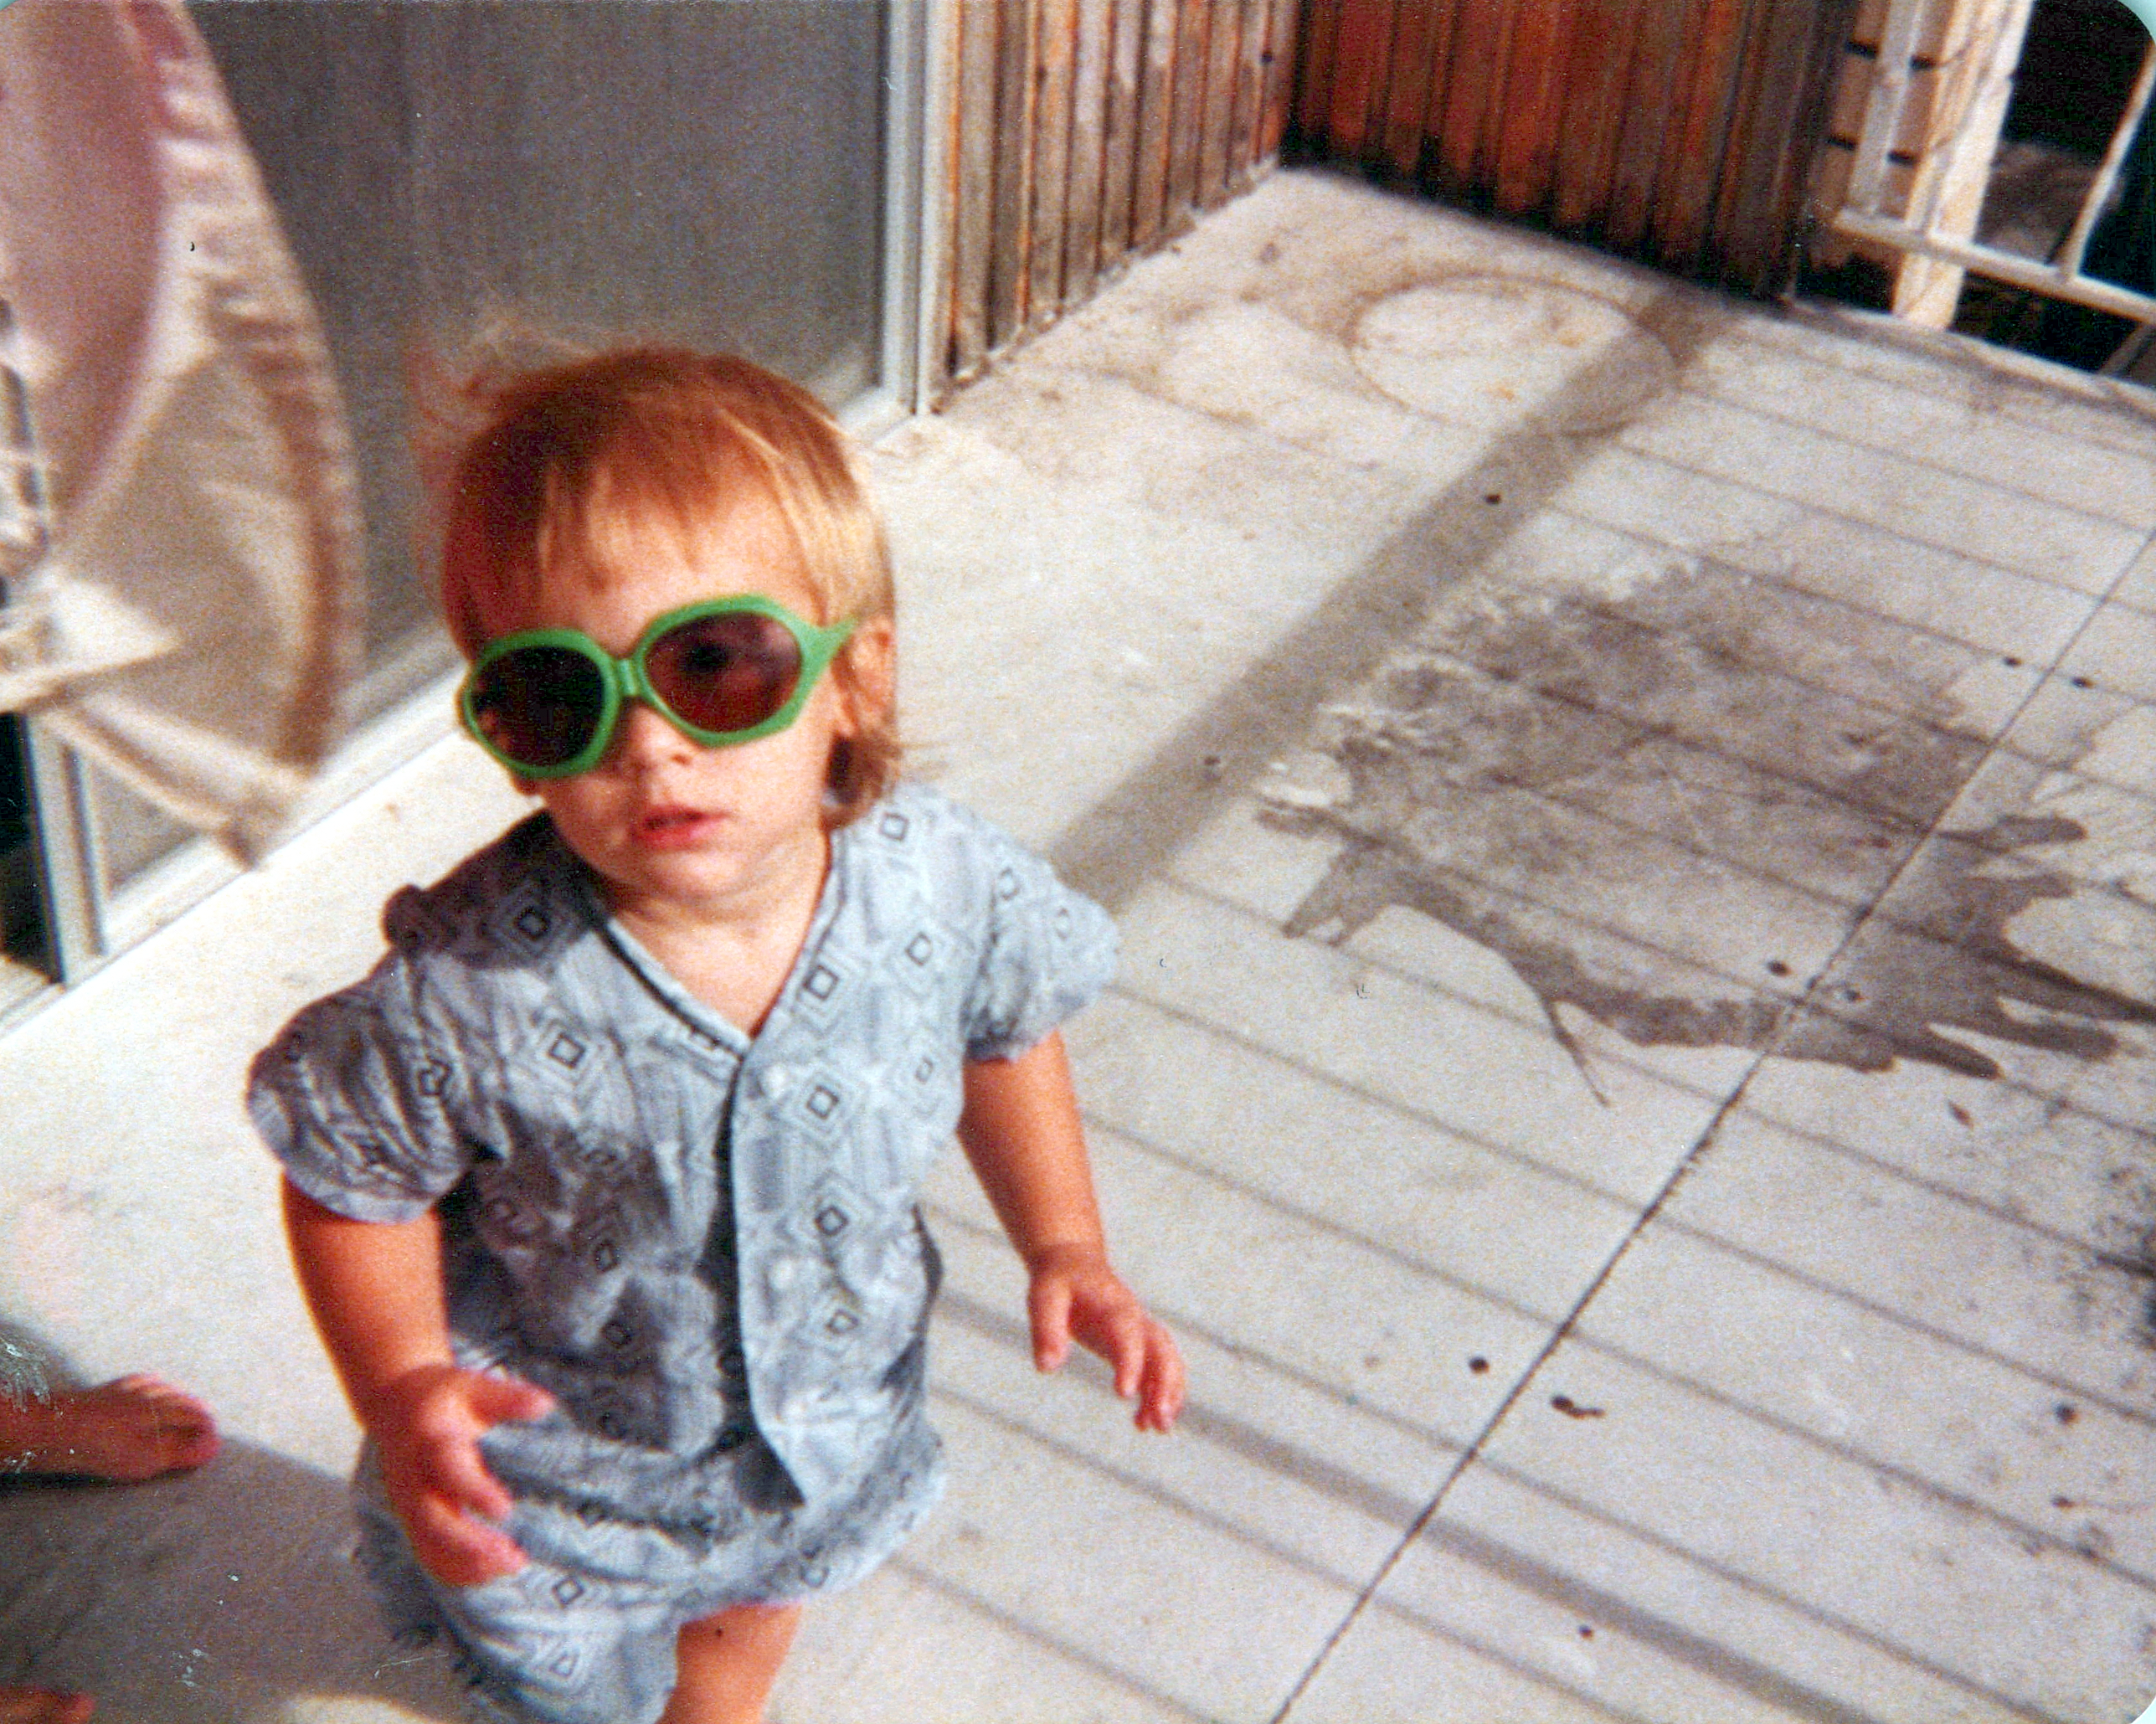
Perhaps all the instant cameras of the 70s and 80s might not have been giving us an accurate picture of the world around us all this time – or, maybe our parents were too busy taking pictures of us to properly work their cameras.
Double Sided Detail
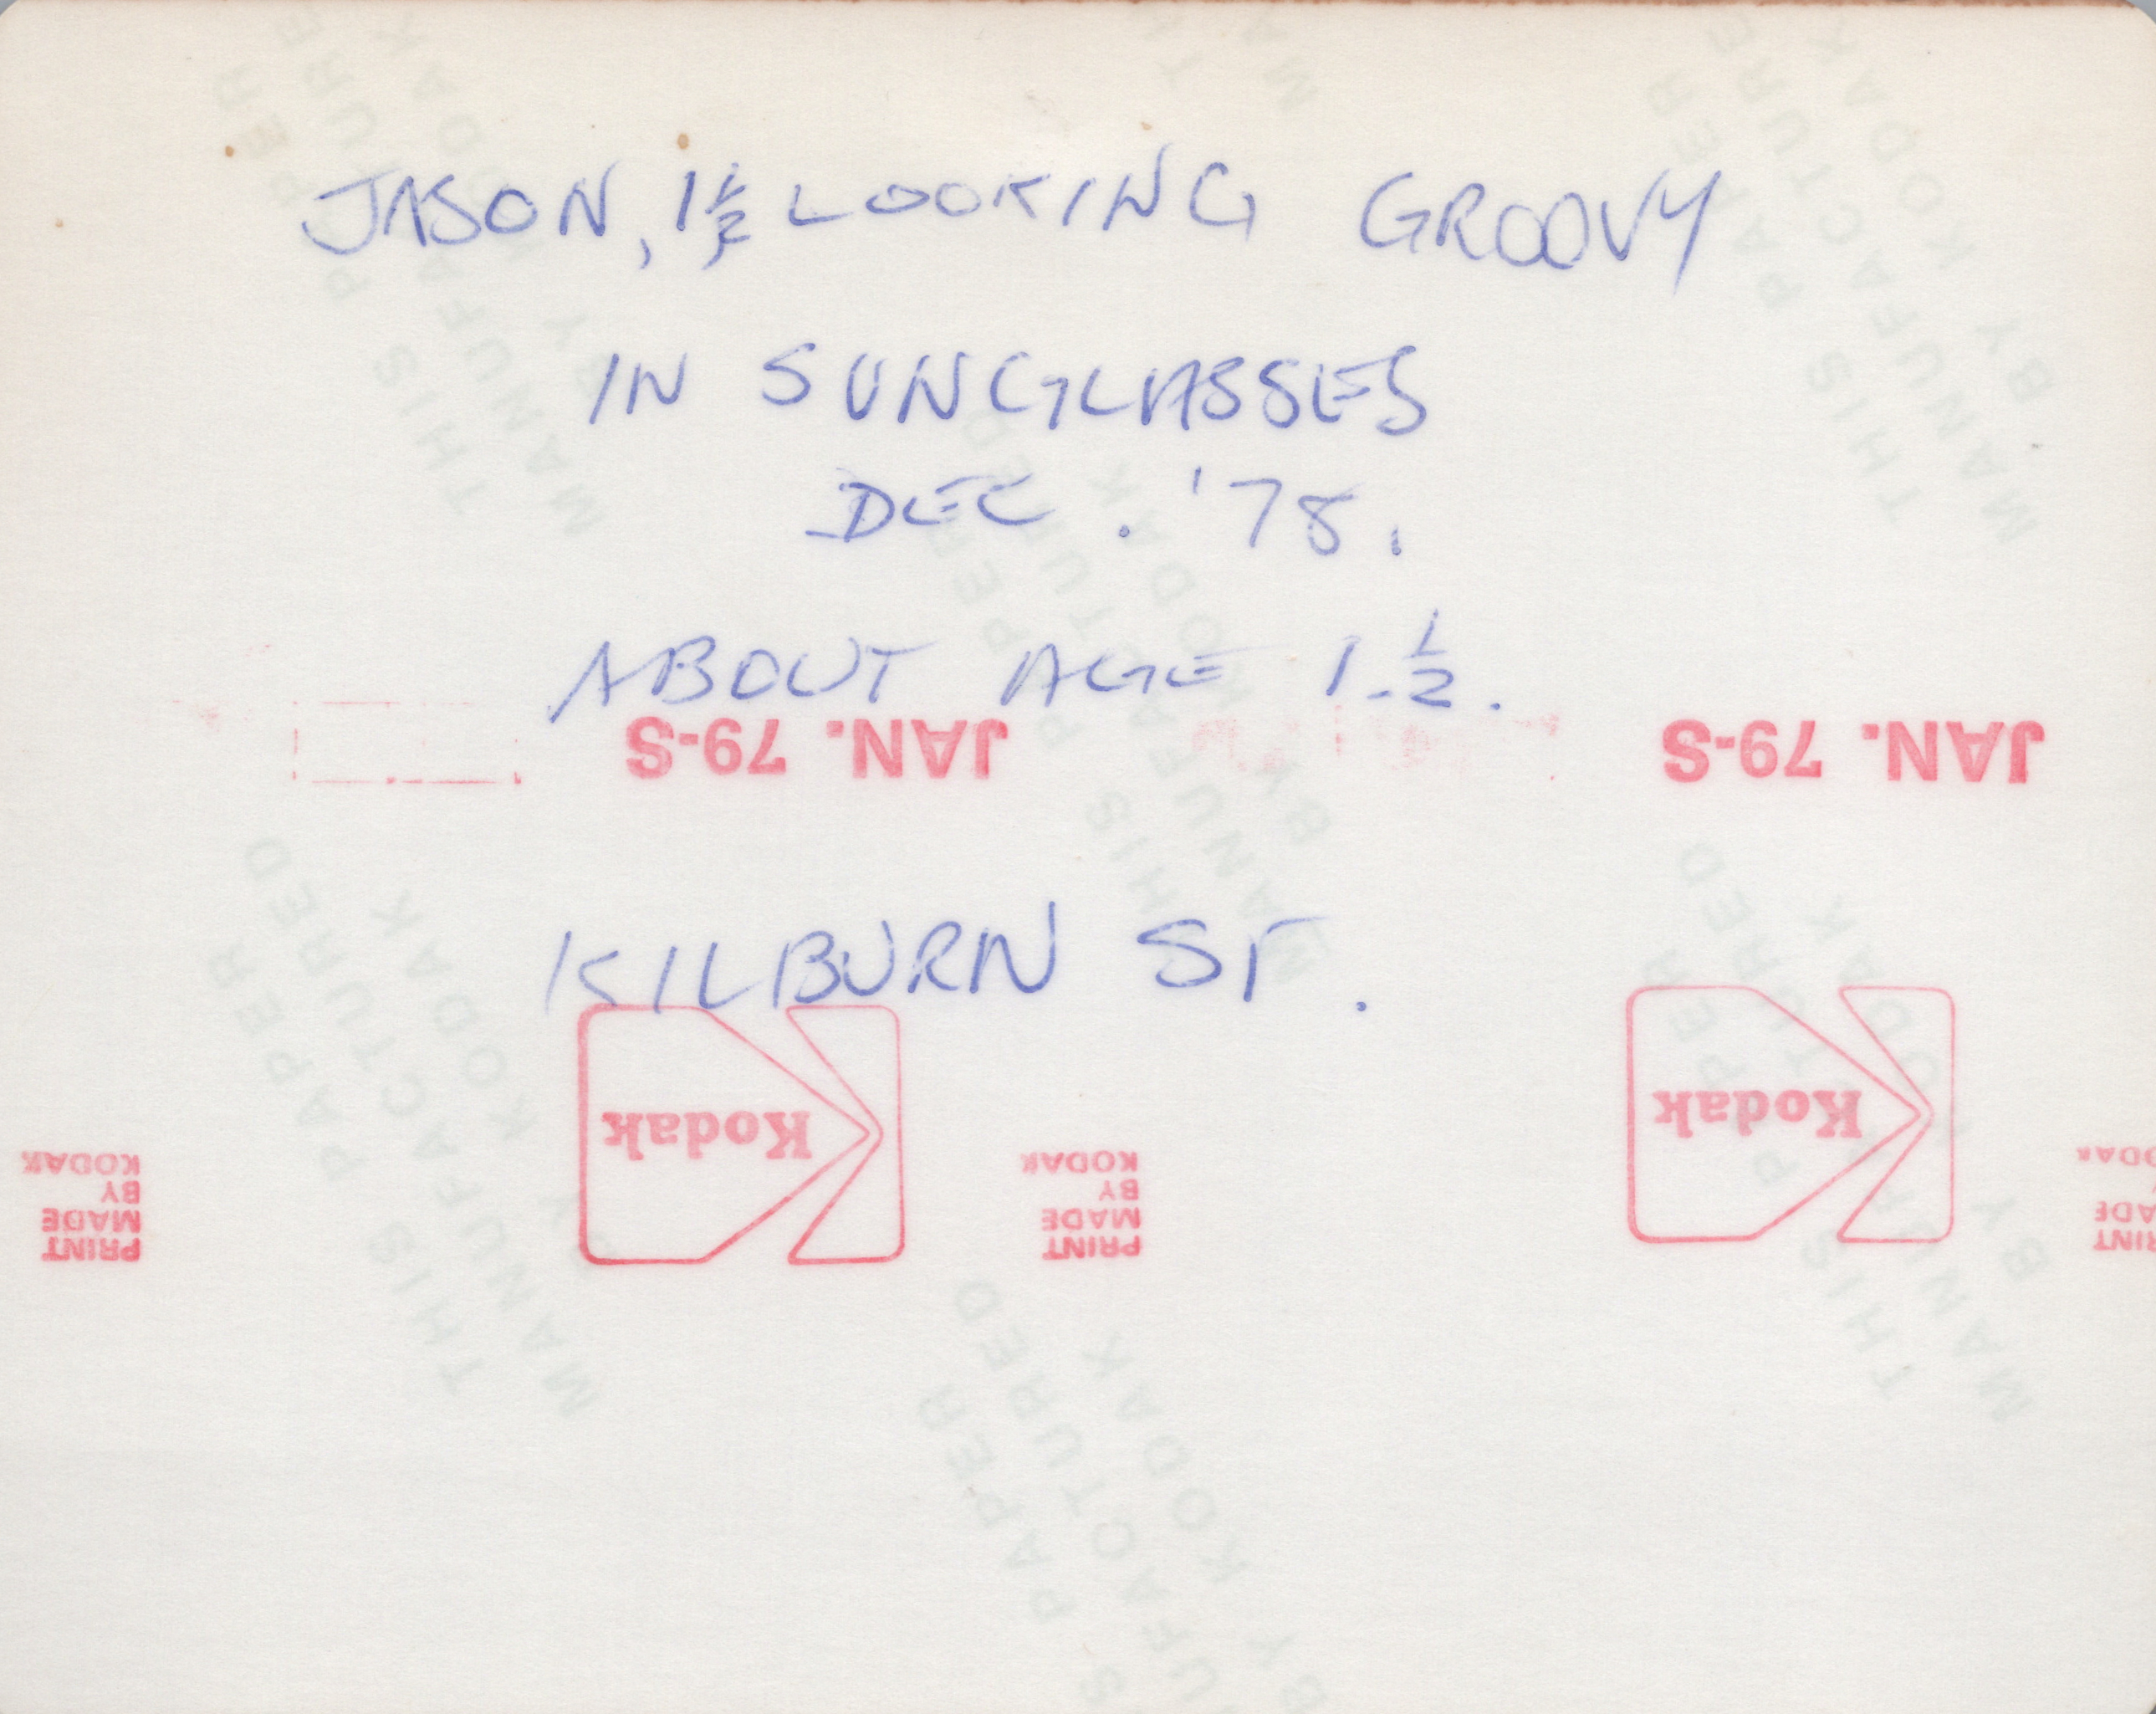
There’s one other scan date that’s particularly impressive – FastFoto actually scans BOTH sides of your photo in the same pass. Feed it a photo with writing on the back, and you’ll find a THIRD file saved, again with the same filename and a different suffix. It’s also smart enough to do some analysis of the back side scan and only save it if it finds enough contrast to indicate the likelihood that the photo contains writing. This lets you save a picture of the caption on the back of your photo alongside the photo itself – you can decide what to do with it.
Attention to detail like this made using FastFoto a pleasure, although there’s definitely improvements that can be made on the software side.
Organising your photos
My parents are well into their 70’s, and there’s a lot of photographs bearing witness to their lives together as well as myself and my sister. We already set up a Google account for my parents a couple of years ago to hold all the photos we had at hand, and their phones are set up to back up new photos into it. I also set up my sister on Google Photos around the same time, so that she can share photos of her children with my parents (okay, okay, and with myself) easily – and at some point my parents will work out how to share albums back to her, I’m sure.
Like most families of our vintage, we’ve got gigabytes upon gigabytes of photos taken after the dawn of digital photography. We’re all sorted there due to some previous efforts.
Around the house, there’s a number of old photo albums containing prints that are our only reference from the 1970s to the 1990s, batches of prints from film that have remained in their sleeves since development, and instant Polaroid photos.
There’s also a large number of slides leading up to and overlapping that time. The FastFoto isn’t a slide scanner, so I’m going to need to deal with those separately to properly complete this task.
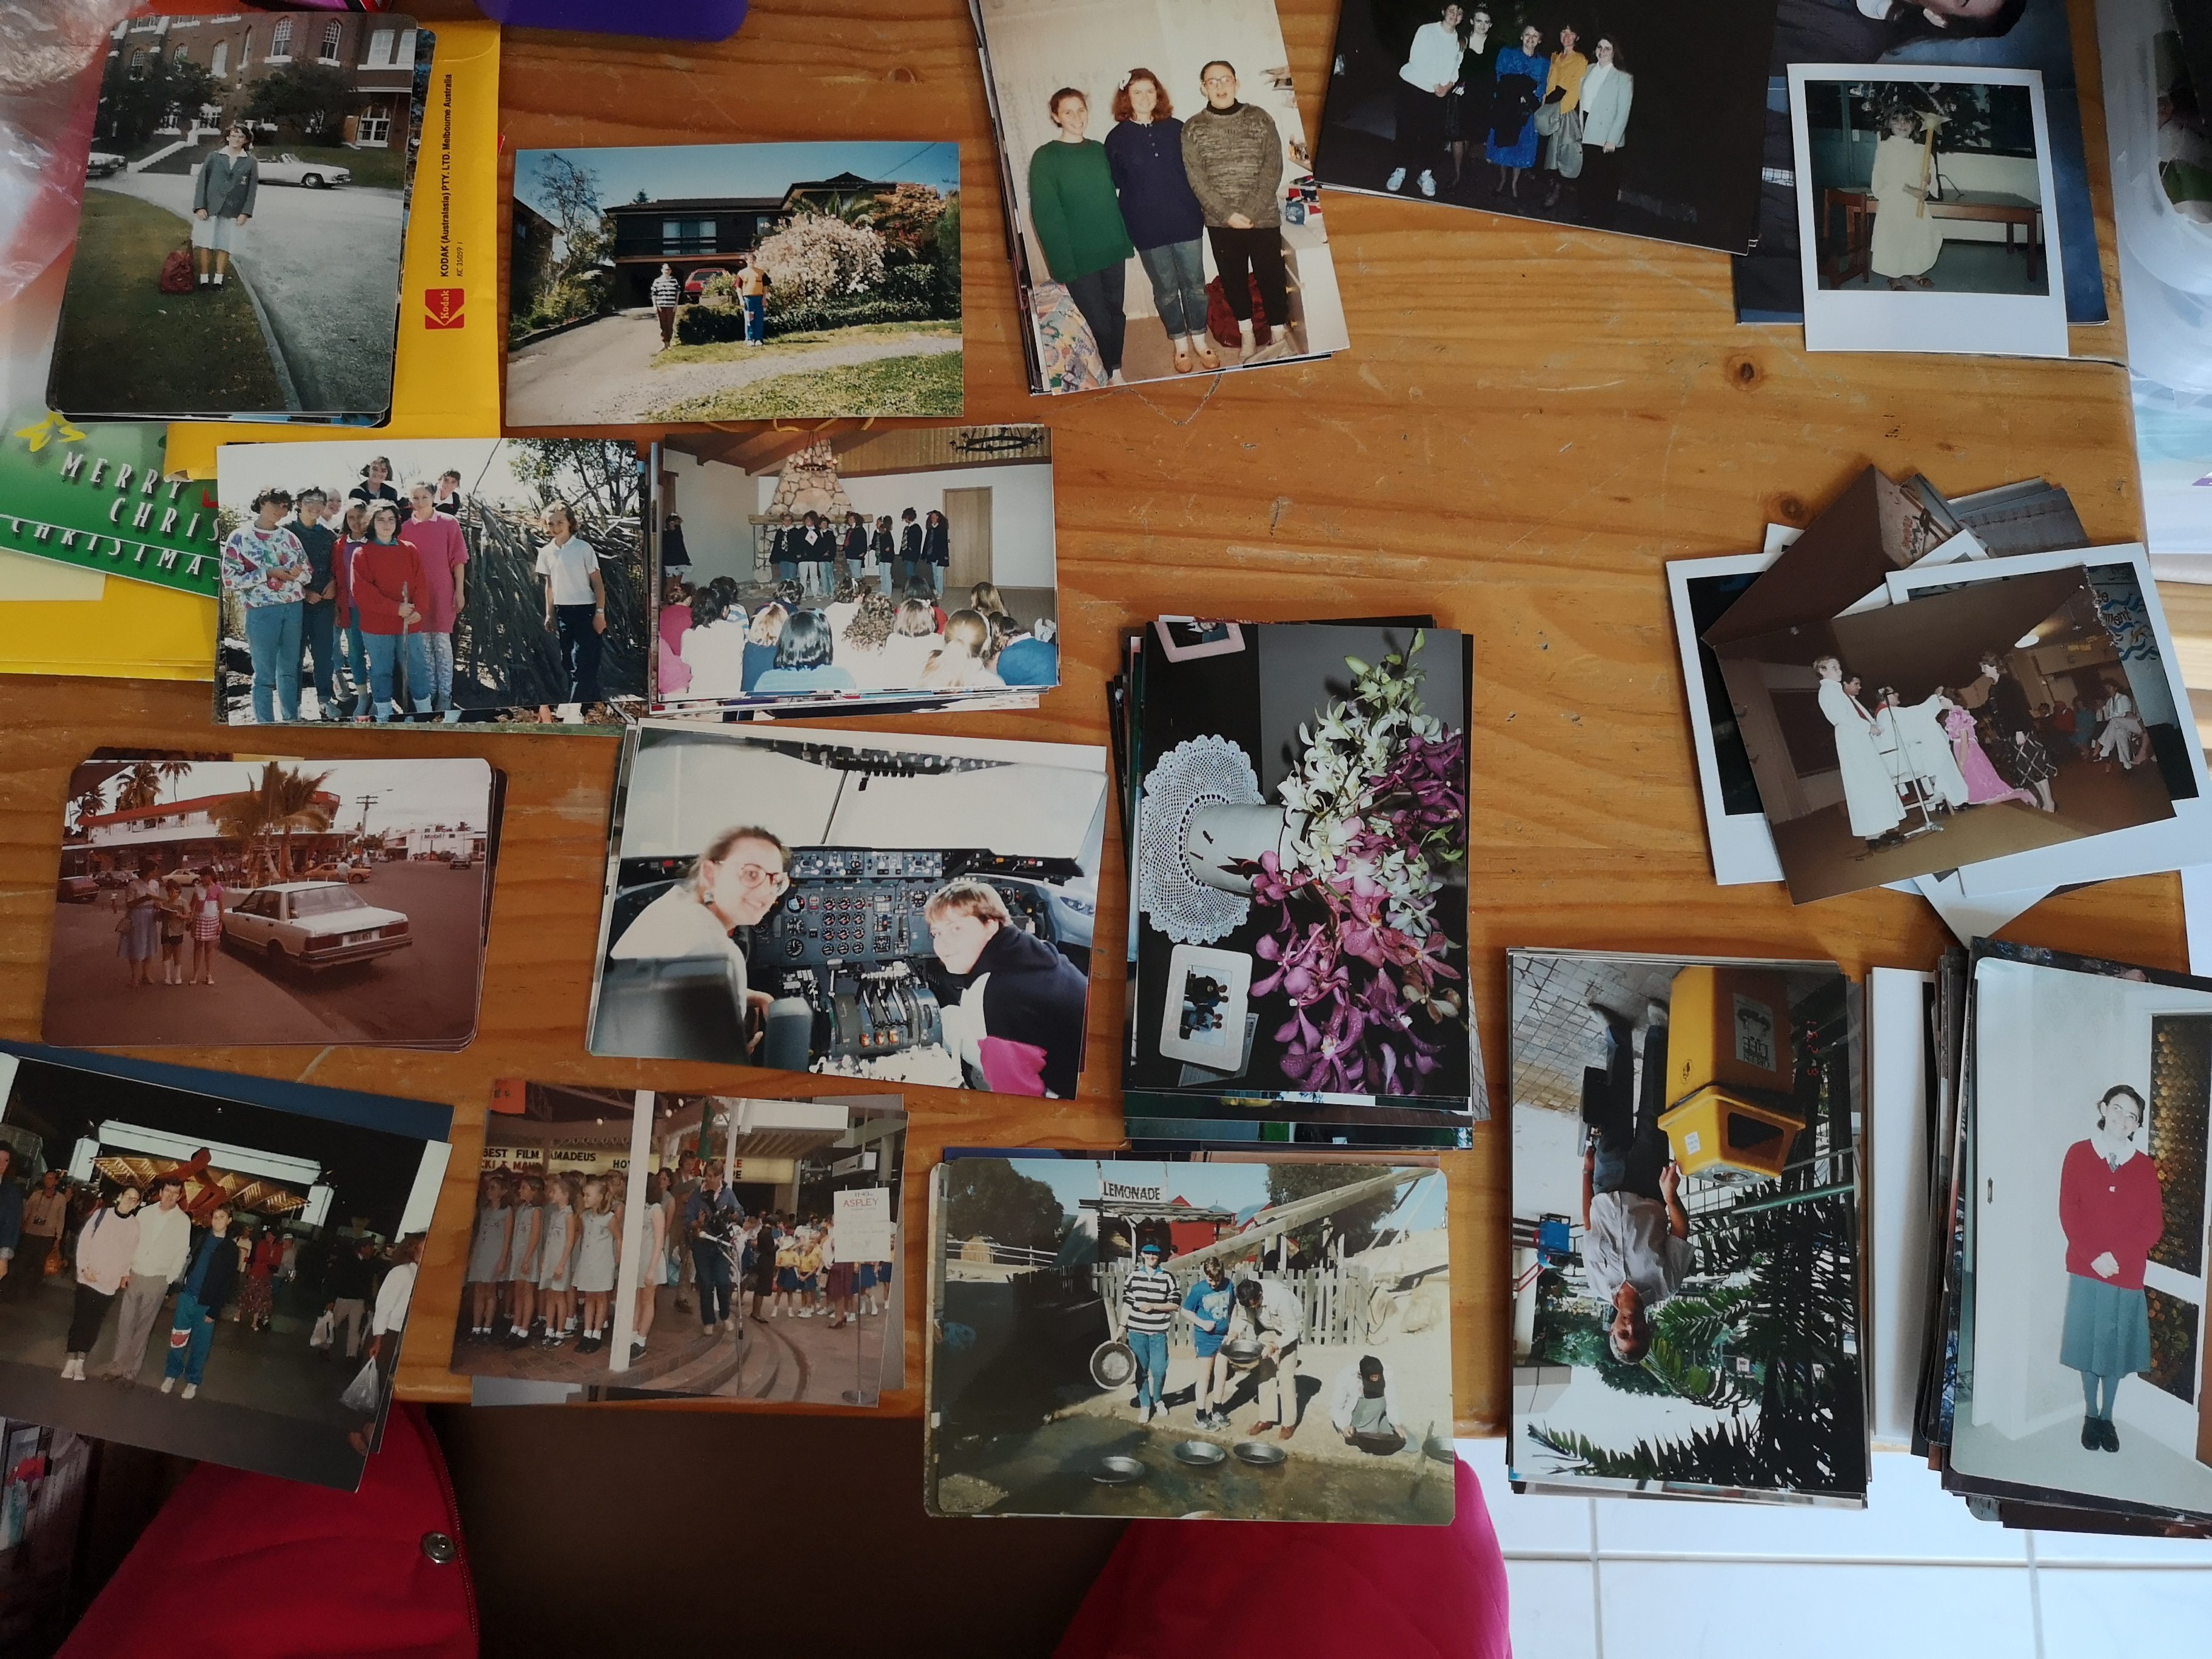
Fortunately, at several points over the years my family has made attempts to organise our photos. Albums sometimes have descriptions, and some photos have written captions on the back identifying who’s in the photos and when they were taken. This is astonishingly prescient, and made my task A LOT easier.
I had let my parents know in advance that this would be a project for my Christmas holiday and asked them to dig out their photos. In the end, I started with a couple of small tubs full of photos still in their sleeves from photo lab with some handwritten notes, 3-5 large albums and about 10-15 smaller albums. Over the course of the project, we found a few more photo sets that got added to this workload.
My family tends to hoard things (sorry guys). This benefited us for the initial setup of my parents’ Google Photos account as it became evident that my Dad had treated memory sticks like film, and would never record over one. Pretty much every memory stick my Dad ever used was stored in one place, making it easy to grab the contents and upload them into Google Photos with intact date & time metadata. Everything from around 2001 is sorted.
Digital Archaeology
Another quirk of how my Dad used cameras over the years is that he would usually leave the date marker enabled on his cameras. This caused much consternation over the years as my sister and I would make fun of him for it, but it turns out this is actually a godsend in terms of organising photos.
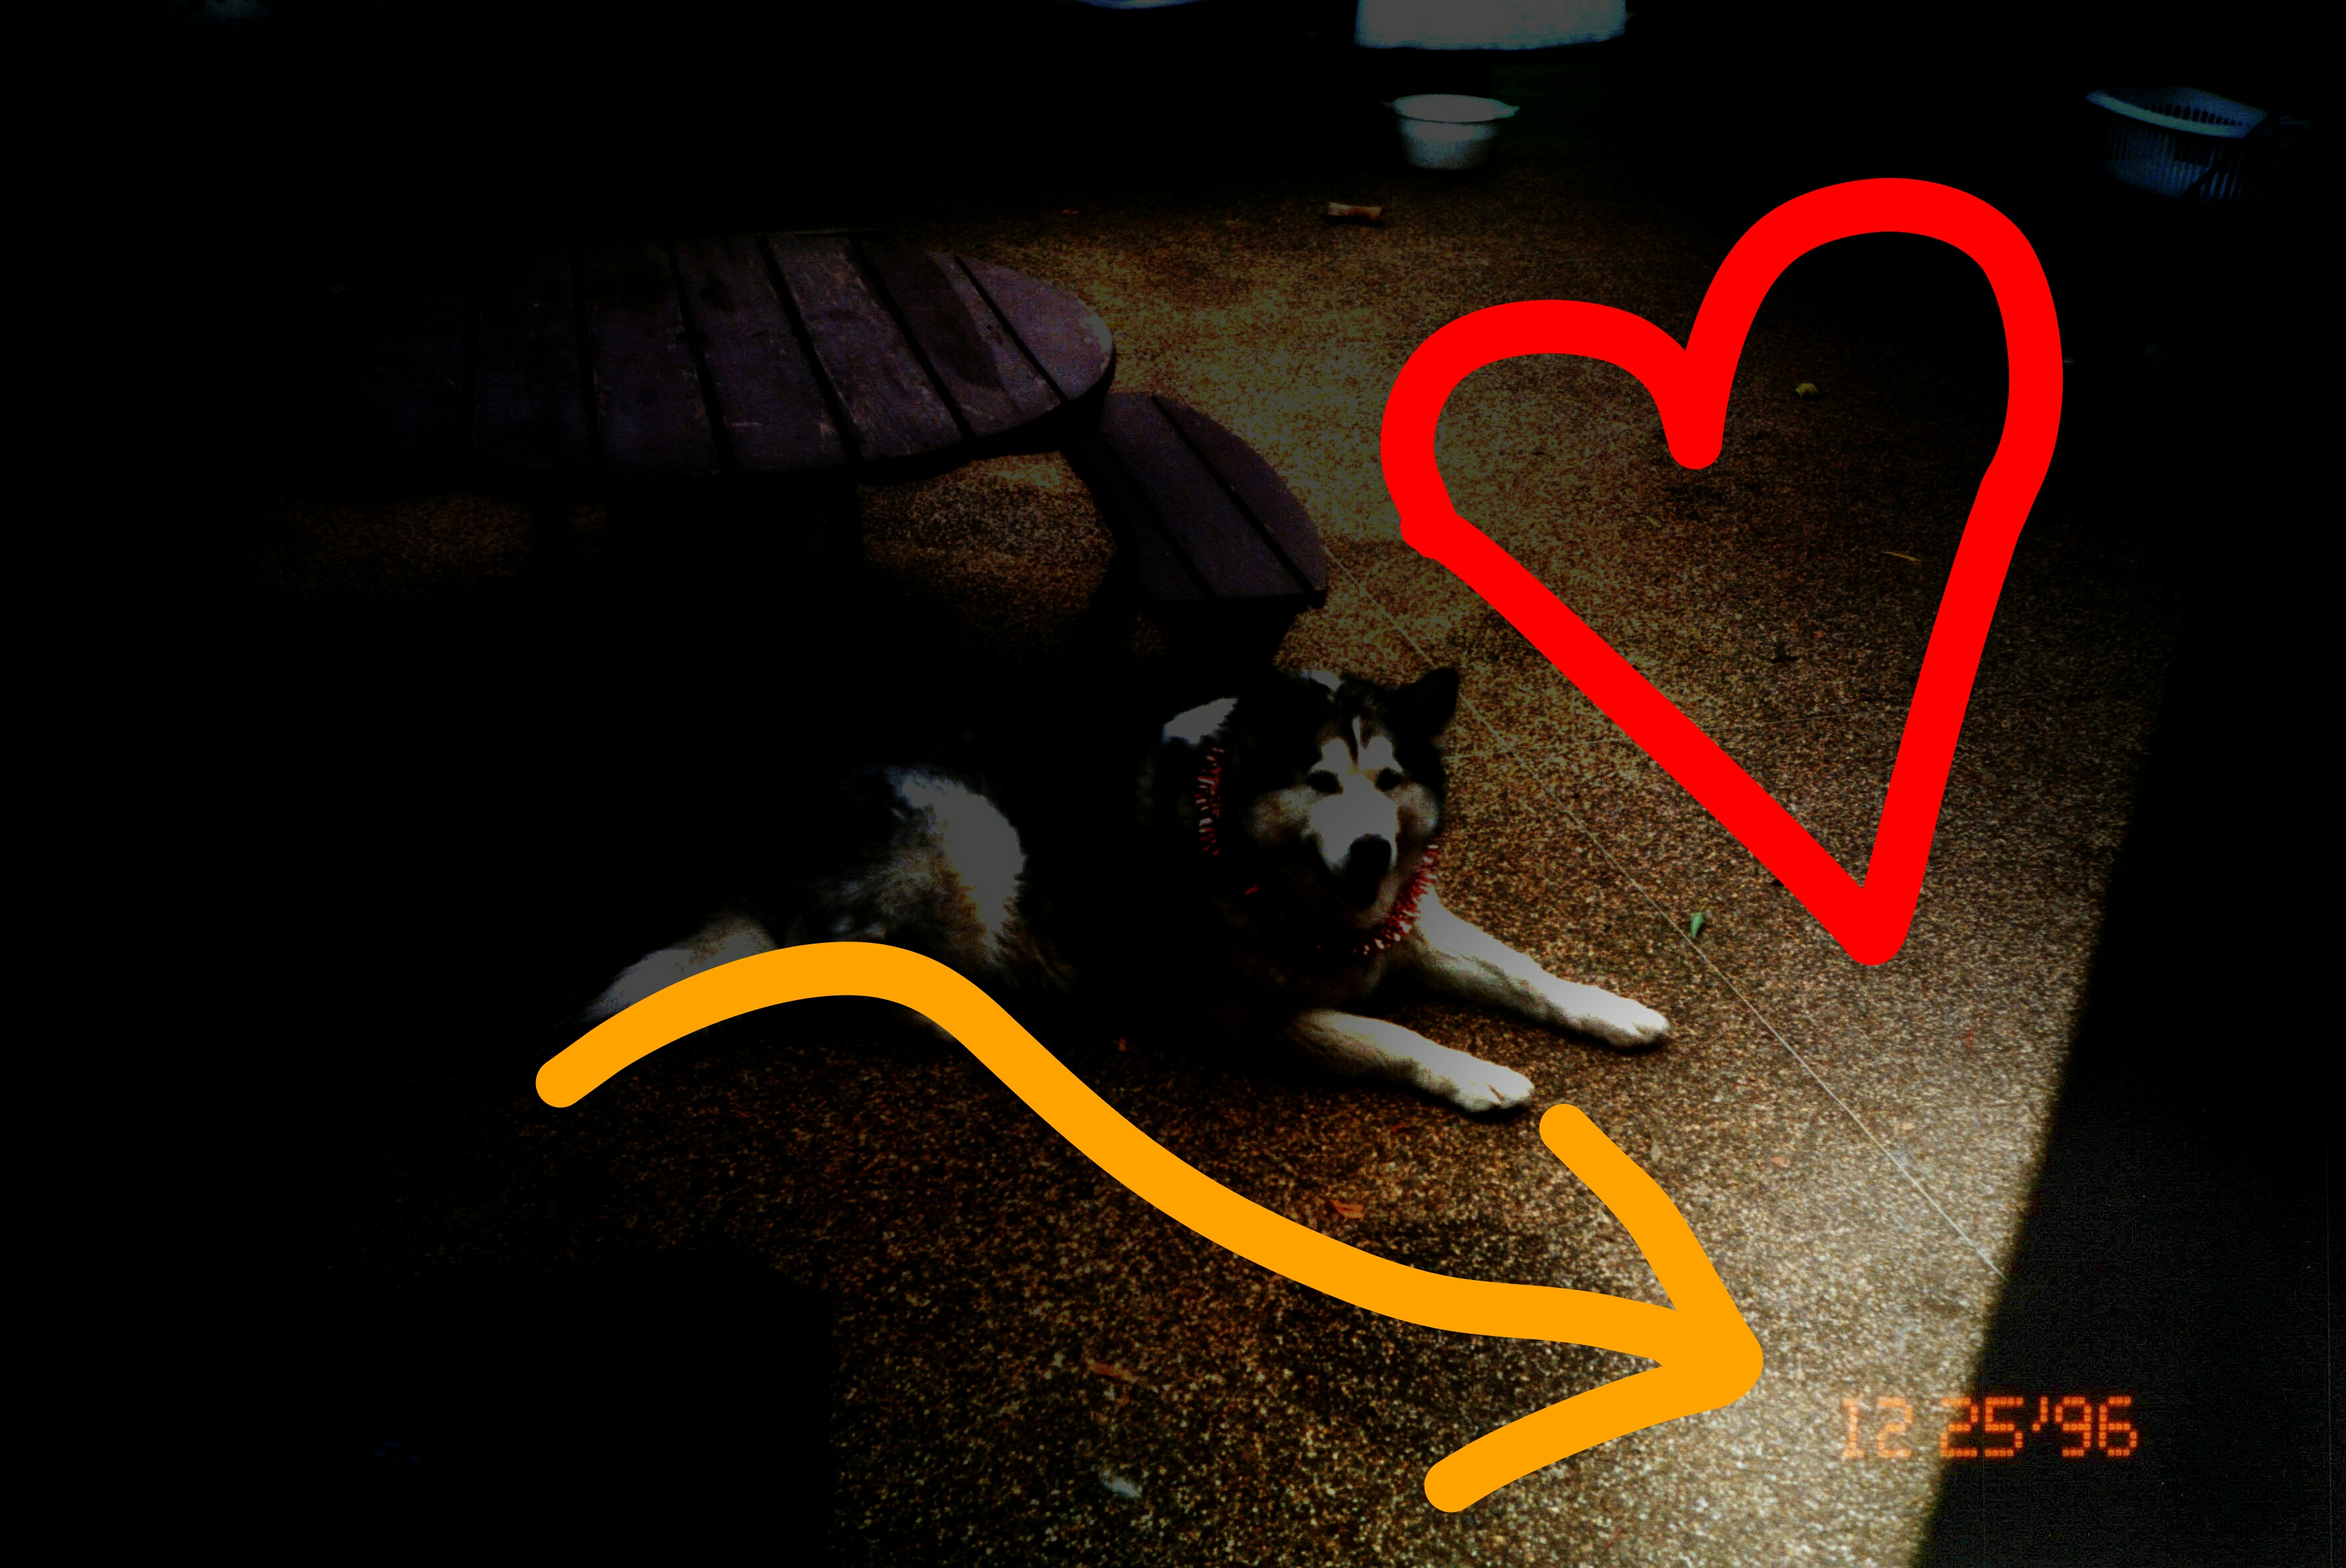
If you’ve a family member who did this and filled in the lower right corner of all your photos with an actual real date the photo was taken, go and give that person a hug right now.
Without a digital source with embedded date/time and without a date burned into the photo, determining the era of a batch of photos is an imprecise process.
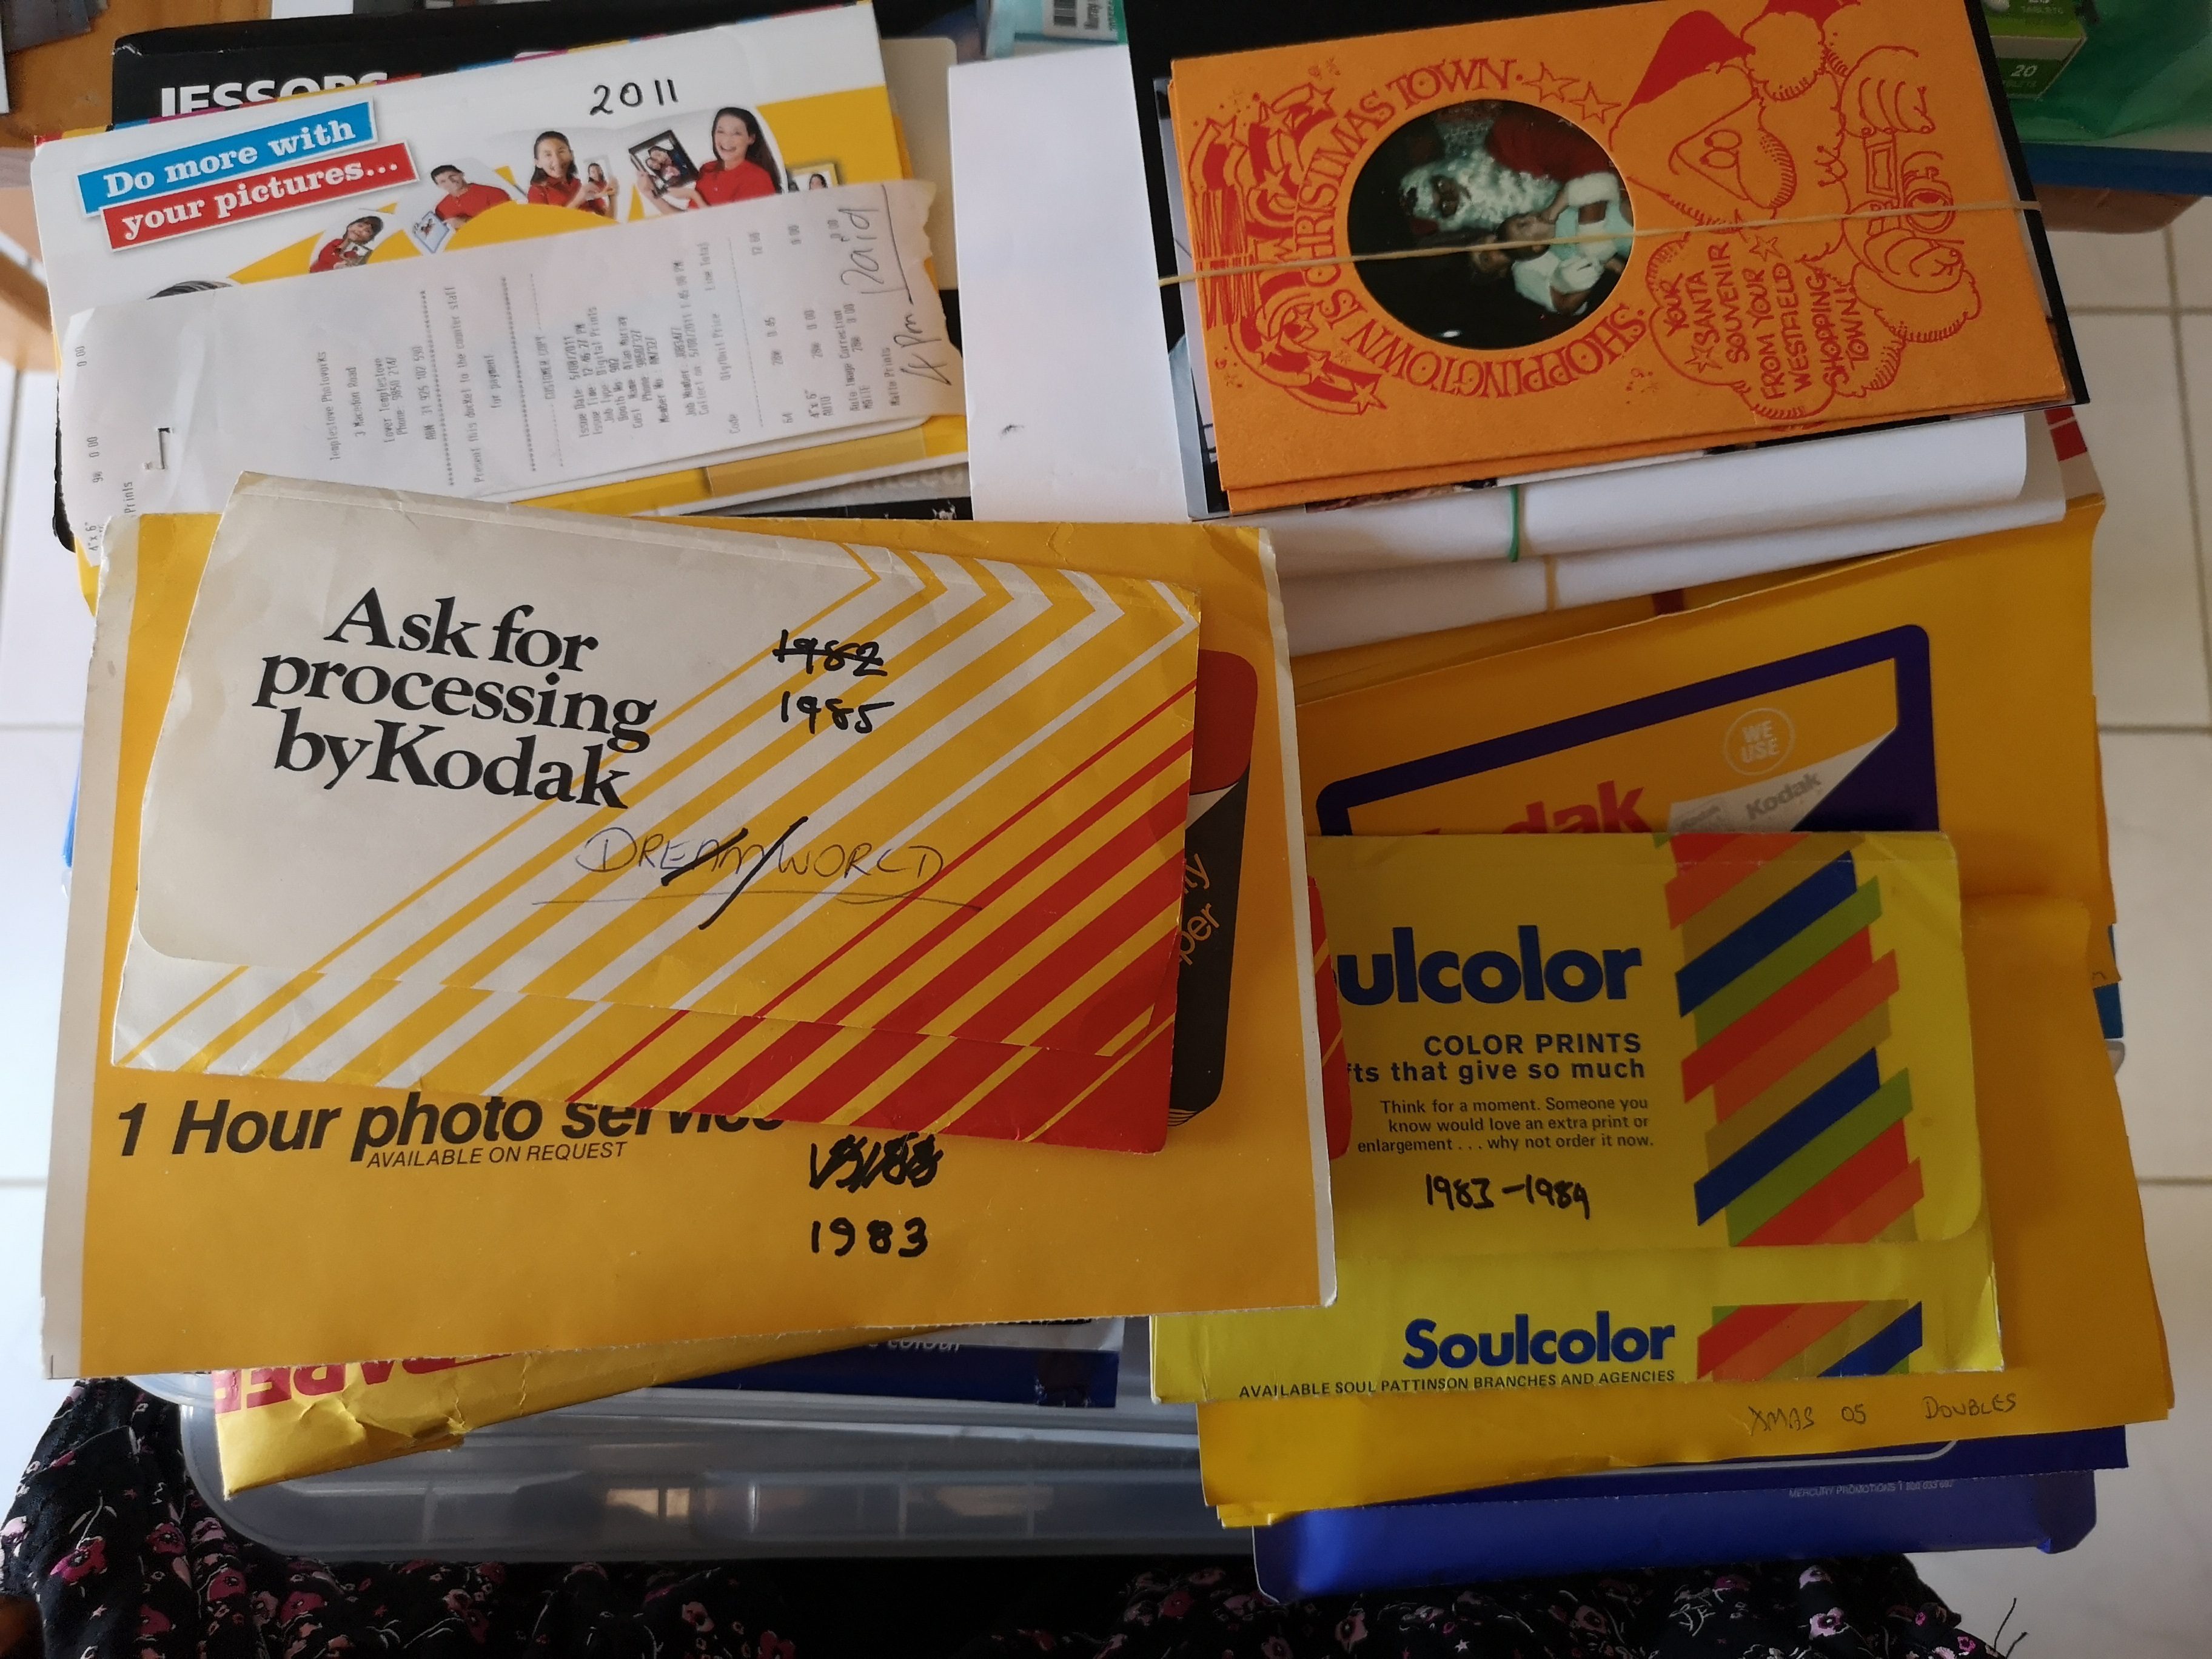
While scanning prints from the late 70s & early 80s, we found that a bunch of them came with Month-Year stamps on the back. This was super handy as it gave an a approximate ceiling on the photos (they were obviously taken before they were printed). It’s a shame this practice stopped.
An era can also be gleaned by looking at the size and shape of the batch of photos, as different types of film have had different development and printing processes applied to them over the years. Size, border and corners can all be good indicators. You can also compare with others with known dates.
Finally, you can look at the actual photos for a hint. It’s nontrivial, but it doesn’t take too long to flip through a batch of 20-30 photos to find anything that might aid your chronology. Photographs of newspapers, information boards, tickets and more can help with this.
You can also use Google to give you dates of events that might be in the photos. At one point I managed to date a batch of photos because one was taken in a cinema foyer with a “Now Showing” poster for “Babe” in the background.
If you really can’t work it out, you can just go with a year. For older photos, an era is probably okay.
Scanning Photos
When you initiate a scan, Epson’s FastFoto software asks you for three pieces of information, and you need to give it at least one.
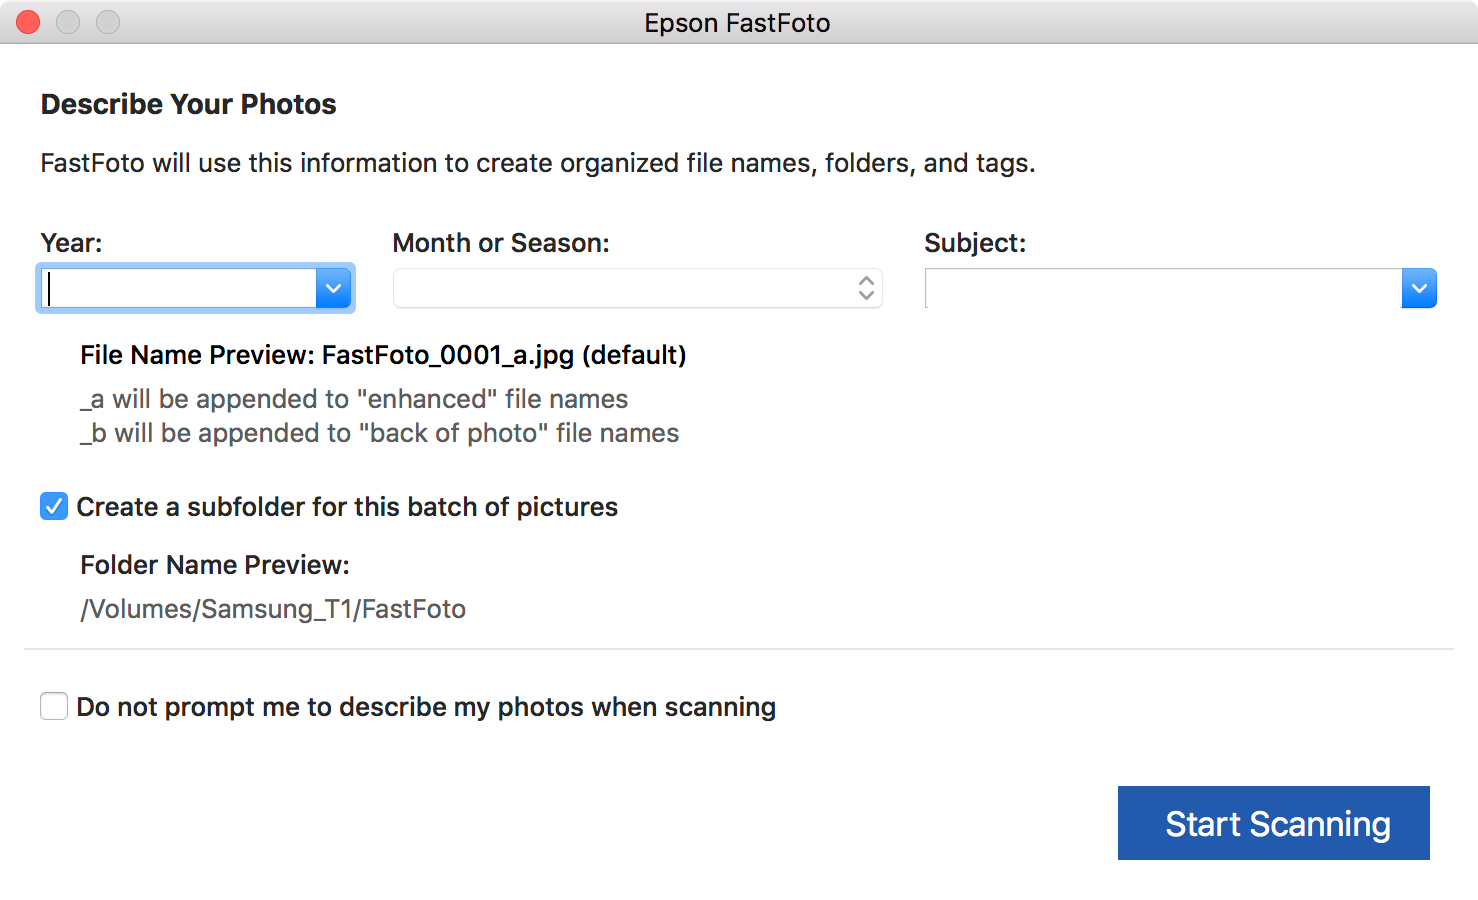
There’s Year – offering both individual years and eras; Month – offering every month, but also seasons; and Subject – a text field that lets you enter text, offers all the values you’ve used before in a dropdown list, and autocompletes when you start typing.
FastFoto can be configured to create a directory based on the values you input here, and I think it’s a good idea to keep that option enabled as it lets you keep your output organised. Files inherit the naming scheme, with automatic appending of a numeric suffix (001, 002, 003, etc) and the enhancement / rear scan suffixes to the appropriate filenames.
You’ll probably want to avoid using spaces in the Subject field. They make it into filenames, and that can make it harder to work with folders and files if you’re using command-line tools (spoiler). The subject field is really only meant to be a quick reference anyway, eg “Dinner” rather than “Jason eating pasta at dinner”.
As the scans progress, you do need to keep an eye on the output tray. Occasionally photos would feed into the output area underneath the previous photo, disrupting the order. It’s not a deal-breaker, just something to be careful of if you’re going to replace photos into their albums (although depending on the age of the album you probably wouldn’t be able to tell us they were out of order) in 2019.
Repair job
There were some things we didn’t scan. A couple of the family photo albums simply did not want to give up their photos.
It turns out the sticky stuff they put on albums in the 70s and 80s either holds tight enough that you feel like you’re going to rip the photo to remove it, or it gives way with the slightest of pressure. Both present some issues.
We gave up on the albums that wouldn’t give up their photos, and plan to use the Google Photos Scanner app to bring those pictures in.
We also bought a small double-sided tape dispenser so that photos could be placed back into albums that had lost their stickiness on their pages. We took the decision to add the sticky material into the album because after scanning the photos it was unlikely we’d need to get them out again.
Processing photos, and some software issues
After scanning a batch of photos, FastFoto offers you the choice to continue to scan with the current settings, or process the results.
Processing the results is the stage at which the photos from the scanner are actually written to disk. It’s also when the FastFoto software performs automatic enhancements and rear scan assessment, and it can take a bit of time depending how many photographs you’ve scanned.
It’s here that a couple of limitations in the FastFoto software start to manifest.
Firstly, you’ll want to keep an eye on your disk usage. I ran out of disk space while scanning a batch of photos and FastFoto either crashed – taking the entire batch of photos with it; or it simply failed to write the files, without even warning me. This seems like some of the easiest and most basic checks that the software should implement – is there enough space for the file I’m about to write; and then was the write successful… if not, then pause and alert the user.
Additionally, the FastFoto software did crash out of the blue a couple of times while scanning – the current scan batch was lost and needed to be redone. At least, given the speed of scanning, this was a relatively minor inconvenience. It did however mean that I kept scan batch sizes to about 70-80 photos max between processing runs.
Another quirk is that FastFoto doesn’t actually let you set the precise date of a photo. It only works in Year-Month precision, setting the date to the 1st of the month. If you don’t specify a month, it goes to the 1st of January, and if you only set an era (eg 1980s), it goes to the first year is the era (eg, 1st of January 1980).
Year-Month precision a good starting point for scanning a batch of photos that were probably taken over a period of time, so this is understandable. However, if you’ve got a photo that gives you a precise date, you can’t set it within FastFoto.
You can edit the Year-Month-Subject details of a photo, but FastFoto won’t move the file from its current folder – this can introduce conflicts if you edit the details of a photo and then manually move it into a folder that has existing photos.
Post processing
The FastFoto software is ultimately pretty bare-bones. It’s good at what it does, but lets you down a bit if you’re a power user working with thousands of files – weird, considering the scanner’s goal is to create as many files from your photos, as quickly as possible.
The application does seem to assume you’re going to ship the photos out pretty fast, probably into a more detailed photo editor or storage system. There’s no deeper metadata editing system beyond Year-Month-Subject – not even a multi-line input field for a description.
For export, FastFoto can integrate with Dropbox and Google Drive, but not Google Photos. You can also opt to send scanned images directly into the Photos app on the Mac (weirdly, the Mac version of the app doesn’t have a crop tool but the Windows version does – perhaps that’s why).
It becomes evident that the FastFoto software is simply working with files on disk. It doesn’t store related metadata, doesn’t cache thumbnails (it can take a while to open a folder full of photos) and, disappointingly, it also doesn’t recognise files as a group once scanned. If you rotate an original photo, you have to rotate its enhanced version too.
The rear side scanning feature is handy, but FastFoto doesn’t really give you so anything to do with those scans. You can’t easily extract the text from them because they’re usually handwritten notes, and FastFoto doesn’t even offer you a text input field in which to transcribe it. I’m certainly not going to upload the rear scans into Google Photos.
I ended up storing the rear scan filenames in a spreadsheet and working through folders using with the Mac Preview app to open them all and flip through them one by one.
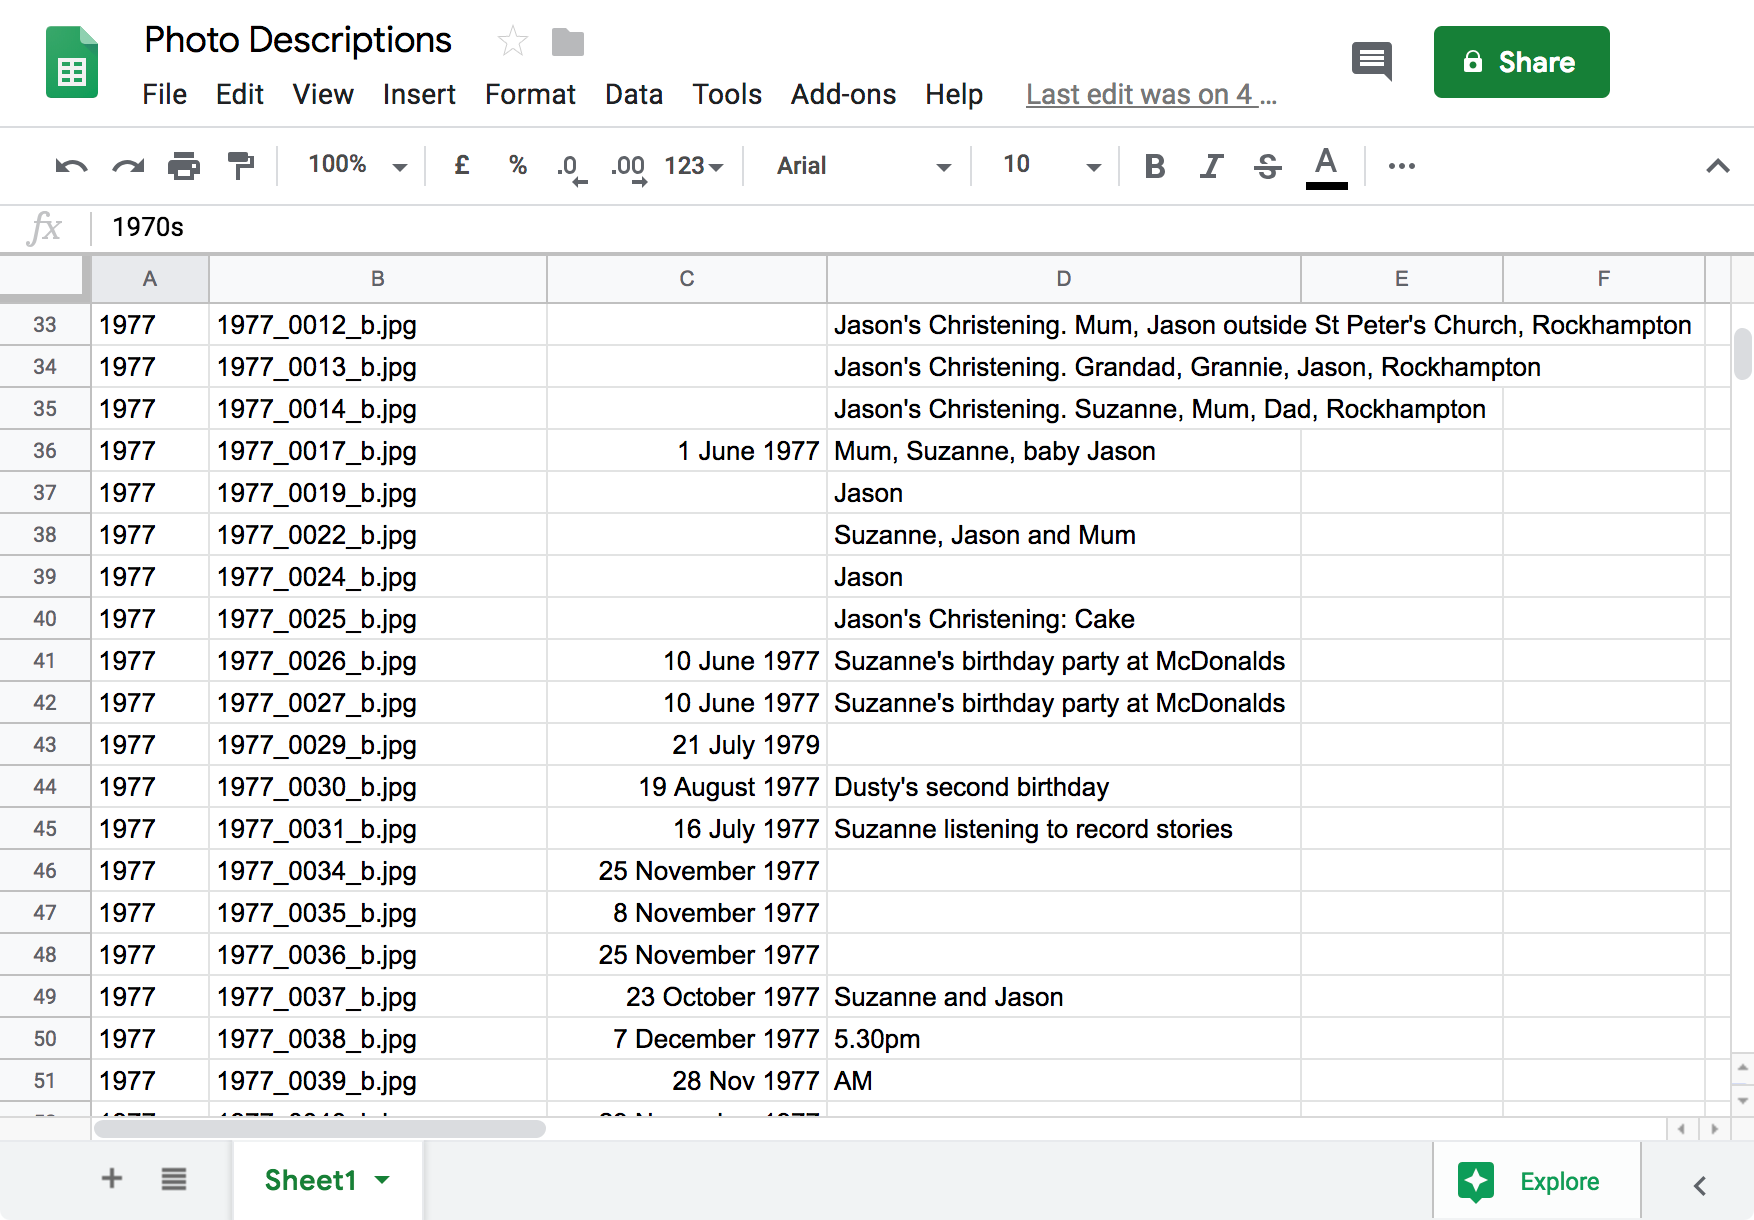
You can find some code below to help you do this using the Mac Terminal app to find JPG files and open them all at once:
# Enter the directory you want to check out
$ cd 1978_December/

# Use the Mac "open" command to open multiple files in Preview
$ open *.jpg

Export and Upload
With no Google Photos integration, I ignored the FastFoto export integration and worked with the files it produced on disk myself.
I decided that I wanted to use the enhanced version of photos instead of the original scans, which meant finding a way to only expose the enhanced photos to the Google Backup & Sync tool.
Fortunately by this time I had plenty of hard drive space free, so I created a single target directory on disk and set about copying all the enhanced files into this location (note – copied; I left the original FastFoto output folders and files alone).

It was during this process that I realised the spaces in some of my Subjects created some problems. In case you need to remove spaces from filenames:
# Rename all " " to "_" in current and subdirectories
$ find . | grep " " | xargs -I{} rename --nows {}
With that in order, copying all the files to their upload location was pretty simple:
# Move all FastFoto-enhanced files to the upload path
$ UPLOAD_PATH=/path/for/upload
$ find . | grep *_a.jpg | xargs -I{} mv {} ${UPLOAD_PATH}
Finished Results
At last, I had a single folder with almost 5000 output files. Those files were roughly organised with their chronology information in their filenames, and FastFoto had written a date that Google Photos would understand into the file metadata.
I set Google’s Backup & Sync tool loose on the directory and it made fast work of the upload, taking about a day to do the upload.
My parents’ Google Photos account now scrolls back to 1957, where there’s a photo of my Dad at age 13 asleep by a river in Mildura.
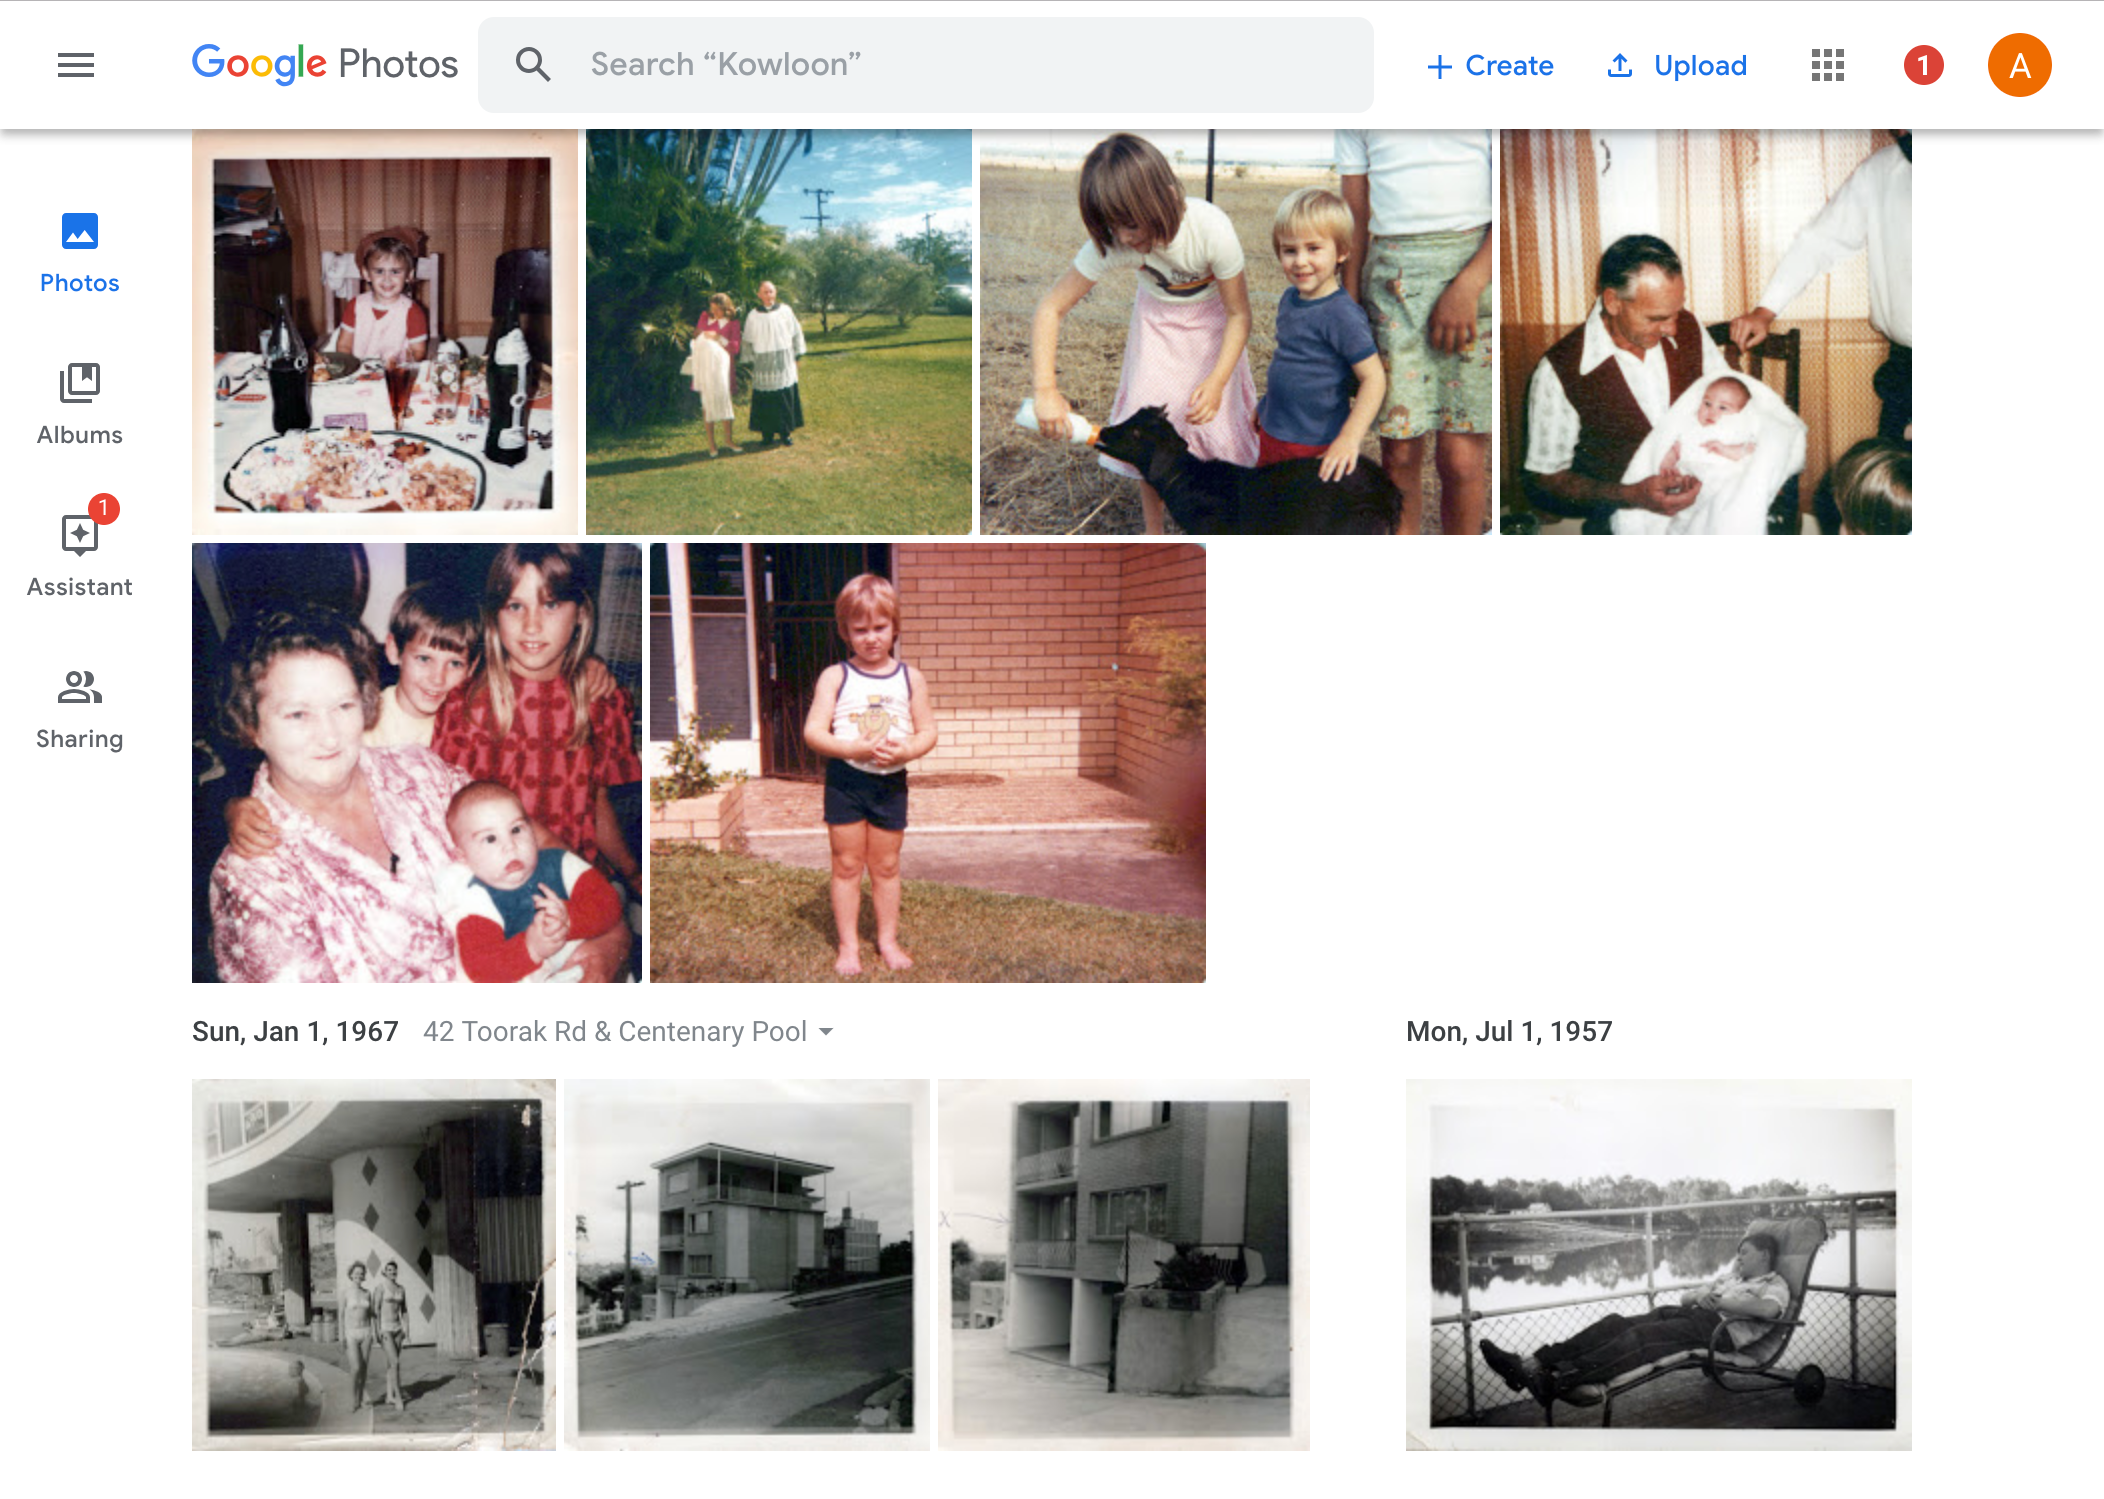
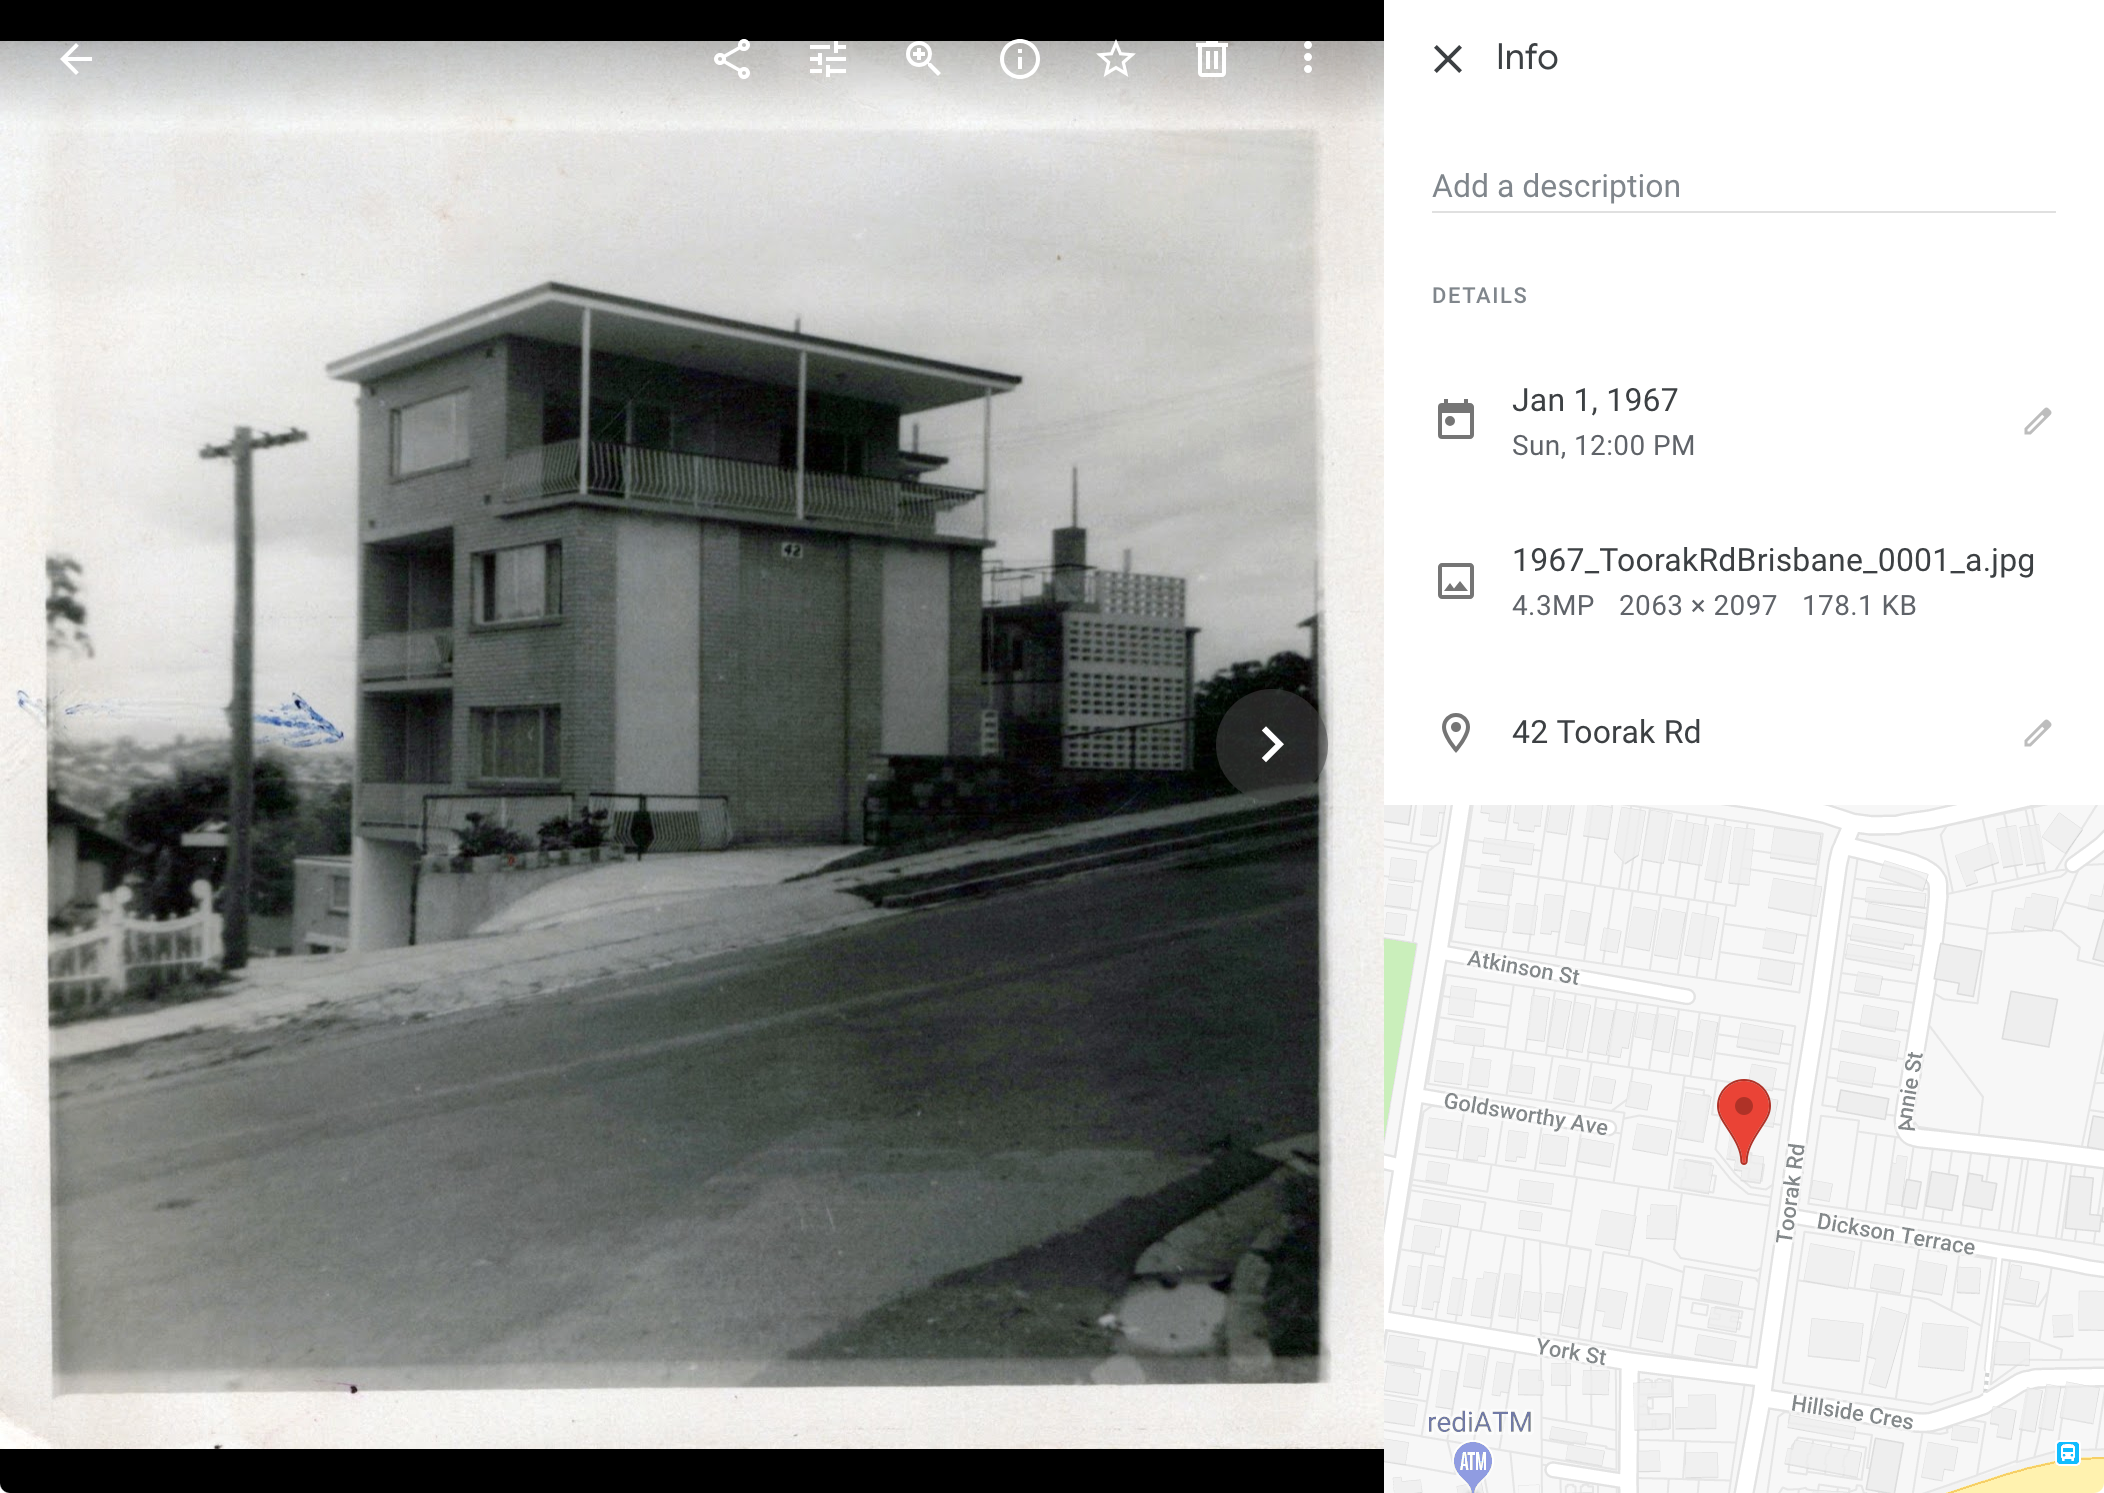
We found a photo of the apartment my mum rented in 1967 in Brisbane, and found the address on Google Maps – and even found that the apartment block is still there! The photo is now tagged with the address, adding to the Google Photos browsing experience.

There’s some gaps. We didn’t find many photos of my parents prior to their relationship, and their wedding photos weren’t amongst the photos that came up for scanning.
The biggest gap though is the missing slides from the 60s and 70s. I need to work out the best way to scan in several hundred slides, and they’ll need to be dated as well. I’ll probably take the slides to a nearby store and get them to do the scanning.
So should you buy one?
This is a complicated question, mainly complicated by the fact that the FastFoto scanner carries a retail price of $800. For a scanner, that’s a lot. I daresay I’d like to see more than the no-frills scanning software for that purchase price.
FastFoto is a fantastic piece of hardware and does exactly what it says on the box, but it’s probably not something you’re going to keep long term.
Once you’ve finished scanning photos, the FastFoto scanner operates as a more traditional motorised feed scanner – and there are cheaper options for that.
If you’ve set yourself a large scanning task and you value your time, you can look at it as an investment – you can take less time doing the scanning than you otherwise might, and that’s a win. Depending on your workload, it might even be cheaper to send things elsewhere for scanning (and that party might well use their own FastFoto to do the scans).
I really wish Epson offered these scanners as a rental – a couple of hundred dollars for a couple of weeks with the scanner would be amazing value.
Alternatively, you might go in with some friends on the purchase and share the scanner around to perform similar duties for each of you.
As it stands though, unless you’ve got new photo prints coming in regularly for scanning, you’ll probably want to sell it off and recoup some of your hard-earned cash.


